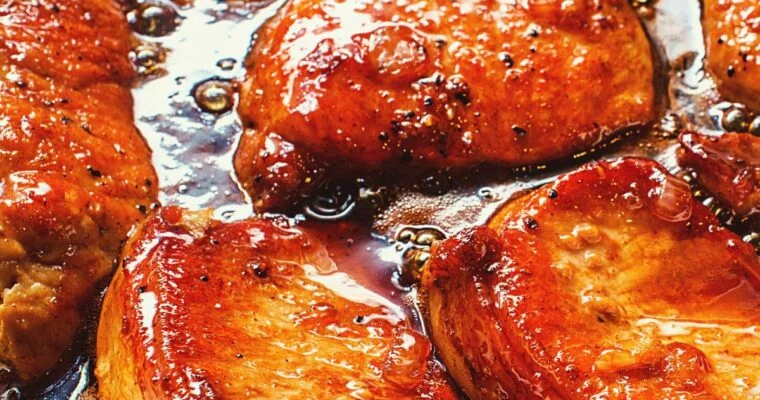
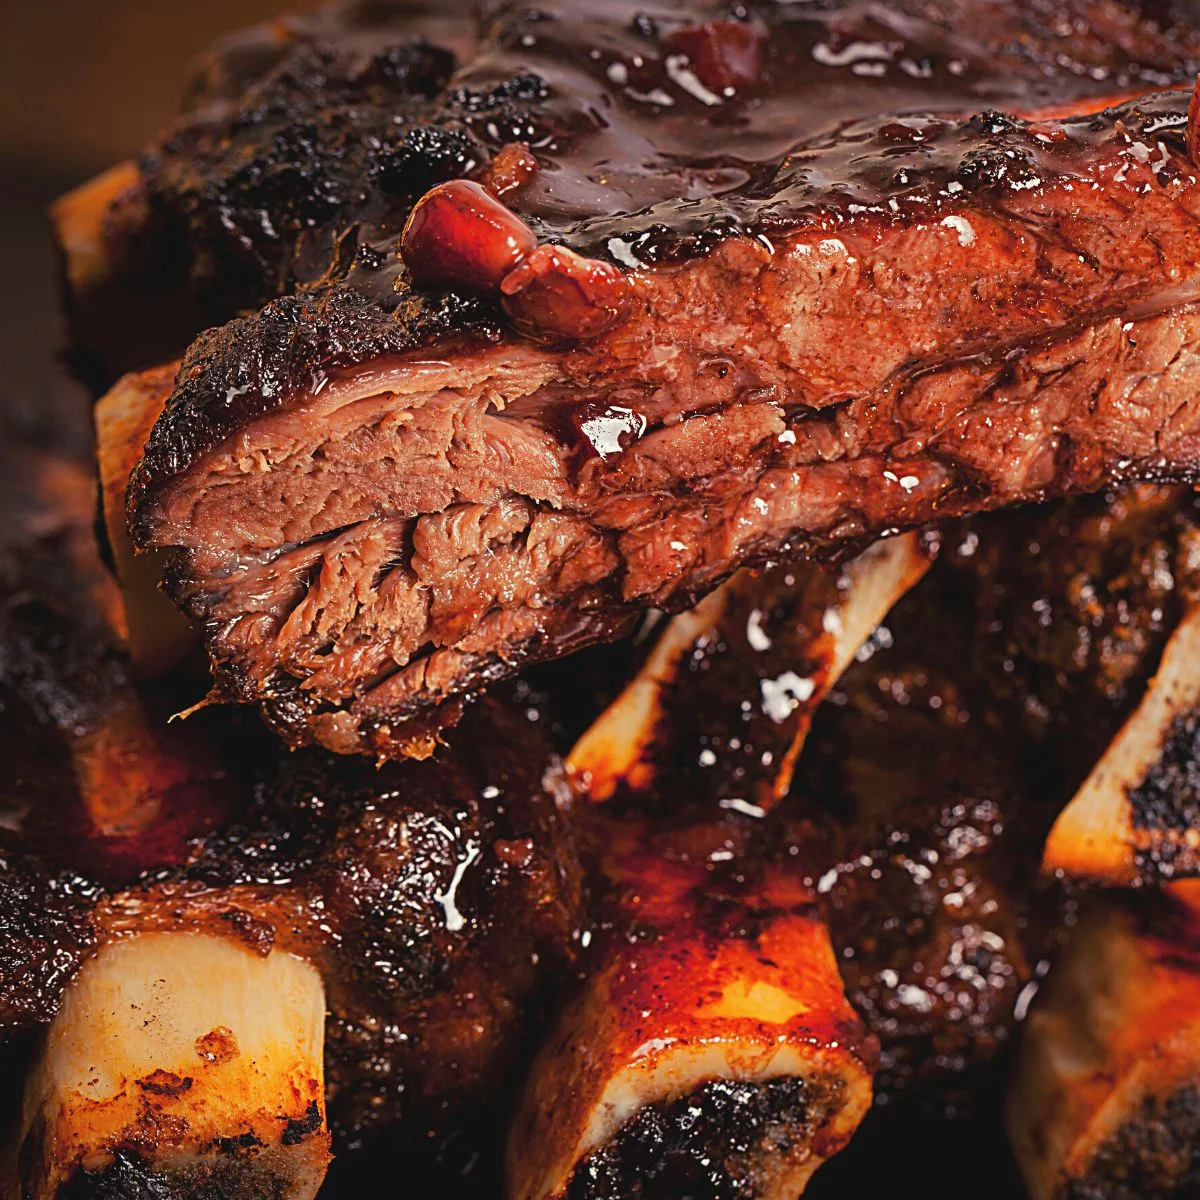
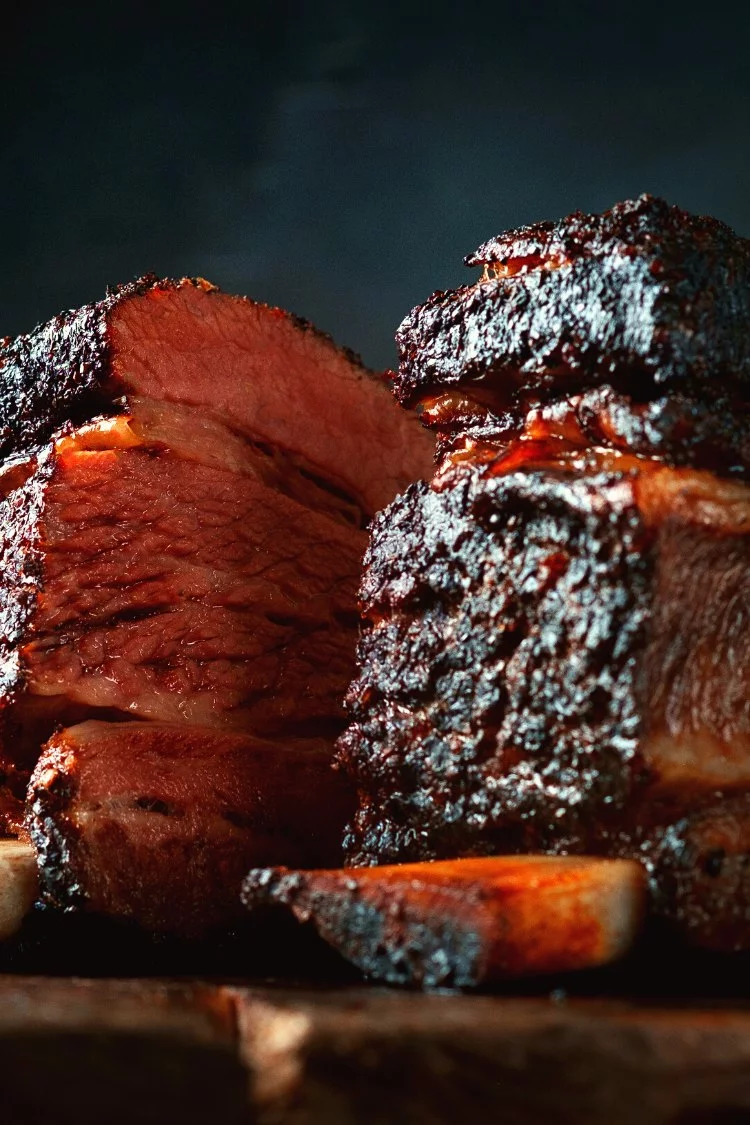
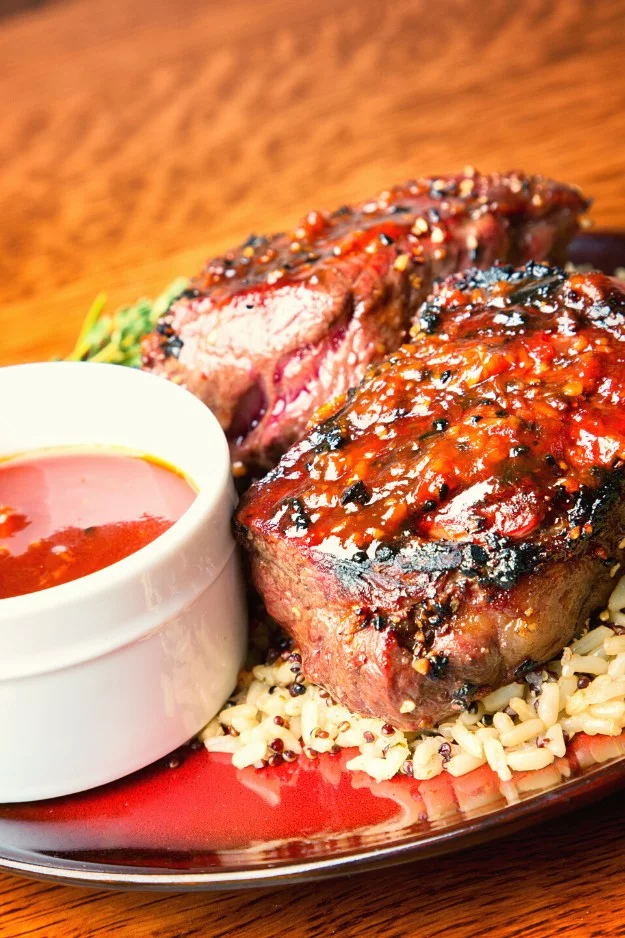
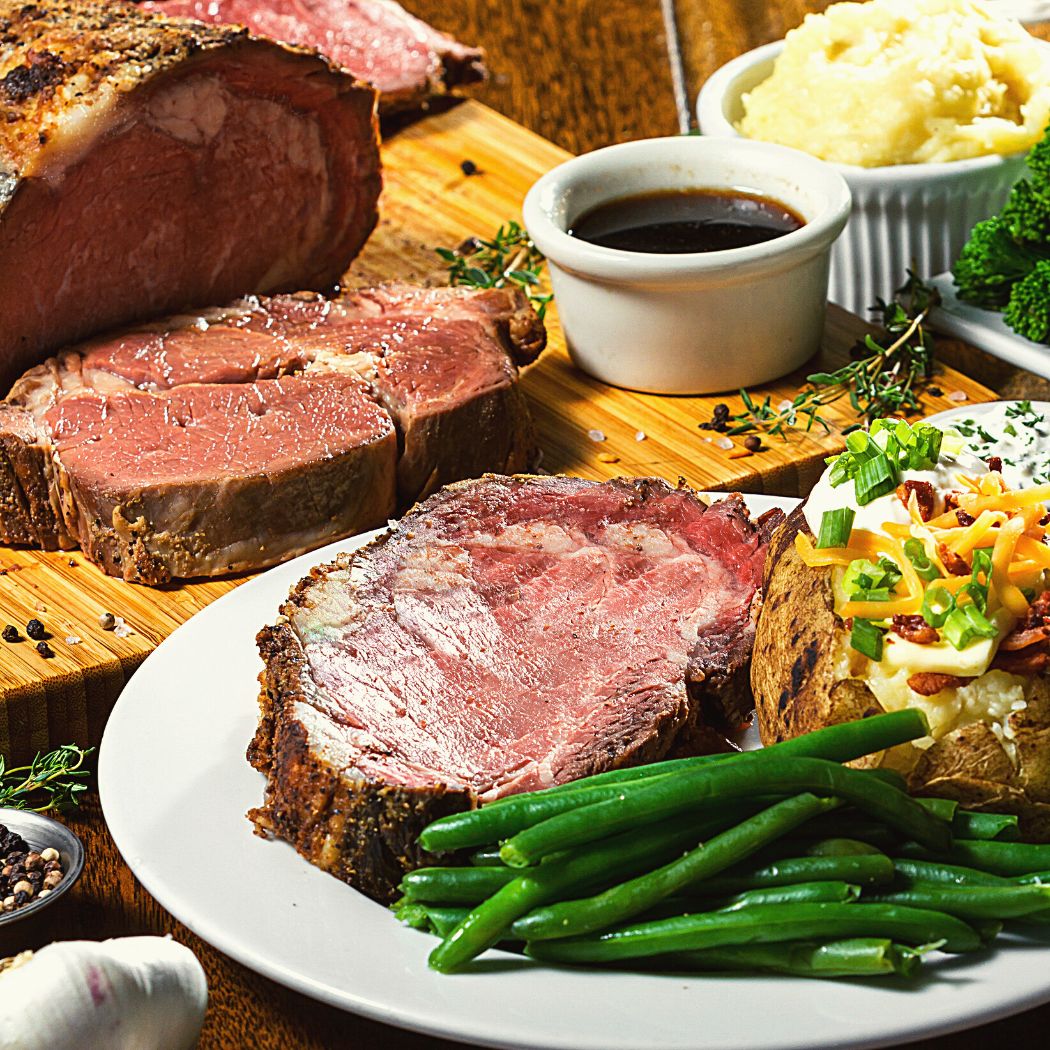
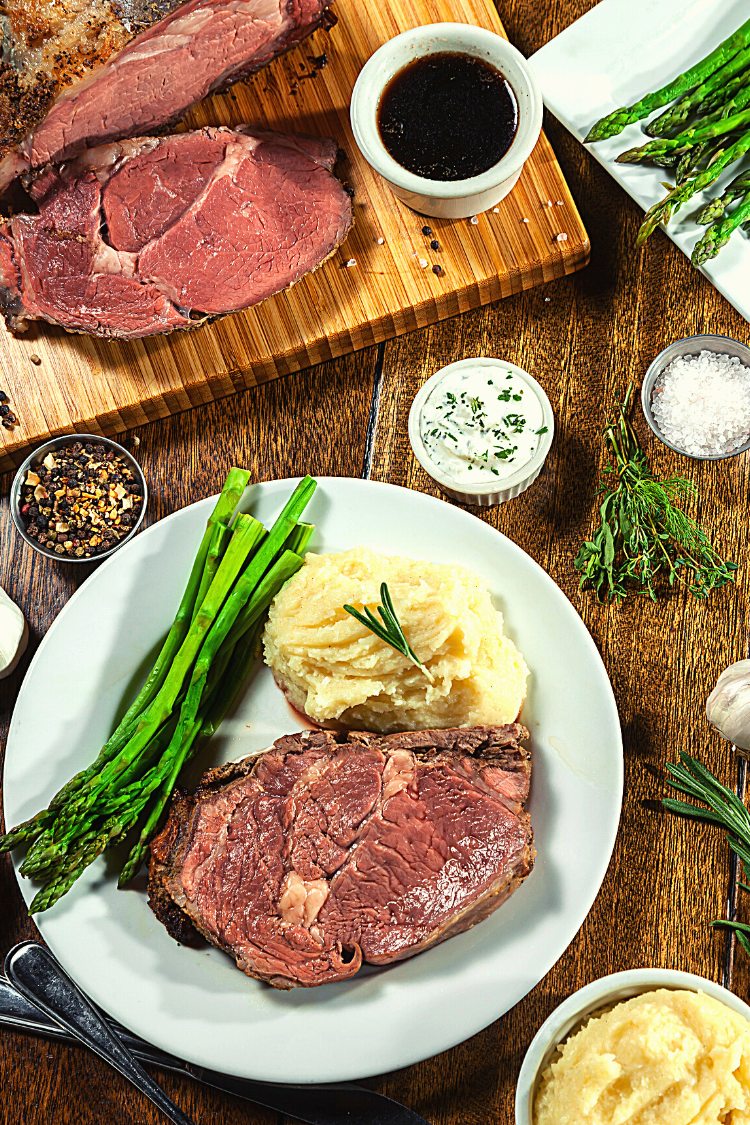
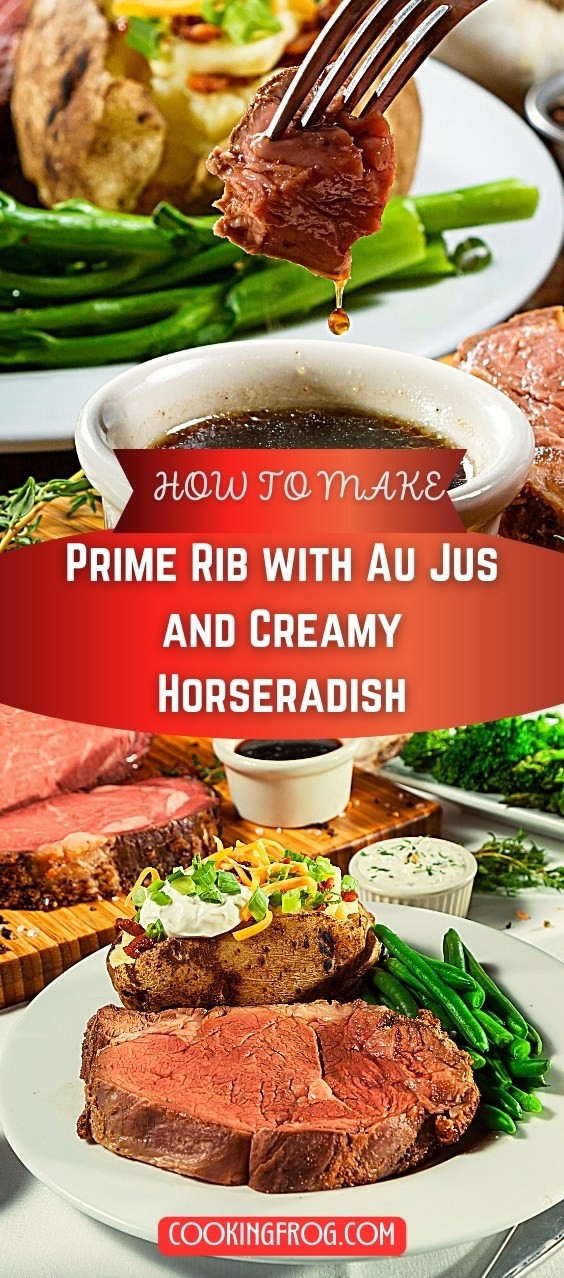
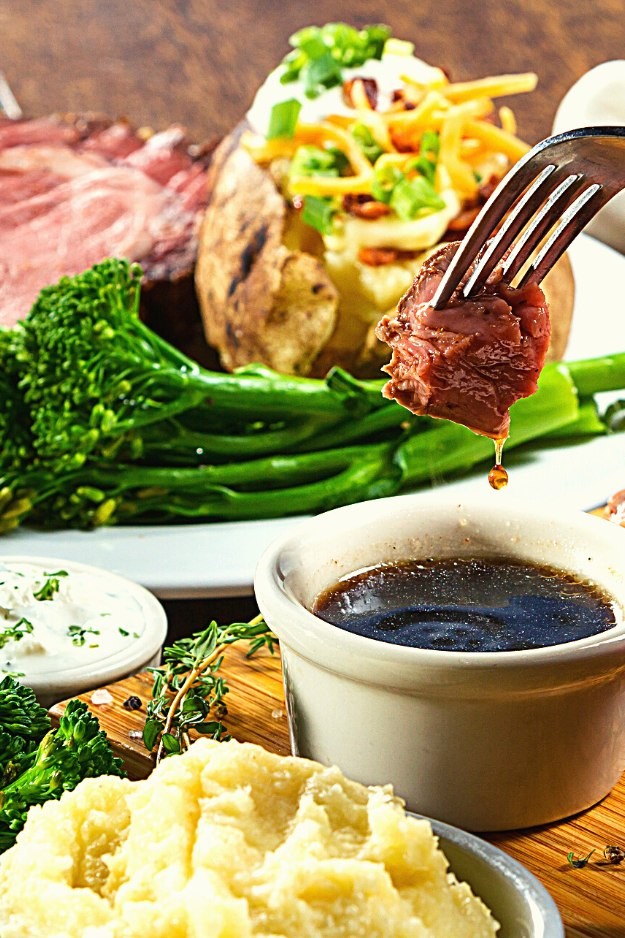
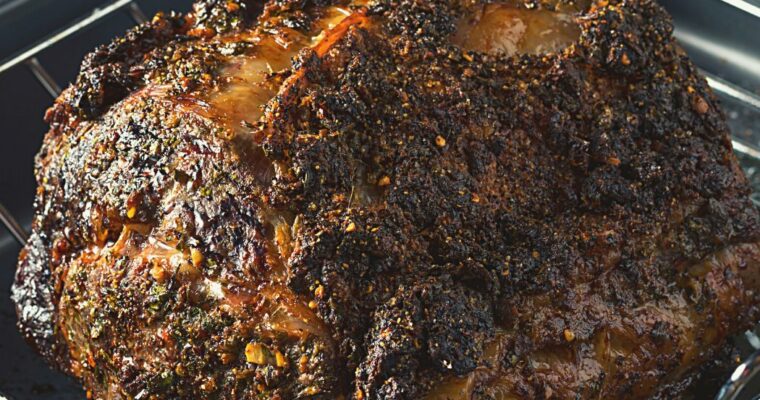
Easy and Delicious Recipes

Recent Posts

The Best Burrito Sauce Recipe in No Time

The Best Burrito Sauce Recipe in No Time

Have you ever been disappointed by a burrito sauce you bought at the store? If so, you need to step up your burrito game with a homemade sauce that will surpass your expectations. This burrito sauce is the real deal. It has authentic Mexican flavors Read More

Crispy Air Fryer Cauliflower Recipe with Seasoning Mix

Crispy Air Fryer Cauliflower Recipe with Seasoning Mix

With this air fryer cauliflower recipe, you’re in for a ride full of flavor. In just 15 minutes, this crispy, charred, and delicious cauliflower will make your taste buds dance with joy. We’ve added a lively mix of spices to this dish that will tingle Read More

How to Make Corn Nuggets in No Time

How to Make Corn Nuggets in No Time

Have you ever wanted a fast and easy-to-make snack that is crunchy and savory? Look no further than corn nuggets you make yourself. These tasty little nuggets have a crispy outside and a moist, flavorful inside that will make your taste buds dance happily.

And what’s best? You can make a batch of these tasty bites in less than five minutes. Yes, you don’t have to wait in long lines or buy bland food from the store. With just a few simple ingredients and a little bit of expertise, you can make a delicious treat that will satisfy any craving.

What are Corn Nuggets?

These tasty treats are a spin-off of corn fritters, which are a popular snack in South America. Even though sweet corn is the main ingredient in both, corn nuggets add a whole new level of flavor.

Unlike thin, flat fritters, corn nuggets are often deep-fried or fried until the outside is crispy and has a lot of flavors. And what’s best? They come in many different flavors, from spicy to sweet and spicy, to fulfill any craving.

So, corn nuggets are a great choice whether you want a quick snack or something new to put on a party platter. Try them for yourself, and get ready to be hooked on how good they taste.

How to Make Corn Nuggets in No Time

Ingredients you’ll need

You won’t want to miss this recipe for corn nuggets if you’re looking for a tasty snack that’s easy to make and only needs a few simple ingredients. Also, you probably already have most of the ingredients in your kitchen, but you can easily find them at your local grocery store if you need more.

You’ll need the following items to create these irresistible nuggets:

Oil: Choose an oil with a high smoke point, like peanut oil or vegetable oil, to fry your corn nuggets. This will make sure that your corn nuggets are crispy and brown.

Flour: You can use either white flour or whole wheat flour for the flour, whichever you prefer. White flour will make your nuggets lighter and fluffier, while whole wheat flour will give them a heartier, nuttier taste.

Egg: The egg acts as a binder, holding all the other ingredients together and ensuring that your nuggets stay together while you fry them.

Milk: Milk makes the batter a little bit creamier and helps to balance the flavors.

Baking powder: Baking powder is a key ingredient that makes your nuggets rise and feel soft and fluffy.

Shortening: Shortening is the way to go if you want to deep-fry your nuggets. It has a high smoke point, more than margarine or butter, which makes it great for frying at high temperatures.

Sweet corn: Last but certainly not least, sweet corn is the recipe’s star. You can use either canned or fresh sweet corn to give your nuggets a sweet, juicy flavor that will make your taste buds start dancing.

How to Make Corn Nuggets (Step-By-Step)

Step 1: Heat the oil

The first step in making tasty corn nuggets is to prepare the oil. You can do this in a pan or in a deep fryer. Oil should be heated to 365 F or 185 C.

Step 2: Mix the batter

While the oil is getting hot, get the batter ready. Mix the flour, baking powder, salt, and sugar in a small bowl. In a different bowl, whisk together an egg, milk, and melted shortening until the mixture is smooth. Mix the corn into your flour mixture after adding the egg mixture. Mix the ingredients well.

Step 3: Cook The Nuggets

Drop spoonfuls of your batter into the hot oil with a spoon. The nuggets should be cooked until they are golden brown. To cook both sides, flip them over.

Step 4: Strain and serve

Once your corn nuggets are done, take them out of the oil with a slotted spoon. Put them on paper towels to get rid of any extra oil. After that, your corn nuggets are ready to eat.

Step 5: Enjoy!

Now that you’ve made your yummy corn nuggets, it’s time to sit back, relax, and eat them. Whether you are hosting a party, a family dinner, or simply a snack, these delicious little nuggets are certain to please.

How to Make Corn Nuggets in No Time

How long do you deep-fry corn nuggets?

To get the right texture when cooking corn nuggets, it’s important to time things just right. In this case, you should cook it at high heat for 10 to 12 minutes and flip it over halfway through (around 7-8 minutes).

The reason for this particular cooking time is that it lets the nuggets cook all the way through and evenly and also gives them that crispy, golden brown outside that we all love. If you cook the nuggets for too long, they might get dry and overcooked. If you cook them for too little time, they might be soggy or mushy.

By sticking to the recommended cooking time and temperature, your nuggets will be the perfect mix of crispy and juicy, making them a hit with everyone who tries one.

Storing & Reheating

If you can’t get enough of the crunchy outside and juicy inside of these tasty snacks, you need to know the best way to store them so they stay juicy and tasty. Here are some insider tips on how to store corn nuggets.

Storing corn nuggets in the fridge

Once you’re done enjoying your corn nuggets, be sure to put them in a container that won’t let air in and place them in the fridge. That will keep them fresh for up to 3 days. Remember that freshness is the key to keeping your favorite snack’s taste and texture.

Storing corn nuggets in the freezer 

Now, don’t worry if you have some leftovers that you can’t eat in three days. You can still eat them later if you put them in the freezer. Just put them in a zip-top bag and freeze them for up to 3 months. So, you can eat chicken nuggets whenever you want, even if you don’t have fresh ones on hand.

Reheating corn nuggets 

If you want to reheat your nuggets, be careful about how you do it. You can bring them back to life in the oven, air fryer, or skillet, but you should never put them in the microwave. Trust us, microwaving them will make them limp and mushy, and that’s not how corn nuggets are meant to be eaten!

Corn Nuggets Recipe

Are you ready for a detailed recipe for these delicious corn nuggets? I’m not talking about a quick bite off a corn cob. I’m talking about corn nuggets, which are the golden standard of corn dishes. These fried corn balls are like the lovechild of popcorn and hushpuppies, and they’re guaranteed to make everyone love them.

Ingredients

  • 1 cup of flour
  • 1 tsp of baking powder
  • 1/2 tsp of salt
  • 1 tsp of sugar
  • 1 egg, large
  • 1/2 cup of milk
  • 1 Tbsp of shortening, melted
  • 12 oz of corn, canned and drained
  • 1 cup of frying oil; use more if required

Instructions

  • Heat the oil in a pot or fryer to get ready to fry by making sure it is at 365F.
  • Mix together flour, baking powder, salt, and sugar in a medium bowl. Then, whisk an egg, milk, and shortening together in a separate bowl.
  • Now comes the fun part: mix the wet and dry ingredients together and fold in the corn.
  • Place spoonfuls of your delicious nugget batter into the hot oil. Fry them until they are golden brown and crispy (about 2-3 minutes).
  • Once your corn nuggets look perfect, take them out of the oil and put them on a paper towel to soak up any extra oil.
  • Voilà! Your corn nuggets are done and ready to eat. Don’t wait too long though, because these little bites of heaven are best when they are served right away.

Were those corn nuggets mind-blowing? Well, don’t keep that deliciousness to yourself! Share the image below on Pinterest to let everyone know what they’re missing out on. Trust me; your friends will thank you forever. Spread the corny joy, and let’s make the world a crunchier, happier place!

Irresistible Corn Nuggets Recipe

Starbucks Chai Tea Latte Copycat Recipe

Starbucks Chai Tea Latte Copycat Recipe

Say goodbye to the drive-through and hello to a unique chai tea latte! This Starbucks-inspired recipe is authentic, giving each cup a balanced blend of sweet and spicy flavors. No more waiting in line; it’s time to bring barista magic into your home. So, grab Read More

Authentic Portuguese Caldo Verde Soup Recipe

Authentic Portuguese Caldo Verde Soup Recipe

Hello folks, we’re about to go on a tasty trip to the sunny streets of Portugal! Today, we’ll make Caldo Verde soup, a traditional Portuguese soup that will warm your heart and please your taste buds. This hearty green soup is not only full of Read More

Starbucks Carrot Cake Copycat Recipe

Starbucks Carrot Cake Copycat Recipe

Hello, fellow cake enthusiasts! Today, we’ll make the famous “Starbucks Carrot Cake Recipe.” This soft, moist cake has been a popular dessert for years. It’s the perfect example of fluffy carrot heaven.

Before Starbucks was even an idea in its founders’ heads, people were making their own versions of carrot cake in their own kitchens.

Now, the special formula for the famous Starbucks carrot cake is kept under lock and key, much like all the top-secret recipes of the big restaurants. But don’t worry! You can make the magic of Starbucks‘ carrot cake in your own kitchen if you follow this copycat recipe because I’ve worked hard and used my taste buds to figure out what makes it so good.

Starbucks Carrot Cake Copycat 

If you like sweet treats, you’ll adore a freshly baked slice of carrot cake with cream cheese frosting. With just the right amount of sweet and sour, this cake is a favorite choice for dessert. Many people like to pair it with a cold glass of milk or a hot latte to make the experience even better.

Starbucks is known for its delicious baked goods, and its carrot cake is no different. It has a lot of flavors and is moist because it is made with high-quality ingredients like nuts and raisins. Starbucks works with local bakeries to make sure their cakes, scones, and muffins are always fresh. These bakeries use their top-secret recipes to make the cakes, scones, and muffins they sell in their coffee shops.

Cooking Frog has the secret recipe you need to make your own version of the carrot cake at Starbucks. This recipe is easy to follow and will make a delicious, moist cake that tastes just like the kind you’d buy at your favorite coffee shop. So, why not make it at home and show off your baking skills to your friends and family?

Starbucks Carrot Cake Copycat Recipe

Starbucks Carrot Cake Ingredients

All-purpose flour: All-purpose flour is essential for making a soft and tender cake crumb because it is the main ingredient in the cake batter that gives it structure. It is made from a mix of different kinds of wheat flour so that it can be used for all kinds of baking.

Carrot: The star of this cake, the shredded carrot, gives the cake natural sweetness, moisture, and texture. It also helps give the cake its beautiful orange color and gives this dessert a healthy touch.

Baking powder and baking soda: These two leaveners are very important to the rise and texture of the cake. Baking powder releases carbon dioxide, which makes the cake rise. Baking soda reacts with the acid in the batter to make air pockets, which makes the cake light and fluffy.

Spices: Cinnamon, nutmeg, and allspice are all spices that make the cake taste warmer and more fragrant. In this recipe, the spices add a hint of sweetness and warmth, while the salt aids in balancing the flavors and bringing out the sweetness of the other ingredients.

Brown sugar: Brown sugar is an important part of this recipe because it gives the cake a rich, complex taste. Unlike white sugar, brown sugar has molasses in it, which makes the cake taste more complex and rich.

Vegetable oil: In this recipe, vegetable oil is used instead of butter. It helps keep the cake moist and soft. Vegetable oil has no taste of its own, so it doesn’t change the taste of the cake.

Eggs: Eggs give the cake batter richness, consistency, and structure. They also help the ingredients stick together, making a batter that is easy to work with.

Vanilla: Vanilla extract is a common ingredient in many baking recipes, including this Starbuck carrot cake. It gives the cake a subtle sweetness and flavor. Vanilla makes the other ingredients taste better and gives the cake a classic, time-tested flavor.

Walnuts and raisins: Chopped walnuts and golden raisins give the cake flavor and a crunchy texture that goes well with the soft, tender crumb. The walnuts give it a nutty taste, and the golden raisins give it a little sweetness and a chewy texture.

For the frosting: For the frosting, cream cheese provides a creamy and tangy base, while milk brings moisture and assists in thinning out the frosting. Vanilla extract adds flavor, and powdered sugar balances the tanginess of the cream cheese with sweetness.

Optional garnish: chopped pecans give the finished cake a crunchy texture and nutty flavor, making it a beautiful and tasty dessert.

Starbucks Carrot Cake Copycat Recipe

Starbucks Carrot Cake Recipe

With this Starbucks Carrot Cake Copycat Recipe, you can chew into a warm, fuzzy slice of heaven. This copycat recipe has all the flavors you love, from the spicy sweetness of cinnamon and nutmeg to the juicy crunch of fresh carrots, all wrapped up in a rich cream cheese frosting.

Ingredients

  • 1 1/2 cups all-purpose flour
  • 2 tsp of baking powder
  • 1 tsp of baking soda
  • 1/2 tsp of salt
  • 2 ½ tsp of cinnamon
  • 1/3 tsp of nutmeg
  • 3 eggs
  • 1/3 tsp of allspice
  • 1 1/2 cups dark brown sugar
  • 1 ¼ cup of canola or other vegetable oil
  • 1/4 teaspoon vanilla
  • 2 cups of shredded carrots (2 large carrots)
  • 1 cup of chopped walnuts
  • 1/2 cup of golden raisins

Frosting:

  • 8 oz of softened cream cheese
  • 1 ½ Tbsp of milk
  • 1 tsp of vanilla
  • 3 ¼ cups of powdered sugar

For Garnish, optional

  • 1/4 cup of chopped pecans

Instructions

  • First, set your oven to 350°F.
  • In a large bowl, mix the dry ingredients (flour, baking soda, baking powder, cinnamon, salt, allspice, and nutmeg).
  • Use an electric mixer to combine the brown sugar and oil, then add the eggs and vanilla extract and beat on high speed for 1 minute. This will make a smooth and luxurious mixture that’s ready for the next step.
  • Mix the wet mixture with the dry mixture, stir until it’s all merged, then turn the speed up and blend until the batter is as smooth as silk.
  • Mix in the shredded carrots, crunchy walnuts, and plump raisins by hand. Pour the batter into a 13×9-inch baking pan that has been nicely greased. Get ready for a taste sensation with every bite!
  • Bake for 55 to 60 minutes, or until a toothpick inserted in the middle comes out clean. Allow the cake to cool down completely. This will ensure a perfectly baked cake with a moist center.

For the frosting

  • Mix cream cheese, milk, and vanilla extract with an electric mixer, then add powdered sugar one cup at a time until the frosting is smooth and creamy. This frosting puts the finishing touch on a delicious cake.
  • Frost your cake with the whole bowl of cream cheese frosting, sprinkle some pecans on top and cut it into 12 pieces.
  • Serve and enjoy every bite! Keep leftover cake in the fridge so you can enjoy the flavors again another day.

Feeling inspired by this delicious recipe for Starbucks carrot cake? Let’s spread happiness and love! Share the photo below on your Pinterest board. You never know; your friends might start coming to you for baking! 🎂

Starbucks Carrot Cake Copycat Recipe

Juicy Cast Iron Skillet Chicken Breast Recipe in No Time

Juicy Cast Iron Skillet Chicken Breast Recipe in No Time

Juicy Cast Iron Skillet chicken breast is a masterpiece that will change the way you cook. With a timeless mix of lemon garlic butter with herbs and a tasty parmesan cheese crust, it’s almost effortless to make. The juicy skillet chicken breast recipe is a Read More

Authentic German Pork Chops and Sauerkraut Recipe

Authentic German Pork Chops and Sauerkraut Recipe

This delicious recipe for Pork Chops and Sauerkraut, also called the ultimate German Pork Chops, will take you on a trip to the heart of Germany. This dish is a must-try for anyone who wants to add some cozy warmth to their dinner table. This Read More

How Long to Cook Pork Chops in the Oven (Full Guide & Recipe)

How Long to Cook Pork Chops in the Oven (Full Guide & Recipe)

Depending on how you cook them, the time can vary, but pork chops generally can be cooked in an oven at 350 F for 30–45 minutes or in an air fryer at the same temperature for 20–30 minutes. But remember that the cooking time can be affected by the thickness of the pork chops, the temperature you cook at, and whether or not you use foil.

The best way to make sure your pork chops are cooked to perfection is to use a meat thermometer to check for an internal temperature of 145 degrees F, which is what the USDA says is the safest temperature for pork. Also, giving the pork chops a few minutes to rest before serving will let the juices redistribute, making for a more flavorful and tender piece of meat.

Pork Chops Cooking Temperatures

Medium-rare – Cooking pork to perfection can be tricky, but with the appropriate internal temperature and rest period, you can attain the perfect finish. According to the USDA and Food Safety, the safe internal temperature for pork is 145 degrees Fahrenheit. To attain medium-rare doneness, this temperature should be reached and followed by a minimum of 3 minutes of rest time.

Medium – For folks who prefer their pork chops slightly firmer, an internal temperature of 150 to 155 degrees Fahrenheit is advised for medium doneness. 

Medium-well – And for those who prefer their pork chops thoroughly cooked, 155 to 160 degrees Fahrenheit is the suggested temperature range for medium-well doneness.

Well-done – Lastly, an internal temperature of 160 degrees Fahrenheit is considered well-done for individuals who prefer their pork chops fully cooked.

How Long to Cook Pork Chops in the Oven (Full Guide & Recipe)

How Long to Bake Pork Chops at Various Temperatures

The information below will help you determine the proper baking time for pork chops baked at different temperatures.

How Long to Bake Pork Chops at 350 F

At 350 degrees Fahrenheit, pork chops can take anywhere from 30 to 45 minutes to cook, depending on how thick they are. A meat thermometer is an essential tool for making sure the pork is cooked just right and not too much.

By keeping an eye on the temperature inside, you can ensure your pork chops are always juicy and tender. Don’t leave it up to chance; use the thermometer to make sure your pork chops are cooked just right.

How Long to Bake Pork Chops at 375 F

If you set your oven temperature to 375 degrees Fahrenheit when baking pork chops. Check on the pork chops after 15 minutes, no matter how thick they are. If the chops are less than 1 1/2 inches thick, they should be done in 30 minutes or less.

How Long to Bake Pork Chops at 400 F

How long pork chops take to cook is directly related to how thick they are. At 400 degrees Fahrenheit, a pork chop that is 1/2 inch thick will take about 7-8 minutes to cook for every inch of thickness.

For instance, a chop that is 3/4 of an inch thick will take about 10 to 12 minutes to cook, while a chop that is 1 inch thick will take about 15 to 16 minutes. Keep in mind that the cooking time can change based on things like the cut of pork and how accurate your oven’s temperature is.

How Long to Bake Pork Chops at 425 F

It is critical to utilize a higher temperature oven to get a delightfully crispy coating on breaded pork chops. A temperature of 425 degrees Fahrenheit is adequate to get the required effect.
Cooking time for pork chops between 1/2 and 3/4 inch thick is around 20 minutes.

Remember to keep an eye on the cooking process to ensure the meat is cooked to your liking and the breading is golden and crunchy.

How Long Does it Take to Cook Bone-in Pork Chops?

When baking pork chops, it’s important to remember that cuts with the bone in will take longer to cook than cuts without the bone. Most bone-in pork chops need 35 to 45 minutes of baking time at 350 degrees Fahrenheit.

For example, a pork chop with a bone still in it that is 1 inch thick will need about 40 to 45 minutes to bake. In general, pork chops with bones should be cooked for 10% to 20% longer than chops without bones to make sure they are fully cooked.

This extra time will make the pork juicy and tender, and the bone will give the dish more flavor.

How Long to Cook Pork Chops in the Oven (Full Guide & Recipe)

What is the Best Temperature For Baking Pork Chops?

Even though there is no “best” temperature for cooking pork chops, the texture and taste of the meat can change depending on how it is cooked and at what temperature. A juicy and tender pork chop can be made by baking it at 350 degrees F for 30-45 minutes and 375 degrees F for about 25 to 30 minutes or until the temperature inside reaches 145 degrees F.

If you want the outside to be more caramelized, you can turn up the heat to 400 degrees F and bake for about 15 to 16 minutes for 1-inch thick pork chops.

You can also pan-fry, air-fry, or grill pork chops, but make sure to use a meat thermometer to ensure the internal temperature reaches 145 degrees F.

Again, when cooking pork chops, the safe internal temperature recommended by the USDA, which is 145 degrees F, is the most important thing to think about. This temperature eliminates any dangerous bacteria that might be in the meat, making it safe to eat.

How to Know if Pork Chops are Done Without a Thermometer?

When you don’t have a meat thermometer on hand, it can be hard to cook the perfect pork chop. But don’t worry; there’s still a way to help you cook pork chops just right.

One way to do this is to look at how firm the meat is. If you press your finger into the pork chop, it should feel firm but not hard. This means the meat is cooked but still tender. If there are soft spots in the middle, that means the pork is still rare.

On the other hand, a pork chop that feels very tough is probably well-done.

A unique trick called the “finger test” is another way to tell if meat is done. Just put your left or right hand in front of you and press the meaty part under your thumb. This should feel like touching raw meat.

Next, press the pad under your thumb and first finger together. You will notice that as you press each finger, the meat feels more done. Finger 1 is for rare meat, finger 2 is for medium-rare, finger 3 is for medium-well, and finger 4 is for well-done.

This method can be used for any kind of meat, making it a good starting point for new cooks. It’s a simple and effective way to check if meat is done without a thermometer, and it’s a fun way to show off your cooking skills to your friends and family.

Pork finger test. How to test if pork is cooked your hand. How Long to Cook Pork Chops in the Oven

How Long to Cook Pork Chops in Air-Fryer

Using an air fryer to cook pork chops is a quick and easy way to make a tasty meal. Depending on how thick the chops are, they usually need to be baked at 350°F for 15–30 minutes or at 400°F for 12–15 minutes.

Use this air-fryer pork chops recipe with an amazing rub mixture. And don’t forget to check the chops’ internal temperature every two minutes once the recommended baking time is almost up to ensure they don’t get too dry or overcooked. Covering the pork chops with aluminum foil while they bake in the air fryer can help them keep more moisture.

Oven-Baked Pork Chops Recipe

Now is the time to turn on the oven and get ready to make some delicious pork chops that will make your mouth water! Now that we know how long to cook pork chops and at what temperature, let’s put that knowledge to use and make the best oven-baked pork chops you’ve ever had!

Ingredients

  • 4 boneless pork chops, about 1 inch thick
  • 2 tbsp brown sugar
  • ½ tsp garlic powder
  • ½ tsp of onion powder
  • 1 teaspoon dried thyme
  • ½ tsp mustard powder
  • ½ tsp paprika
  • ½ tsp ground black pepper

Instructions

  • First, heat your oven to 375° F and put parchment paper on a baking sheet.
  • Next, give your pork chops a quick rinse with water and pat them dry with paper towels. Then, coat them with olive oil and put them on a baking sheet that has been prepared.
  • Now, let’s make the spice mixture work its magic. Mix brown sugar, paprika, dried thyme, garlic powder, onion powder, mustard powder, salt, and pepper together in a small bowl. Ensure to stir it well so that all the flavors mix together. Once the mixture is ready, rub it all over your pork chops, making sure to cover all sides.
  • Place the pork chops in the oven for 25 to 30 minutes if they are 1 inch thick and boneless. (If not, check the article above for how long it takes to cook different cuts of pork chops at different temperatures)
  • Keep a close eye on the internal temperature with an instant-read thermometer. You want it to be 145° F for medium-rare. Note that thinner pork chops will cook faster and pork chops with bones will take longer to cook. Just be careful not to overcook the pork chops, or they might get dry.
  • When they are done, take them out of the oven and allow them to rest for 5 minutes before serving. And that is it: cooked to perfection and seasoned pork chops that will be a favorite with your friends and family.

Don’t forget to save the image below to your Pinterest board, because we know you’ll want to make this recipe over and over again. 🙂

How Long to Cook Pork Chops in Oven (Full Guide & Recipe)

Soft and Fluffy Brioche Cinnamon Rolls Recipe

Soft and Fluffy Brioche Cinnamon Rolls Recipe

Are you ready to step up your baking with cinnamon rolls? Presenting our gloriously delicious brioche cinnamon rolls. These rolls are the ideal pleasure for any breakfast or brunch since they are made with delicious buttery brioche dough and are generously packed with cinnamon sugar. Read More