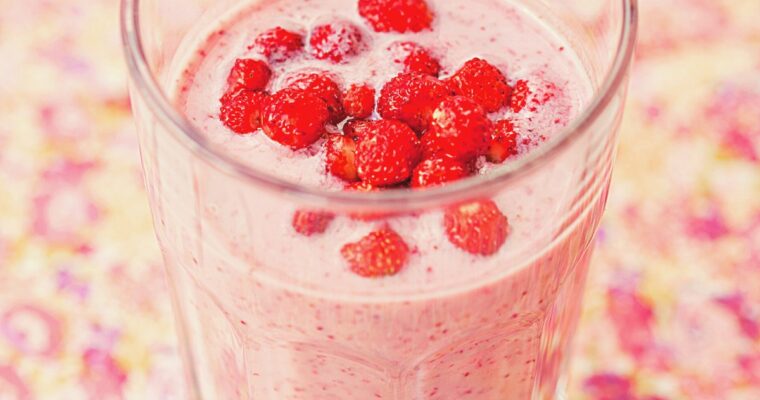
Easy and Delicious Recipes

Recent Posts

Homemade Lobster Ravioli Sauce Easy Recipe

Homemade Lobster Ravioli Sauce Easy Recipe

This elegant recipe for the BEST Lobster Ravioli sauce has only basic ingredients, which you probably have at your hand, and can be made in just 20 minutes. The lemon brown butter and Pecorino Romano cheese are the star ingredients in combination with a bit Read More

How to Cook Venison Backstrap (3 Ways + Marinade Recipe)

How to Cook Venison Backstrap (3 Ways + Marinade Recipe)

Without a doubt, the finest deer cut is the backstrap. It is a no-brainer why this is one of the best wild game cuts since it is simple to prepare and melts in your mouth—a must-have for any cuisine from a rural farmhouse or romantic supper. Read More

Pollo Asado Chipotle Copycat Recipe

Pollo Asado Chipotle Copycat Recipe

Copycat Chipotle Pollo Asado is one of the tastiest grilled chicken recipes I’ve made recently. This chicken is flavorful and tender with lime and orange juice in a chipotle-based marinade.

Fans of Chipotle Mexican Grill will recall that the chain finally introduced a fresh chicken option to its menu in 2022 after 30 years. This must be a really special and tasty chicken meal. The chicken in this copycat recipe is juicy and delicate, with a smokey taste and a touch of spice.

The chicken is not only delicious but also quite simple to prepare. The marinade may be made ahead of time in a food processor or blender and needs no special attention. Marinating the chicken in the fridge overnight will make for a flavorful grilled meal the following day.

Fun Fact on Chipotle: Free burrito coins (and cards) are available! The coins are extremely rare, and nobody knows how to obtain them other than by purchasing them on eBay for $35. At that price, you’d be better off buying the burrito yourself.

What is Pollo Asado?

Pollo Asado is a traditional Mexican cuisine that consists of chicken marinated with Pollo Asado spice, grilled, and served with salsa, lime, and tortillas. Chipotle Mexican Grill’s version in the United States is created with chicken thighs marinated in a vibrant, boldly flavored marinade and topped with fresh squeezed lime juice and cilantro.

Pollo Asado Chipotle Copycat Recipe

Ingredients for Pollo Asado

Meal planning is a breeze with this recipe for chicken Asado! Make enough chicken to last the whole week and serve it with rice, salsa, and your preferred taco toppings!

Additionally, the marinade may be made, and the chicken can be frozen once it has been marinated. I adore keeping a couple of freezer-stocked batches of marinated Pollo Asado for quick weekday dinners!

Chicken Thighs (or Chicken Breasts) –  Pollo Asado may be made with any cut of chicken, but my personal preference is boneless, skinless chicken thighs or chicken breasts. They are ideal for shredding into bite-sized pieces to use with tacos and burrito bowls.

Garlic – Fresh garlic is used in large quantities to make the marinade that gives this chicken its distinctive garlic taste.

Onions –  The onion has to be quartered after peeling, then the ingredients are added to a food processor or blender. 

Orange and Lime Juice – The marinade’s distinctive citrus taste is created by combining orange and lime juice, which goes particularly well with the smokey chipotle chiles in adobo.

Cilantro – Cilantro gives the marinade a freshness and can be left out if you’re not a fan.

Chipotle peppers in adobo –  sneaky kitchen substance: chipotle peppers in adobo! Add some chipotle chiles in adobo to a marinade to enhance the taste. They are spicy and richly smoked in taste. They also give the marinade a lovely reddish-orange hue.

Harissa Seasoning – Another secret weapon to increase the flavor of this Pollo Asado. 

Smoked Paprika – I adore smoked paprika because it gives food a smokey taste right away without having to cook or barbeque it first. Since the chicken may be air-fried or pan-fried without losing the distinctive grilled flavor, this is an excellent marinade for use all year round.

Oregano – If you can get Mexican oregano, I suggest using that kind. Any dried oregano will do because it has a deeper, earthier taste.

Cumin – Cumin is a deep, rustic spice that is frequently used in Mexican cuisine.

Salt & pepper – Last but not least, right? You can’t make any chicken dish without seasoning it with salt and pepper. 🙂

How to Make Chipotle Pollo Asado

For the Marinade:

Step 1: Blend, process, or use a big bowl and a handheld immersion mixer to purée all the marinade ingredients. Blend the ingredients until the sauce is smooth and the mixture is uniform.

Step 2: Place the chicken thighs or chicken breasts and marinate in a big, airtight container or Ziploc bag. Mix until the marinade is uniformly distributed over the chicken.

Step 3: Place in the refrigerator, then leave the marinade ideally for up to 24 hours, and at least 4 hours if you’re in a hurry. 

For Grilling Chicken:

Step 1: Set the grill to 350° to 400°F. Apply olive oil to the grill.

Step 2: Grill the chicken for 15 to 30 minutes, turning once, or until the internal temperature reaches 165 degrees Fahrenheit.

Step 3: Serve and enjoy; not really a cooking step, but it’s my favorite step. 🙂

Is Pollo Asado Too Spicy?

You can adjust this recipe’s spice level to suit your personal preference. Despite this, classic Pollo Asado can be a little spicy. Adding citrus notes will significantly reduce the spice content, and the amount of heat is negligible for most.

Add more citrus than what is called for in the recipe if you want to skip the spice completely.

Pollo Asado Chipotle

Additional Ways to Make Pollo Assado

Chipotle Pollo Asado in an Air-fryer

Step 1: Apply olive oil to the air fryer basket.

Step 2: Fill the air fryer basket with the previously marinated chicken.

Step 3: For 8 minutes, air-fried the chicken at 400 °F. Flip the chicken over after turning the air fryer on. Cook the chicken for 6-7 minutes or until it reaches 165°F internally. Enjoy!

Chipotle Pollo Asado – Pan-Seared 

Step 1: Place some olive oil in a pan that can be used for grilling and set it over medium heat.

Step 2: The chicken and the marinade should be added when the pan is heated. To prevent the chicken from drying out, sear it in the remaining sauce.

Step 3: Sear for 5 minutes, turn, and cook for another 3 to 5 minutes or until an instant-read thermometer inserted into the center of the chicken reads 165 degrees Fahrenheit.

Step 4: After the chicken is cooked, use the sauce left in the pan to dress the chicken. This adds more flavor and helps keep the chicken moist. Add a little water if the sauce dries up in the pan while you’re searing the chicken.

A Guide to the Perfect Pollo Asado

  • Marinade – the marinade has so much flavor that you only need to marinate the chicken for a short period, but I still recommend marinating it for at least 30 minutes. Give the chicken time to marinade in the fridge the night before if you can. Adding citrus juices like lime and orange will enhance the chicken’s taste and help it retain its moisture. Marinate the chicken a day ahead and let it sit in the fridge overnight to save time on preparation. A double batch of marinated chicken can be prepared and stored in the freezer for later use.
  • Chicken, thighs, or breasts – boneless, skinless chicken thighs or breasts are a great option. If prepared right, they can both be juicy cuts of chicken you can use with the Pollo Asado marinade. Thighs have more fat than chicken breasts, so they don’t dry out as much when cooked. If you want to have leftovers or use the chicken for meal preparation, I suggest using chicken thighs, so the flesh doesn’t dry out.
  • Grilling, pan-searing, or air-fried – Regarding the preparation approach, grilling the chicken yields the most outstanding results in terms of taste. Good charring and a pleasant smokey taste develop in the marinade. However, whether pan-fried or air-fried, chicken is excellent any time of year.

Share the image below to your Pinterest board if you like this Chipotle-style Pollo Asado!

Pollo Asado Chipotle Copycat Recipe

Pollo Asado Chipotle Copycat Recipe

With this copycat marinade, you can have delicious, authentic-tasting Chipotle-style Pollo Asado in no time. This marinade is packed with delicious flavor because to the aromatic herbs and spices used in its preparation.

Ingredients

For the Chicken

  • 3 lbs of chicken thighs or chicken breasts
  • 1 Tbsp of olive oil
  • 5 Tbsp of water (for pan-searing cooking method, optional)

For the Marinade

  • 7 oz of chipotle peppers in adobo sauce (1 can)
  • 4-5 Tbsp fresh lime juice
  • 4-5 Tbsp of orange juice
  • 1/2 cup of fresh cilantro
  • 1 tsp of Harissa Seasoning
  • 5-6 garlic cloves
  • 1 onion, diced
  • 1 tsp of cumin
  • 1 Tbsp of dried Oregano
  • 1 tsp of ground Coriander
  • 1 tsp of smoked paprika
  • 1 tsp of Lemon Salt or regular salt
  • 1/2 tsp of pepper

Instructions

For the Marinade

  • Place all the ingredients for the marinade in a blender, food processor, or big bowl and purée using a handheld immersion blender. The sauce will be smooth once the ingredients have been blended well.
  • Combine the marinade and the chicken thighs or breasts in a large airtight container or Ziploc bag. Mix until the marinade has coated the chicken well.
  • Place in the refrigerator, cover, and marinate for up to 24 hours. Although marinating for at least 4 hours is acceptable, overnight marinating is recommended for the finest flavor.

Grilling the Chicken

  • Heat the grill to a high setting of 350°–400°F. Apply olive oil to the grill.
  • Grill the chicken for 15 to 30 minutes, turning once, or until the internal temperature reaches 165 degrees Fahrenheit.
  • Serve hot, and enjoy!
How Long to Cook Salmon at 400 F? (With Recipes)

How Long to Cook Salmon at 400 F? (With Recipes)

You are concerned about how long it takes to cook salmon at 400 F since it is more complex than you believe in preparing salmon. When cooking salmon, it’s essential to use the proper technique and temperature so that the fresh salmon fillet flavor is Read More

How to make Chicken Wing Brine (Effortless recipe)

How to make Chicken Wing Brine (Effortless recipe)

Would you like to make the most delicious and simplest chicken wing brine? With an extra spicy kick, this simple brined chicken wing dish is salty, a little bit sweet, and spicy. Without a doubt, one of the most well-liked party dishes is chicken wings. Read More

Juicy & Tender Air-Fryer Ribs Recipe

Juicy & Tender Air-Fryer Ribs Recipe

Considering how simple it is to make, you’ll be astonished by how wonderfully Air-Fryer ribs turn out, with tender meat and perfectly crisp edges.

People were raving about my oven-baked baby back rib recipe a day after I posted it, so it only seems logical to put them in an air fryer now.

Although baking baby back ribs in the oven has always been my go-to method since it’s quick and easy and results in the tastiest ribs, I’m now calculating the ups and downs after using an air fryer for cooking ribs of baking the ribs in the oven. 

Although nothing beats hours of slow cooking on an outdoor barbecue, they are still delicious after only 30 minutes. 

With just a few basic ingredients, my tender Air Fryer Ribs are ready in no time! Enjoy amazingly delicate, delicious baby back ribs quickly and easily.
With this simple method, you won’t believe how great the ribs turn out!

Also, check my Oven Braised Costco Short Ribs Recipe

Ingredients you’ll need

The list of ingredients is almost identical to my oven-baked ribs, minus the onions. 

Pork Baby Back Ribs: I prefer to get the leanest baby back ribs when purchasing pork. I’ll trim off any surplus fat before applying the sweet, dry rub.

BBQ Sauce: You may either make your own or buy it. The Stonewall Kitchen’s baby back rib BBQ sauce is my favorite.

Brown Sugar: Although light brown sugar would also be suitable, I opted for dark brown.

Paprika: This ingredient gives the ribs a gorgeous color, and I like to use sweet paprika over smoked paprika.

Salt & Pepper: You can adjust the salt and pepper to your preference.

Garlic Powder: To ensure that all ribs are evenly covered, I like to use garlic powder in this recipe rather than raw garlic.

Onion Powder: Onion powder is also included in this dish’s flavor. It contributes to the distinctive flavor of the spice rub.

Dry Ground Mustard: you may use yellow mustard if you’d like. Wet yellow mustard should be used to coat the ribs and marinate them for at least two hours in the fridge.

Cayenne Pepper: The ribs get a little bite from this spice, which goes well with the other tastes. If you don’t like spice, you may leave this out or change the quantity to your preference.


How to make Air-Fryer Ribs

Here is a brief guide on how to cook these baby back ribs using an air fryer.

Step 1: Remove the Silver Skin

When cooking ribs, keep in mind that the thin silver skin or membrane that wraps around the back of the meat must be removed. The membrane, a substantial skin covering, will prevent the ribs from moving. It is not a good idea to leave it on since it will make the ribs less tender and less delightful to consume.

It is straightforward to eliminate. Find a bit of the membrane surrounding the flesh that you can grab by turning the ribs over. You may also insert a tiny knife blade between the ribs and the silver skin to separate them.

It has a silver color and forms a very thin coating on the back. Use paper towels and pull back when you’ve captured a piece of the silver skin. If you do it correctly, the membrane should come off in one piece and its whole.

Juicy & Tender Air-Fryer Ribs Recipe

Step 2: Apply Sweet, Dry Rub

Next, prepare, apply, and thoroughly rub the dry rub into the ribs. It is easy to make and adds a ton of flavor.

You may leave it in the fridge overnight with the rub for even more flavor, but it’s unnecessary. The ribs gain an additional layer of robust flavor from the rub. I definitely suggest using it.

But if you like, you can season it with salt and pepper. Make sure to season the ribs generously.

Step 3: Air-Fry your ribs

Before cooking the ribs in the air fryer, it is crucial to preheat the appliance. This prevents the food from adhering to the basket and enables it to reach the proper temperature for uniform cooking. Set it to 380 degrees Fahrenheit (195 C).

It should take three to five minutes to heat. The ribs may be placed in the basket once it has warmed up. The basket doesn’t need to be sprayed with oil.

Depending on the size of your air fryer, you may need to chop the rack of ribs in half or even thirds to fit it within. When chopped in half, it fits in my 5-quart air fryer. The cooking is unaffected by the slight center overlap of the halves.

Place the ribs on the air fryer tray, meat side down, and cook for 25 minutes, flipping them after 10 minutes.

Step 4: Finishing the Ribs

Once the 20 minutes are up, remove the basket and use BBQ sauce to coat the ribs on both sides. Return them to the air fryer with the meat facing up.

Increase the heat to 390°F (200°C) and cook the ribs for an additional 5 minutes or until the tops are slightly browned. Brush with extra BBQ sauce and serve.

Extra Tips

  • When the 20 minutes are up, remove the ribs from the air-fryer and coat them well on both sides in BBQ sauce.
  • Take them back to the air fryer, flesh facing up.
  • The ribs should be cooked for a further 3-5 minutes, or until the tops are just beginning to brown, over a higher heat of 390°F (200°C).
  • Serve after rubbing with more barbecue sauce.

Air-Fryer Ribs Recipe

These tasty and speedy Air Fryer Ribs are soft, juicy, and covered in the BEST rub mixture and BBQ sauce.

Ingredients

For the Ribs

  • 2 lbs of baby back ribs
  • BBQ sauce

For Dry Rub

  • 2 Tablespoons of brown sugar
  • 1 Tablespoon of paprika
  • 1 teaspoon of black pepper, ground
  • 1 teaspoon of salt
  • 1  teaspoon of garlic powder
  • 1 teaspoon of onion powder
  • 1 teaspoon of ground mustard
  • ½ tsp of cayenne pepper

Instructions

  1. Preheat the Air Fryer:
    • Set your air fryer to 380°F (193°C). Allow it to preheat for a few minutes.
  2. Prepare the Ribs:
    • Remove the silver skin from the back of the ribs. This is a thin, membrane-like layer. Peeling it off helps in better seasoning and cooking.
    • Generously apply your preferred dry rub seasoning to both sides of the ribs, ensuring an even coat.
  3. Position the Ribs in the Air Fryer:
    • If your rib rack is too large to fit into the air fryer, cut it into two halves.
    • Place the ribs in the air fryer basket, meat side facing down.
  4. First Phase of Cooking:
    • Cook the ribs for 25 minutes. At the halfway mark (around 12-13 minutes), carefully flip the ribs to ensure even cooking.
  5. Adding BBQ Sauce:
    • After the first 20 minutes of cooking, pause the air fryer and take out the basket.
    • Brush the ribs generously with BBQ sauce.
  6. Final Cooking Phase:
    • Return the ribs to the air fryer, this time with the meat side facing up.
    • Increase the temperature to 390°F (200°C).
    • Cook for an additional 5 minutes, or until the sauce on top starts to caramelize.
  7. Serve:
    • Once cooked, remove the ribs from the air fryer.
    • Optionally, brush them with more BBQ sauce for added flavor.
    • Let them rest for a few minutes before serving.

Enjoy your delicious, air-fried ribs!

Video Recipe

If you’ve liked this Air-fryer ribs recipe, please share the image below on your Pinterest board!


FAQs

At what temperature should I cook the ribs in the air-fryer? 

Baby back ribs are air-fried in this dish for 20 minutes at 380 degrees Fahrenheit. The size of the rib rack has a significant impact on how long they need to cook at this temperature. A rack that is on the smaller size will probably take 18 minutes, while a larger rack may take up to 30 minutes. 5-8 minutes should be added to the cooking time if cooking two racks at once.

Should I cover the ribs in the air-fryer?

The ribs should not be covered in the air-fryer. Both covering the ribs and placing parchment paper below them are not necessary. To cook food evenly, the air fryer moves air around the meal. You may stop the airflow by covering them.

How do I know when the ribs are cooked in the air-fryer?

The ribs are cooked when the internal temperature hits 175 degrees F (80 degrees C). Meat at this stage is still juicy and tender. Don’t use the absence of bone-retracting or crumbling meat as a sign of doneness; it only occurs with long and slow cooking.

Shouldn’t the ribs get more tender the more they cook in the air-fryer?

Yes, the longer they cook, the more tender the ribs get. This is why lengthy, slow cooking is favored over quick cooking, such as in an air fryer. But the ribs turn out moist and tender without turning dry, thanks to this quick and simple cooking method.

Should I place the ribs bone side up in the air-fryer?

For the first ten minutes of cooking, the ribs’ bony sides need to be exposed. The ribs are cooked with the boney side down for the final 15 minutes. With uniform cooking and the development of crispy particles on the meat’s surface, thanks to this.

More Air-Fryer recipes:

Air-Fryer Brats

Crispy Air Fryer Chicken Nuggets

Crispy Air Fryer Corn Dogs

Air Fryer Pork Steak with Delicious Rub

Oven-Baked Baby Back Ribs Easy Recipe

Oven-Baked Baby Back Ribs Easy Recipe

It’s hard to believe how juicy and tender these oven-baked baby back ribs are—cooked till they fall off the bone after being rubbed with a delicious dry rub. Then perfectly cooked while covered in a delicious barbecue sauce. Cook Advice: Cooking baby back ribs in the Read More

Homemade McDonald’s Hash Browns Copycat Recipe

Homemade McDonald’s Hash Browns Copycat Recipe

It is time for another McDonald’s copycat recipe. After making these delicious Egg McMuffins, and Chicken McGriddles, we’re making McDonald’s hash browns this time. These mouthwatering hash brown patties made from shredded potatoes are cooked to be fluffy inside and crispy and toasted on the exterior. Read More

Smoked Pork Loin (With Sweet Rub Recipe)

Smoked Pork Loin (With Sweet Rub Recipe)

The smoked pork loin is a delicious meal. It’s a fantastically multipurpose cut that lends itself to a wide variety of seasonings, smokes in a short amount of time, and looks great when served.

This recipe for smoked pork loin includes detailed instructions for cooking the perfect roast, down to the exact times and temperatures required, and my secret technique for making the meat extra soft and juicy.

This Smoked Pork Loin is the ideal roast for a big dinner or a backyard barbecue with friends and family. It’s delicious, simple, and can be made with little effort. Get the smoker going and get some of my Sweet Rub; I’m ready to cook!

Pork loin vs. Pork Tenderloin

The pork loin and the pork tenderloin are not the same cut, and they are very different from one another. The pork tenderloin is smaller and thinner, while the pork loin is thick enough to be sliced into steaks.

There is, however, a significant distinction based on preparation methods. While pork loin benefits from long roasting or grilling, pork tenderloin is best when cooked rapidly over moderate heat. We have an excellent Air-Fryer Pork Tenderloin recipe here.

Smoked Pork Loin Recipe (+ Sweet Rub)

Is Pork Loin a Good Substitute for Pork Tenderloin?

Although both pork slices are rather lean, they should not be used interchangeably in recipes because to their distinct sizes and forms.

Smoking a Pork Loin Roast

There are several reasons why pork loins are perfect for smoking. The first is their accessibility; they are a cheap cut found in most supermarkets and butcher shops. In the United States, loins are often sold as either half loins (weighing around 4–5 pounds) or full loins (weighing about 8 pounds).

This recipe for smoked pork loin roast works well with any size of loin you have on hand. In general, you should plan on serving a half pound of roast per person for dinner and a third of a pound during a party.

For tender, juicy results, smoke the pork loin at 225 degrees Fahrenheit (107 degrees Celsius) for 2 1/2 to 3 hours or until the internal temperature hits 145 degrees Fahrenheit (63 degrees Celsius).

For a well-cooked roast, cook it until the thermometer registers 145 degrees Fahrenheit (63 degrees Celsius), then remove it from the smoker and let it rest, covered with foil, for 10 to 20 minutes.

This will allow the roast to reabsorb its juices and stay warm for serving. Pork chops, pork roasts, pork loins, and pork tenderloin should be cooked to an internal temperature of 145 degrees Fahrenheit (63 degrees Celsius) and rested for three minutes, as recommended by the United States Department of Agriculture.

While smoking a roast, it’s more necessary to cook it to a certain internal temperature than for a certain period. Smoking times will differ from individual to individual and smoker to smoker due to various factors, including but not limited to climate, smoking style, and cut. I use a wireless thermometer to check on my smoked pork loins periodically. 

This recipe may use charcoal, gas, pellet, or electric smoker. Indirect heat from a gas or charcoal grill will also work.

In the absence of a permanent water reservoir, a disposable aluminum foil pan filled with water can be placed beneath the roast to keep it moist during smoking. Water pans in a smoker is essential for maintaining an even temperature and tender meat.

Smoked Pork Loin Recipe (+ Sweet Rub)


Smoked Pork Loin Recipe

Do you have everything you need to smoke the tastiest, juiciest pork loin ever? Then you need not go any farther than this recipe for my smoked pork loin, which can be prepared with my signature rub or amped up by infusing flavor into the pork. For your next gathering, serve this smoked pork loin.

Ingredients

For the Pork Loin

  • 5 lb pork loin roast
  • 3 TBSP of apple cider vinegar
  • 3 TBSP of whiskey

For the Dry Rub

  • 4 TBSP of brown sugar
  • 1 Tbsp of sea salt
  • 2 tsp of hot smoked paprika (you can use mild if you don’t like hot)
  • 1 tsp of cayenne pepper
  • 2 tsp of black pepper
  • 3 tsp of garlic powder
  • 2 tsp of onion powder
  • 1 tsp of ground mustard

Instructions

  • To start, preheat your smoker to 225 degrees Fahrenheit. (Most pellet grills don’t require it, but adding a pan of water to the smoker’s corner will help maintain even moisture levels.)
  • Combine the dry ingredients to make the rub.
  • Mix the whiskey and apple cider vinegar in a small glass.
  • Remove any extra fat or skin. Make some tiny holes all over the roast’s exterior using the sharp edge of a knife.
  • Apply the whiskey and apple cider vinegar mixture on the roast.
  • Rub the spice mixture all over the roast, covering it well.
  • Smoke your pork loin roast at 225°F (107°C) for 2 1/2 to 3 hours.
  • The roast must smoke until the thickest section of the roast achieves an internal temperature of 145°F (63°C).
  • Before slicing the roast thinly, let it to rest for 15 minutes under foil. Enjoy!

Share the image below on your Pinterest board if you like this smoked pork loin recipe!

Smoked Pork Loin Recipe (+ Sweet Rub)

FAQs

How long does pork loin take to smoke?

A 5-pound pork loin has to be smoked for 2 1/2 to 3 hours at 225 degrees Fahrenheit. Or when it reaches a temperature of 145 degrees Fahrenheit inside.

What temperature should finished smoked pork be at?

The pork is fully cooked when the internal temperature hits 145 degrees Fahrenheit.

How should leftovers be stored?

Before putting the meat in an airtight container, let it cool to room temperature. For up to three days, store in the fridge.

Can I freeze smoked pork?

You can, indeed! After being cooked and cooled, place the tenderloin in an airtight freezer-safe zipper bag after being carefully wrapped in aluminum foil. When sealing, be sure to press out as much air as you can. For up to three months, keep the pork in the freezer.

Easy Tiger Sauce Recipe in No Time

Easy Tiger Sauce Recipe in No Time

Pour some Tiger Sauce over a sandwich or use it as a dipping sauce. This sauce’s tanginess and subtle heat make it a versatile condiment. This tiger sauce has a delightfully smooth texture and a rich, powerful taste that’s just a bit spicy. It can Read More