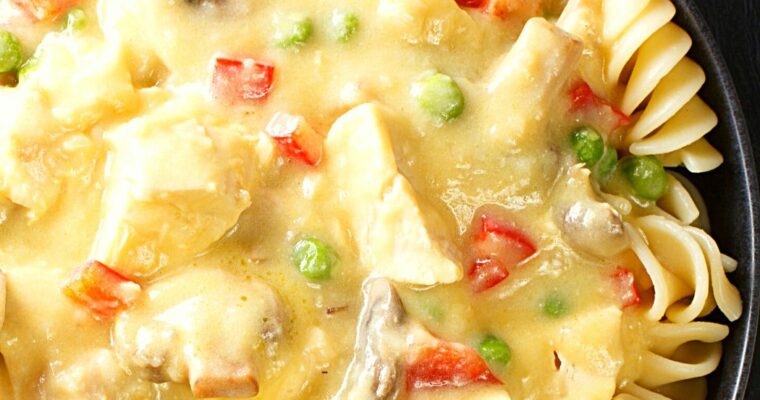
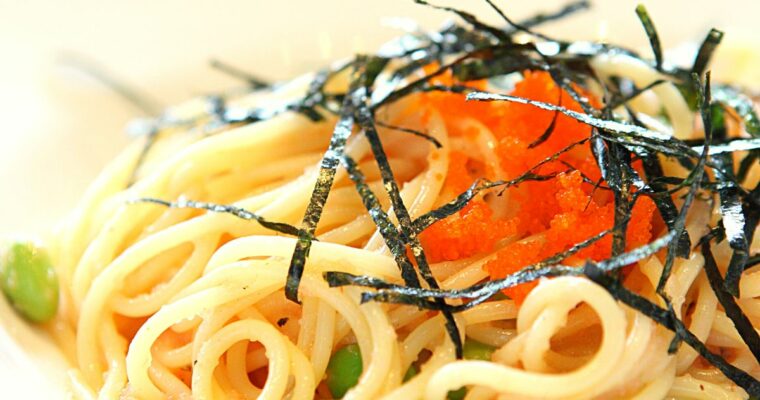
Easy and Delicious Recipes

Recent Posts

Famous Berliner Currywurst Recipe

Famous Berliner Currywurst Recipe

Currywurst fans, listen up! I’ve spent much time perfecting my currywurst recipe because I’m a skilled cook who loves spicy and flavorful foods. I’ve made so many delicious sausage dishes, like beer bratwurst, air-fryer brats, and Polish kielbasa, that I’m almost like a sausage sommelier. Read More

Air-Fryer Pork Chops with Garlic Butter Easy Recipe

Air-Fryer Pork Chops with Garlic Butter Easy Recipe

Prepare to bite into the most flavorful pork chop you’ll ever have. These air-fryer pork chops are covered in a delicious garlic butter sauce and cooked to perfection in an air-fryer. The result is tender, juicy pork chops that are healthier than conventional fried pork Read More

Delicious & Creamy Chipotle Lime Sauce Recipe

Delicious & Creamy Chipotle Lime Sauce Recipe

This chipotle lime sauce is great for giving bold, spicy flavor to any dish, whether you want to drizzle it over grilled chicken, toss it with shrimp, or use it as a dip for your favorite chips. This sauce is hard to resist because it has smoky chipotle peppers, tangy lime juice, and a touch of sweetness.

Chipotle Lime Sauce

This sauce will make you scream, “Asombroso!” (That means “awesome” in Mexican-Spanish, in case you didn’t know). Every bite is like having a party in your mouth. The smoky chipotle peppers will make you do the salsa, the tangy lime juice will make you sing mariachi, and the hint of sweet flavor will make you do the cha-cha-cha.

Why you’ll love this recipe

  • This recipe for delicious sauce couldn’t be any easier to make. You can make this tasty dip quickly with less than ten easy-to-find ingredients.
  • This tasty sauce has a lot of fresh, healthy ingredients, so it’s a great way to add flavor to any dish without feeling bad about it.
  • It’s easy to make this tasty dip ahead of time and keep it in the fridge so you can quickly add it to tamales, taquitos, and other Mexican-style dishes.
  • With chipotle peppers, lime, and other flavorful ingredients, this sauce makes any dish taste great.

Delicious & Creamy Chipotle Lime Sauce Recipe

Ingredients you’ll need

This chipotle lime sauce is tangy and full of flavor. You have to try it! Made from a mix of citrus and herbs, it’s the perfect way to finish off any dish. Here are the things you’ll need to make it:

Jalepeño

Chipotles in adobo

Lime juice

Mayonnaise

Olive oil

Cilantro

Green onion

Garlic

Honey

Orange juice

Salt

Use fresh lime and orange juice and some zest to give the flavor an extra kick. Bottled will work equally well if you don’t have fresh orange juice on hand. And if you want to try something new, add some chipotle powder or chili powder for a little extra kick. Trust us, your taste buds will be glad you did.

What is Chipotle in adobo?

Jalapeno peppers are used to make chipotles in adobo sauce by first being smoked and dried, then being rehydrated and canned with a tasty mixture of tomato, garlic, and other spices.
The outcome is a smokey, spicy condiment that gives various foods depth and spice.

Do I need to have a blender?

You are not required to use a blender. You can use a food processor.

Please don’t worry if you lack either. Everything should be diced as finely as you can before being combined in a dish, in my opinion. You might wish to whisk quickly to prevent the liquids and olive oil from splitting.

Serving suggestions

Serve your sauce on top of burritos, chicken wraps, taquitos, quesadillas, chalupas, nachos, or tacos with ground beef or chicken. Even fish, like my blackened tuna, walleye, and other meats, can be topped with it for a tasty kick.

It tastes fantastic as a salad dressing and on tacos or grain bowls. Test it out with my simple taco salad.

Although you may add this sauce to anything you like, it pairs well with Mexican and Spanish-inspired foods.

Storage

You’ll be relieved to learn that chipotle lime sauce, which has a strong and spicy flavor, can be kept for 2 weeks in the refrigerator. It’s crucial to store your sauce in an airtight container to maintain its freshness and flavor.

Doing this will stop any air or moisture from entering and harming the sauce’s flavor. You can preserve your homemade chipotle lime sauce for several weeks by simply placing it in a container with a tight-fitting lid or wrapping it in plastic wrap.

Just make sure to give it a quick swirl to combine any separated ingredients before serving.

Chipotle Lime Sauce Recipe

Enjoy a delightfully creamy and smooth sauce that is spiced up with a kick of chipotle peppers in adobo sauce and a touch of lime and honey for extra flavor. It’s a wonderful combination of spicy, sweet, and savory!

Ingredients

  • 3 Tbsp of olive oil
  • ½ cup of mayonnaise
  • 1 jalepeño
  • 1 cup of cilantro, diced
  • 1/2 cup of green onion, diced
  • 2 garlic cloves
  • 1 chipotle pepper in adobo, whole
  • 1 Tbsp of honey
  • Orange juice from one orange
  • 1/2 tsp of salt

Instructions

  • Place all the ingredients in a blender or a food processor and blend until the mixture is smooth. If the ingredients aren’t fully mixed, stop the blender and use a spatula to scrape the sides. Mix once more until everything is well blended.
  • When the mixture is creamy and smooth, taste it and add additional salt, adobo sauce, or lime juice as desired to taste. Enjoy!

Sauce alert! If you like this sauce, add the picture below to your Pinterest board. Your taste buds (and Pinterest followers) will be grateful.

Delicious & Creamy Chipotle Lime Sauce Recipe

Delicious Macaroni Pudding Recipe

Delicious Macaroni Pudding Recipe

Here’s a recipe for the tastiest and creamiest macaroni pudding you’ll ever try. If you like mac and cheese but want to try something new, this recipe is just what you need. This macaroni pudding will become a household favorite because of its smooth sauce Read More

Classic Louisiana Hot Sauce (Easy-to-Follow Recipe)

Classic Louisiana Hot Sauce (Easy-to-Follow Recipe)

This authentic Louisiana hot sauce recipe is sure to ignite your taste buds. This sauce is not for the faint of heart; it is made with a blend of fiery jalapeño peppers and powerful, delicious ingredients. But if you like your meals with a little Read More

Moist Egg-Free Banana Muffins with Crunchy Walnuts

Moist Egg-Free Banana Muffins with Crunchy Walnuts

Instead of relying on eggs, these egg-free banana muffins with walnuts are made with a combination of ripe bananas and milk (use plant-based milk for the vegan version) for a delicious and moist texture. The addition of crunchy walnuts not only adds a delightful nutty flavor but also provides a satisfying crunch in every bite.

Plus, these muffins are super easy to make and only require a few simple ingredients. So why not give them a try and indulge in a tasty and satisfying treat that’s free of eggs? You won’t be disappointed.

Egg-Free Banana Muffins in No-Time

If you’re in the mood for a quick and delicious treat that’s egg-free and easy to make, this muffin recipe is for you. With just ten minutes of prep time and two bowls, you can whip up a batch of delicious and fluffy banana muffins that are sure to impress.

The secret ingredient in this recipe is vinegar, which helps the muffins rise and gives them a light and airy texture. The banana acts as a binding agent and natural sweetener, taking the place of eggs. And the most useful part?

These muffins will stay fresh for up to two days when stored in an airtight container, so you can enjoy them anytime you want.  So why not try this recipe and witness how high your muffins can soar?

Moist Egg-Free Banana Muffins with Crunchy Walnuts

Allergy-Friendly Banana Muffins: Delicious, Nutritious, and Safe to Eat

If you’re looking for a delicious and allergy-friendly muffin recipe, look no further! Our eggless banana muffins are perfect for those with common food allergies, including dairy, gluten, and nut allergies. If you have a nut allergy, leave out walnuts. You can even adjust the sugar content to suit your taste and dietary needs. 

For a dairy-free option, simply replace the milk with your favorite milk alternative. When not using regular milk, we love using Oatly Oat Milk for its rich flavor and versatility in baking. To make these muffins gluten-free, simply use gluten-free flour and oats. 

Our go-to is Bob’s Red Mill Gluten-Free 1-to-1 Baking Flour. And for a low-sugar option, try using less sugar and letting the natural sweetness of ripe bananas shine through. However, if you’re in the mood for a sweeter treat, feel free to use up to a full cup of sugar. No matter how you make it, this recipe is sure to be a triumph!

Moist Egg-Free Banana Muffins with Crunchy Walnuts

Egg-Free Banana Muffins Recipe

Here’s a delicious and versatile recipe for eggless banana muffins! Whether dealing with food allergies or being out of eggs, these muffins are a tasty and satisfying treat. Plus, they’re easy to make gluten-free, dairy-free, vegan, and low in sugar. Simply follow the recipe below and enjoy a tasty, eggless treat!

Ingredients

  • 2-3 bananas, mashed
  • 1 cup milk (use plant-based milk for vegan muffins)
  • 1/3 cup of Canola oil
  • 1 Tbsp of Vanilla extract
  • 1 cup of granulated sugar
  • 2 cups All-purpose flour (For gluten-free, use Bob’s Red Mill Gluten-Free 1-to-1 Baking Flour)
  • 1 Tbsp of baking powder
  • ¾ cups of walnuts (leave out if you have a nut allergy)
  • 1 pinch salt
  • 2 tsp of vinegar (you can also use lemon juice)

Instructions

  • First, get the oven preheated to 350F (175C). Prepare a regular muffin tray and lightly grease it.
  • Mash the bananas and add sugar, baking powder, chopped walnuts, milk, oil, vanilla extract, salt, apple cider vinegar, and brown sugar in a medium bowl.
  • Mix all the ingredients until they are fully combined. (Don’t overmix)
  • Distribute the batter evenly between the muffin tins.
  • For the best results, bake the muffins for 25-30 minutes, rotating the pan halfway through or until a tester inserted in the center comes out clean.
  • To cool the muffins faster, remove the pan to a wire rack and leave it there for 5 minutes. Place muffins on a rack and refrigerate for at least an hour.

Egg-Free Banana Muffins Video Recipe

One more thing! We’ve created an awesome new image that we think would be ideal for your Pinterest board. Help us spread the word by sharing it with your followers! Just click on the image below to add it to your board. Thanks for your support!

Moist Egg-Free Banana Muffins with Crunchy Walnuts

Quick and Easy Air Fryer Brats Recipe

Quick and Easy Air Fryer Brats Recipe

If you like brats and like how easy it is to use an air fryer, you’re in for a treat. Today, we’ll show you how to make tasty, easy air fryer brats. This recipe is great for a quick and tasty meal and a great Read More

A Delicious and Traditional Beef Olives Recipe

A Delicious and Traditional Beef Olives Recipe

Today, we’re sharing a delicious traditional beef olives recipe that will impress your guests and elevate your dinner parties. This recipe is easy to follow and produces succulent and flavorful beef olives that are sure to become a favorite.  So, let’s get started and learn Read More

Apple Curd Easy Recipe

Apple Curd Easy Recipe

Rich, delicious and easy to make, this Apple Curd is overflowing with apple flavor. There are only six basic ingredients in our straightforward recipe, and no additional tools are needed.

This luscious apple spread is a favorite in our home all year. We spread it on just about everything we eat. This tasty apple curd recipe eliminates the need for a double boiler or pressure cooker, making it more convenient than other apple curd recipes.

Apple Curd

Have you ever tasted curd made from apples? Apple curd is another flavorful spread that may be used in place of lemon curd, which is perhaps more well-known among the general public. This great adaptable spread is really affordable, especially if you have an abundance of apples in the fall when you can use them to make this spread.

It goes wonderfully with breakfast, whether on bread, toast, pancakes, Croffle, in a sandwich, or stirred into porridge; nevertheless, it also has a wide variety of other uses.

You can also use it to enhance this Italian lemon ricotta cake

Apple Curd Easy Recipe

Ingredients you’ll need

Apples: I chose the Gala variety for flavor, but you may use whichever apples you have. A strong-tasting apple will provide better results, but you may also utilize garden windfalls or other apple deals you can get at this time. Apples with stronger flavors include Honeycrisp, Granny Smith, Pink Lady, and Cox’s Orange Pippin.

Sugar: You can use regular granulated sugar or caster sugar for this recipe. 

Butter – I recommend using salted butter in this recipe.

Eggs: I always go for organic and free-range eggs, especially when making desserts.

Lemon – Jarred lemon juice works well for this. The amount is equal to the juice of a typical lemon.

How to make Apple Curd

Step 1: In a large bowl or saucepan, mix the lemon juice and water. The apples will cook more quickly and uniformly in a large saucepan, and the mixture will cool off more rapidly after being cooked.

Step 2: Place the apples in the water after peeling, coring, and chopping them into pieces of about 1/2 inch.

Step 3: Put the liquid and apples in a saucepan and cook for approximately 20 minutes with the lid on over low to medium heat.

Step 4: Use a potato masher to mash up the apples to accelerate the process. After allowing the mixture to cool for five minutes, strain it through a sieve. In my experience, pushing the mixture through with the back of a big spoon is simpler.

Step 5: Put the mixture back in the pan. Mix the eggs together with a whisk and cut the butter into small pieces. Mix in the apples with the eggs, butter, and sugar. Simmer for 10 minutes while stirring over low heat. This will enable the eggs to solidify the apple curd and dissolve the sugar.

Apple Curd Easy Recipe

Why You’ll Love This Apple Curd

Flavor – Apple curd can be prepared in one pot and has the flavor of apple pie and caramel. The variety of tastes complements so many different dishes!

Texture – Apple curd has a somewhat thicker consistency than custard or jam, but it is still spreadable.

Ease – This recipe is simple and easy to follow, making it ideal for cooks of all skill levels.

Speed – Making apple curd takes only 30 minutes.

Apple Curd Variations

  • To enhance the flavor with a little touch of warmth, you may add cinnamon. Nutmeg can be substituted for cinnamon if you like a more delicate wood taste.
  • To give this apple curd an even more lemony flavor, add more lemon juice or zest. It tastes great to combine apple and lemon flavors.
  • The curd gains richness and sweetness with the addition of vanilla extract or vanilla bean paste. Use vanilla bean paste for a more potent vanilla taste.

Sterilize Jars Before Making Apple Curd

Sterilizing any jar you use for preserves is crucial since germs may grow there quickly and ruin the contents.

I frequently reuse jam jars and lids for preserves. It is best to avoid using a jar lid that has come into touch with vinegar since the seal is destroyed. By soaking in hot water, outdated labels and adhesives can be removed.

Set the oven temperature to 270 F. Soak the jars and lids with hot soapy water and a good rinse, but don’t let them dry. Put the jars on an oven tray with the lids flat on the tray—15 minutes of heating.

The jars (but not the lids) can also be sterilized in the microwave. Jars should be washed and left damp. Put in the microwave for 40 seconds at maximum power.

Also, any jar, lid, or seal can be sterilized in a dishwasher.

Apple Curd Recipe

Apple curd is created in 30 minutes and is buttery, flavorful, and smooth. It makes a wonderful Holiday gift and is the ideal way to use up extra apples from apple picking in the fall.

Prep Time: 10 minutes

Cook Time: 30 minutes

Calories: 690 per jar

Ingredients

  • 6 apples
  • ¼ cup of water
  • 1 ½ cups of sugar
  • 4 tbsp of lemon juice (or juice from 1 lemon)
  • 2 whole eggs + 2 egg yolks
  • ½ cup of butter
  • 1 tbsp of cornstarch (optional, for additional thickness)
  • 2 tbsp of water (for cornstarch slurry, optional)

Instructions:

  1. Prepare Apples: Peel, core, and chop the apples into 1/2 inch pieces.
  2. Mix Liquids: In a large saucepan, mix the ¼ cup of water and lemon juice.
  3. Cook Apples: Add the chopped apples to the saucepan. Cook over low to medium heat with the lid on for about 20 minutes, or until the apples are tender.
  4. Mash Apples: Remove from heat and use a potato masher to break up the apples. Let the mixture cool for five minutes, then strain it through a sieve to remove any large chunks. Return the smooth apple mixture to the pot.
  5. Prepare Egg Mixture: In a separate bowl, whisk together the 2 whole eggs and 2 egg yolks.
  6. Make Cornstarch Slurry (Optional): If using, mix 1 tbsp of cornstarch with 2 tbsp of water in a small bowl until smooth.
  7. Combine Ingredients: Cut the butter into small cubes. Add the butter, sugar, and the egg mixture to the apple mixture in the pot. If using the cornstarch slurry, add it now.
  8. Cook to Thicken: Cook the mixture over low heat, stirring continuously, for 15 to 20 minutes. The mixture should thicken considerably during this time. Be careful to keep the heat low to avoid scrambling the eggs.
  9. Strain and Cool: Once thickened, remove from heat and strain the mixture through a fine-mesh sieve to ensure smoothness.
  10. Chill the Curd: Allow the curd to cool to room temperature, then transfer it to the refrigerator to chill. The curd will thicken further as it cools.

Share the image below to your Pinterest board if you like this Apple Curd Recipe!

Apple Curd Easy Recipe

Authentic South Dakota Chislic Recipe

Authentic South Dakota Chislic Recipe

Chislic may be prepared with venison, lamb, or beef, but in my opinion, venison works best for this distinctive South Dakotan cuisine. Chislic is made with bite-sized pieces of meat that have been deep-fried and seasoned with Worcestershire sauce, garlic powder, salt, and pepper. Many restaurants Read More