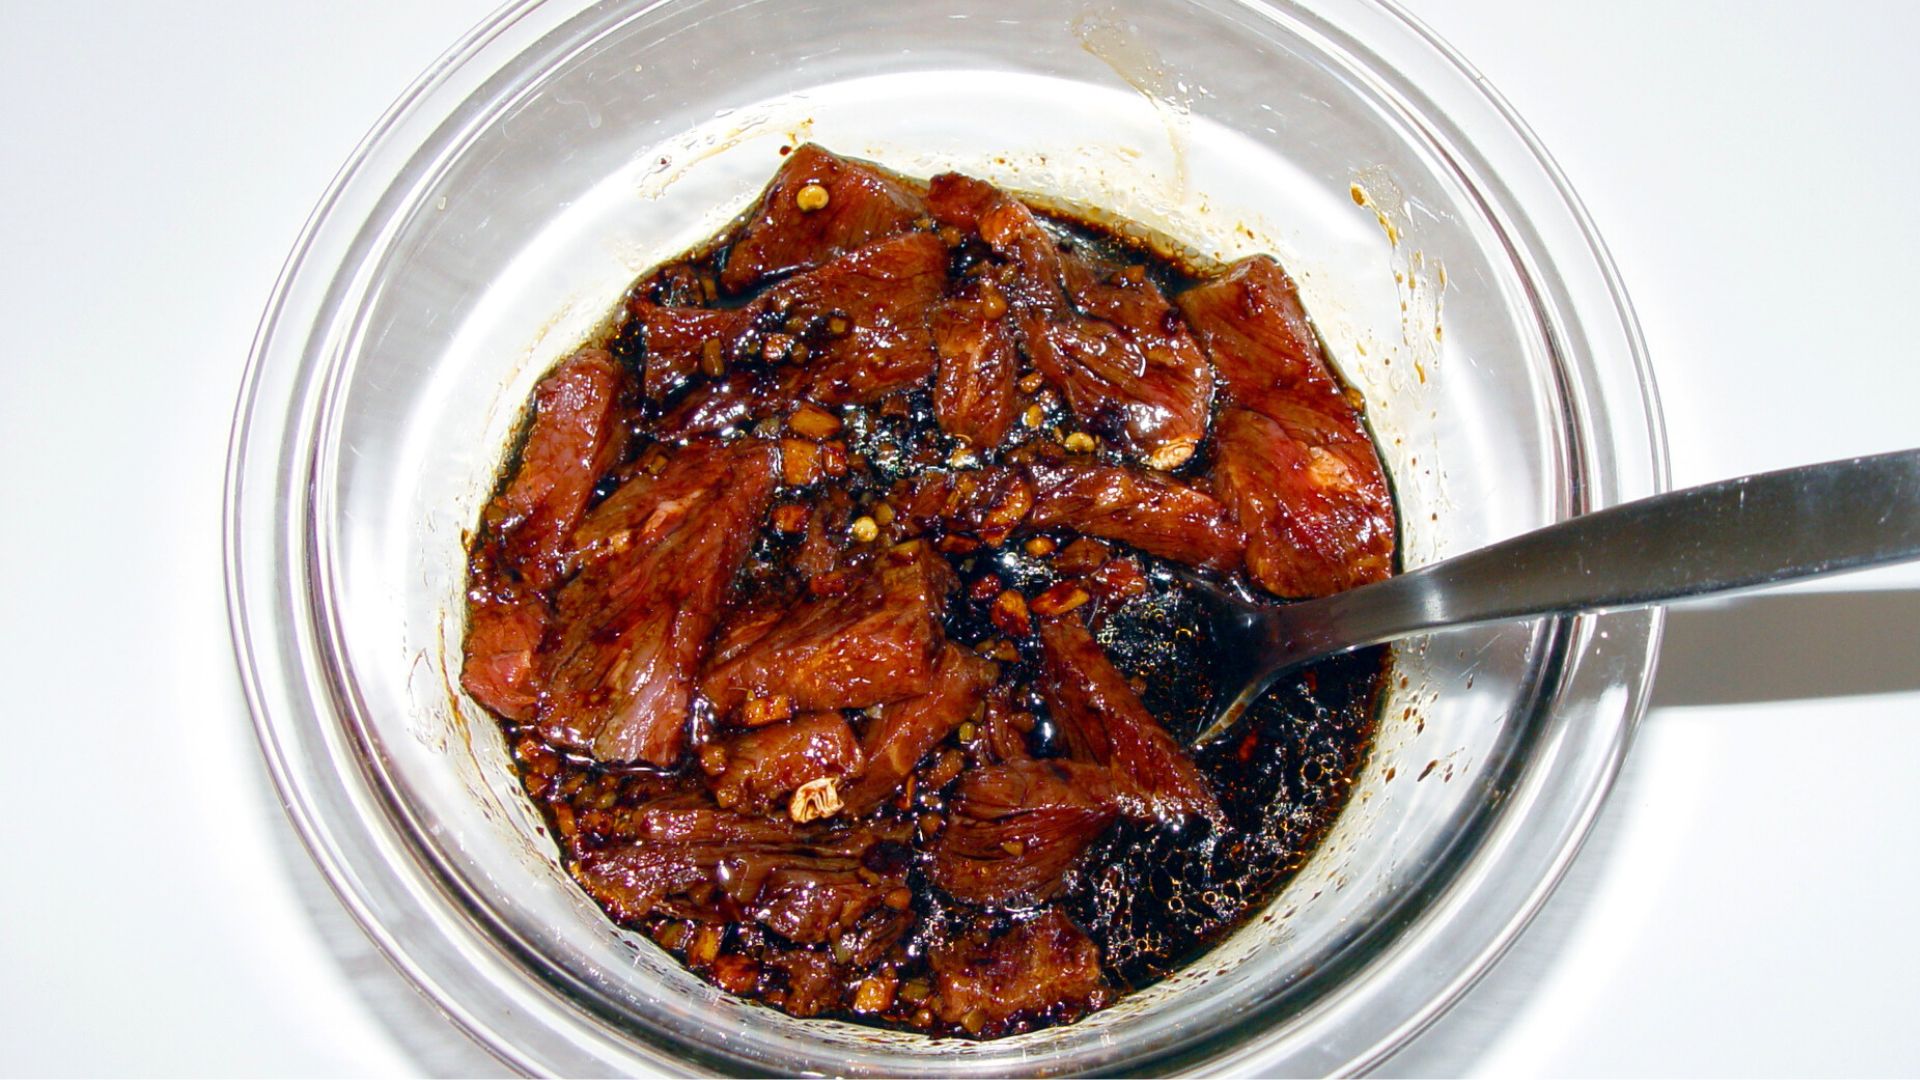
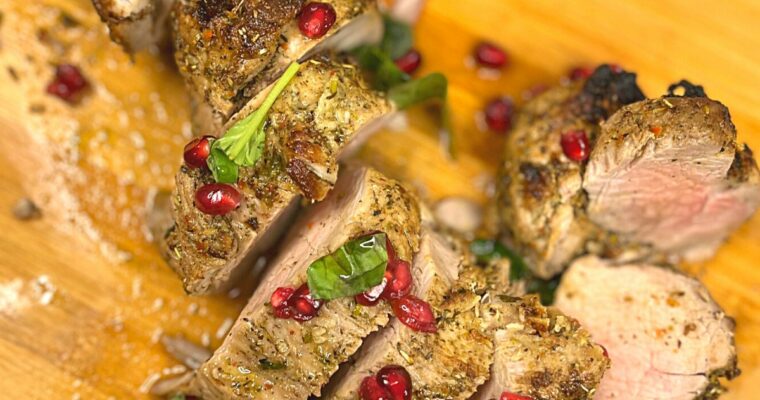
Easy and Delicious Recipes

Author: Sarah Berthold

Creamy Japanese Mentaiko Pasta Recipe

Creamy Japanese Mentaiko Pasta Recipe

This Creamy Mentaiko Pasta recipe is a delectable cod roe pasta made in the signature style of Japanese cuisine that just requires a few simple ingredients. It’s understandable why this new classic has become a staple in Japanese households, given that it boasts a thick, Read More

Onion-Braised Beef Brisket Easy Recipe

Onion-Braised Beef Brisket Easy Recipe

From the rustic kitchens of our ancestors to the chic restaurants of modern cities, the braised beef brisket has traveled through time, evolving with each generation. This dish, a symbol of culinary heritage, has been reinvented numerous times, yet its soul remains intact. Today, as Read More

Homemade Fish Seasoning with Variations

Homemade Fish Seasoning with Variations

Uncover the art of flawless fish seasoning with our detailed guide. Go above the ordinary fish seasonings and into a realm where spices transform every fillet into a gourmet masterpiece.

Picture the peaceful waves of the Caribbean, the fragrance of freshly grilled fish flowing through the air, and the symphony of spices that dance on your plate. 

Dive into this fish seasoning guide, and I swear you will have a culinary experience that will boost your fish dishes and transport you to those sun-kissed beaches with each bite. 

Prepared with love, inspired by travels, and tailored for the modern kitchen, this seasoning is more than just a mix—it’s a story, an emotion, and a promise of an exceptional meal. Let’s set sail on this mouthwatering journey together, shall we?

Homemade Fish Seasoning with Variations

Why Opt for Homemade Seasoning?

Budget-Friendly: Preparing your own seasoning can be more cost-effective than buying pre-made mixes.

Customizable: Make the seasoning to your flavor preferences. Want it spicier? Add some cayenne. Would you prefer a herby touch? Toss in some dried parsley, oregano, or dill.

Long Shelf Life: When stored correctly, homemade seasonings can last for months, ensuring you consistently have a flavorful mixture on hand.

Seasoning Variations for Different Fish Types

Every fish has its distinctive texture and flavor profile, and the proper seasoning can highlight its natural goodness. Here’s a full guide to seasoning variations, ensuring each fish type shines on your plate:

Salmon: Known for its rich, fatty texture, salmon pairs amazingly with a mix of brown sugar, garlic powder, and a hint of chili flakes. The sweetness of the sugar completes the fish, while the chili adds a subtle kick.

Homemade Fish Seasoning with Variations

Cod: A mild-flavored fish, cod benefits from a combination of lemon zest, parsley, and a touch of paprika. This blend improves its delicate taste without overwhelming it.

Homemade Fish Seasoning with Variations

Tilapia: This freshwater favorite pairs nicely with a mix of cumin, coriander, and a dash of turmeric. These spices lend a warm, earthy flavor, making the tilapia’s taste more pronounced.

Tuna: A meatier fish like tuna needs bold flavors. A blend of crushed black pepper, garlic powder, and a sprinkle of dried oregano works wonders. The robustness of the spices complements the strong character of tuna.

Homemade Fish Seasoning with Variations

Trout: Improve trout’s sweet taste with a mix of dill, garlic powder, and a bit of nutmeg. The herbs and spices blend beautifully, highlighting the fish’s natural flavors.

Walleye: Walleye, with its clean and barely sweet flavor, is a treat for fish lovers. Opt for a seasoning blend of celery salt, white pepper, and a hint of sage to enhance its natural taste.

The mildness of these spices complements the walleye’s delicate profile, permitting its true essence to shine through without being overpowered. For an added twist, a squeeze of fresh lemon juice just before serving can boost the dish to new heights.

Homemade Fish Seasoning with Variations

Mahi-Mahi: This vibrant fish, often known for its robust texture and barely sweet undertones, deserves a seasoning that can match its tropical roots. A blend of ground coriander, lime zest, and a touch of smoked paprika can perfectly accompany.

The coriander delivers a citrusy note, the lime zest brings in a tangy freshness, and the smoked paprika hints of smokiness. Jointly, they create a harmonious balance, making your Mahi-Mahi dish reminiscent of a beachside feast.

Homemade Fish Seasoning with Variations

Homemade Fish Seasoning Recipe

Ingredients:

  • 2 tsp of kosher salt
  • 1 tsp of garlic powder
  • 1 tsp of onion powder
  • 1 tsp of dried oregano
  • ½ tsp of black pepper
  • ½ tsp of paprika
  • ¼ tsp of dried thyme
  • ¼ tsp of allspice
  • ½ tsp of dried basil 
  • ¼ tsp of dried rosemary
  • A pinch of lemon zest (optional)

Instructions:

  • Preparation: Start by collecting all your spices and ensuring they’re fresh. Fresh herbs will give your seasoning the rich flavors it deserves.
  • Mixing: In a medium-sized mixing bowl, pour each ingredient separately. Stir the mixture thoroughly using a whisk or a fork, ensuring that each spice is well-integrated into the mixture. This even distribution is essential for a uniform flavor in every pinch.
  • Storage: Once mixed, move your seasoning into an airtight container. This will preserve the potency of your spices. Find a cool, dry spot in your kitchen or pantry, away from direct sunlight or heat sources, to store the container. This ensures the seasoning keeps its flavor and doesn’t degrade fast.

Do you have a knack for standout fish seasoning? If this recipe reeled you in, cast the image below onto your Pinterest board. Dive in and share the fun!

Fish Seasoning with Variations

Homemade Poultry Seasoning with Variations

Homemade Poultry Seasoning with Variations

When it comes to cooking poultry, the proper seasoning can make all the difference. Whether roasting a whole chicken, grilling turkey slices, or baking duck breasts, sprinkling the right herbs and spices can elevate your dish from ordinary to exceptional. Why Make Your Poultry Seasoning? Read More

Chicken a la King Recipe

Chicken a la King Recipe

Have you ever felt the warmness of a comforting embrace in a dish? If not, you’re about to. Today, we’re not just sharing a recipe; we’re sharing an experience, a memory, and a story that revolves around the satisfying Chicken a la King. This isn’t Read More

Air-Fryer Chuck Steak Easy Recipe

Air-Fryer Chuck Steak Easy Recipe

When it comes to steak, the chuck cut often remains surpassed by its more famous counterparts. Yet, with the right touch of Italian seasoning and the preciseness of an air fryer, this underappreciated cut converts into a gastronomic treat. Let’s explore how to advance air-fryer chuck steak to new culinary heights.

Air-Fryer Chuck Steak

Ingredients

  • 2 chuck steaks, about 1 inch thick (≈ 8.8 oz / 250 g each)

  • 1–2 tsp olive oil

  • Salt, to taste

  • Freshly ground black pepper, to taste

  • 1–2 tsp Italian seasoning (adjust to preference)


Instructions

1. Prep the Steaks

  • Take the chuck steaks out of the refrigerator and let them sit at room temperature for 30 minutes.

  • This ensures more even cooking and a juicier steak.


2. Season

  • Drizzle olive oil evenly over both sides of each steak.

  • Sprinkle generously with salt, black pepper, and Italian seasoning.

  • Gently rub the seasonings in for better flavor.


3. Air-Fry

  • Preheat your air fryer to 400°F (200°C).

  • Place the seasoned steaks in the basket in a single layer so they don’t overlap.

  • Cook for 12–13 minutes, flipping halfway through for even browning.

  • For medium-rare, aim for an internal temperature of 135°F (57°C). Adjust the cooking time slightly for your desired doneness.


4. Rest and Serve

  • Remove the steaks from the air fryer and let them rest on a cutting board for 10 minutes.

  • This step allows the juices to redistribute for the most tender bite.

  • Slice against the grain and serve with roasted vegetables, a fresh salad, or air-fried potatoes for a complete meal.


Optional Add-On: Garlic Herb Butter

For extra richness, mix together:

  • 2 tbsp softened butter

  • 1 clove minced garlic

  • 1 tsp fresh chopped parsley

  • A pinch of salt

Spoon a small dollop over the steak right before serving — it melts into the meat and takes the flavor up a notch.


Time Guide

  • Prep Time: 30 minutes (including resting)

  • Cook Time: 12–13 minutes

  • Rest Time: 10 minutes

  • Total Time: ~50 minutes

Do you think this air fryer chuck steak recipe is pin-worthy? Slide it onto your beautiful Pinterest board with the image below. Let’s share the steak love, one pin at a time!

Air-Fryer Chuck Steak

Air-Fryer Chuck Steak


Tips and Tricks for the Perfect Chuck Steak:

  1. Room Temperature Matters: Always start with chuck steak sitting at room temperature for about 30 minutes. This ensures even cooking and a juicier result.
  2. Pat it Dry: Before seasoning, dry your steak with paper towels. Removing excess moisture ensures a better sear and stops the steak from steaming in the air fryer.
  3. Avoid Overcrowding: Place only as many steaks in the air fryer as possible without touching. Overlaying or crowding can lead to uneven cooking.
  4. Thickness Consistency: Ensure all your steaks are of equal thickness. This guarantees they all cook at the same rate, preventing some from being overcooked while others remain undercooked.
  5. Rest After Cooking: This can’t be stressed enough. Letting the steak rest for 10 minutes after cooking allows the juices to redistribute, ensuring every bite is moist and flavorful.
  6. Use a Meat Thermometer: For precision, use a meat thermometer to check the doneness of your steak. This removes the guesswork and ensures your steak is cooked exactly to your liking.
  7. Season Generously: While you don’t want to overpower the natural flavor of the chuck steak, don’t be shy with your seasoning. The right amount of salt and pepper can elevate the taste significantly.
  8. Clean Your Air Fryer: After each use, ensure you clean the air fryer basket and interior. Built-up residue can affect the flavor of your steak and other dishes you prepare.

Storing & Reheating:

Refrigeration: Do you have chuck steak leftovers? Store the chuck steak in a shallow container and refrigerate for up to three days.

Freezing: For extended storage, freeze the cooled steak in an airtight container for up to six months.

Reheating: Heat the steak in a non-stick pan until it’s hot or microwave for 20-30 seconds.

Starbucks Salted Caramel Latte Copycat Recipe

Starbucks Salted Caramel Latte Copycat Recipe

Yearning for that signature Starbucks salted caramel latte? Why not recreate this item from the Starbucks menu right in your kitchen? My take on this beloved copycat version mirrors the rich caramel warmth and the gentle sea salt contrast of the original. With every sip, Read More

Air-Fryer Beef Tenderloin Easy Recipe

Air-Fryer Beef Tenderloin Easy Recipe

In the world of cooking, beef tenderloin holds a special place, well known for its tenderness and rich flavor profile. When paired with the innovative cooking method of an air fryer, this prime cut transforms into a gourmet chef-d’oeuvre. Imagine a beef tenderloin marinated with Read More

Mississippi-Style Pot Roast Easy Recipe

Mississippi-Style Pot Roast Easy Recipe

There’s nothing quite like the fragrance of a pot roast flowing through your home, promising a hearty and delicious meal. The Mississippi-Style Pot Roast, with its unique combination of flavors, is a true testament to the magic of slow cooking. 

Mississippi-Style Pot Roast

Ingredients

  • 3–4 lbs chuck roast

  • 1 packet ranch dressing mix

  • 1 packet au jus gravy mix

  • ⅓ cup (about 5 Tbsp) unsalted butter

  • 6 whole pepperoncini peppers (plus 2–3 Tbsp juice from the jar)

  • 2 Tbsp olive oil

  • 1 tsp smoked paprika

  • Salt & freshly ground black pepper, to taste


Instructions

1. Prep & season the roast

Pat the chuck roast dry with paper towels. Season both sides generously with salt, pepper, and smoked paprika.

2. Sear the beef

Heat olive oil in a large skillet over medium-high heat. Sear the roast for 2–3 minutes per side, until a golden-brown crust forms.

3. Assemble in slow cooker

Place the roast into the slow cooker. Sprinkle ranch dressing mix and au jus mix evenly over the top. Add the butter and pepperoncini peppers. Pour in 2–3 Tbsp of the pepperoncini juice for extra tang.

4. Cook low & slow

  • Low setting: 8 hours

  • High setting: 4–5 hours
    The roast is ready when it’s tender and shreds easily with a fork.

5. Shred & serve

Use two forks to gently shred the beef in the slow cooker, mixing it with the flavorful juices. Serve warm over mashed potatoes, rice, or buttered noodles, with the pepperoncinis on the side.


Tips & Variations

  • For extra richness, add sliced onions or baby carrots to the slow cooker.

  • Want it spicier? Add a few more pepperoncinis or a spoonful of their brine.

  • Leftovers keep well in the fridge for up to 4 days, and they taste even better the next day.

Craving more of this Mississippi charm? Light up your Pinterest board by pinning the picture below. Trust me, it’s roast-worthy!

Mississippi-Style Pot Roast

Choosing the Right Cut

For this recipe, a chuck roast is perfect. It’s a tasty cut of meat that becomes exceptionally tender when slow-cooked. When shopping, look for a piece with good marbling to ensure a juicy outcome.

The Secret Ingredients

What sets the Mississippi-Style Pot Roast apart are its specific ingredients. The blend of pepperoncini peppers and ranch dressing mix might sound unusual, but trust us; it’s a match made in culinary heaven. The added ingredient in this recipe? A touch of smoked paprika for that extra depth of flavor.

Mississippi-Style Pot Roast Variations

The traditional Mississippi-style pot Roast is a dish that’s hard to beat, but for those who love to experiment or simply want to adjust the taste, here are some delightful variations to try:

Chipotle Mississippi Roast

Add 2-3 chipotle peppers in adobo sauce to the slow cooker. This will infuse your roast with a smoky and spicy flavor, excellent for those who like a little heat.

Olive and Tomato Roast

Swap pepperoncini peppers with a handful of Kalamata olives and cherry tomatoes. Sprinkle with some dried oregano and thyme for a Mediterranean twist.

Mushroom and Cream Roast

Add a cup of sliced mushrooms and replace half of the butter with a cup of heavy cream or cream of mushroom soup. This will provide the roast with a creamy, rich texture and taste.

Root Vegetable Roast

Add chunks of root veggies like carrots, parsnips, and turnips to the slow cooker. They’ll absorb the flavors and deliver an earthy, rich complement to the meat.

Remember, cookery is as much about imagination as it is about following recipes. Feel free to mix and match these variations or develop your own. The Mississippi-Style Pot Roast is a versatile dish that can be the canvas for many cooking adventures!

Mississippi-Style Pot Roast


Tips and Tricks for the Perfect Roast

Every dish has its secrets, and the Mississippi-Style Pot Roast is no exception. Whether you’re a chef with years of experience or a kitchen novice, these tips and tricks will ensure that your pot roast is always fantastic:

1. Meat Quality Matters

  • Marbling is Key: When picking a chuck roast, look for one with good marbling. Those little streaks of fat within the meat provide a juicy and flavorful outcome.
  • Fresh Over Frozen: While frozen meat can work, fresh cuts tend to have finer texture and flavor.

2. Searing Secrets

  • Pat it Dry: Before searing, pat the meat dry using paper towels. This ensures a lovely golden crust.
  • High Heat: Ensure your skillet is hot enough before adding the meat. A proper sear locks in the flavors.

3. Slow Cooker Savvy

  • Layering: Place hard veggies, like carrots or potatoes, at the bottom of the slow cooker. They’ll cook more evenly this way.
  • Avoid Overcrowding: Ensure there’s enough space in your slow cooker. Overcrowding can lead to uneven cooking.

4. Flavor Boosters

  • Homemade Mixes: Consider making your ranch or au jus mix at home. This way, you can control the salt and MSG content.
  • Broth Base: Add a cup of beef or vegetable broth to the slow cooker for an even richer flavor.

5. Serving Suggestions

  • Rest Before Serving: Once cooked, let the roast rest for 10 minutes before shredding. This allows the juices to be redistributed.
  • Pairing: This roast pairs beautifully with mashed potatoes, but consider serving with polenta, rice, or a fresh green salad.

6. Storage and Leftovers

  • Refrigeration: Store your leftovers in an airtight container in the refrigerator for up to 3-4 days.
  • Freezing: If you have a bunch of leftovers, consider freezing portions for future meals. Just ensure it’s entirely cooled before freezing.
Chicken Lo Mein (Din Tai Fung Chicken Fried Noodles)

Chicken Lo Mein (Din Tai Fung Chicken Fried Noodles)

There’s magic in recreating your favorite restaurant dishes at home, specifically when it’s a classic like Chicken Lo Mein. This dish, often overshadowed by the more well-known dim sum offerings at places like Din Tai Fung, is a hidden jewel that deserves its moment in Read More