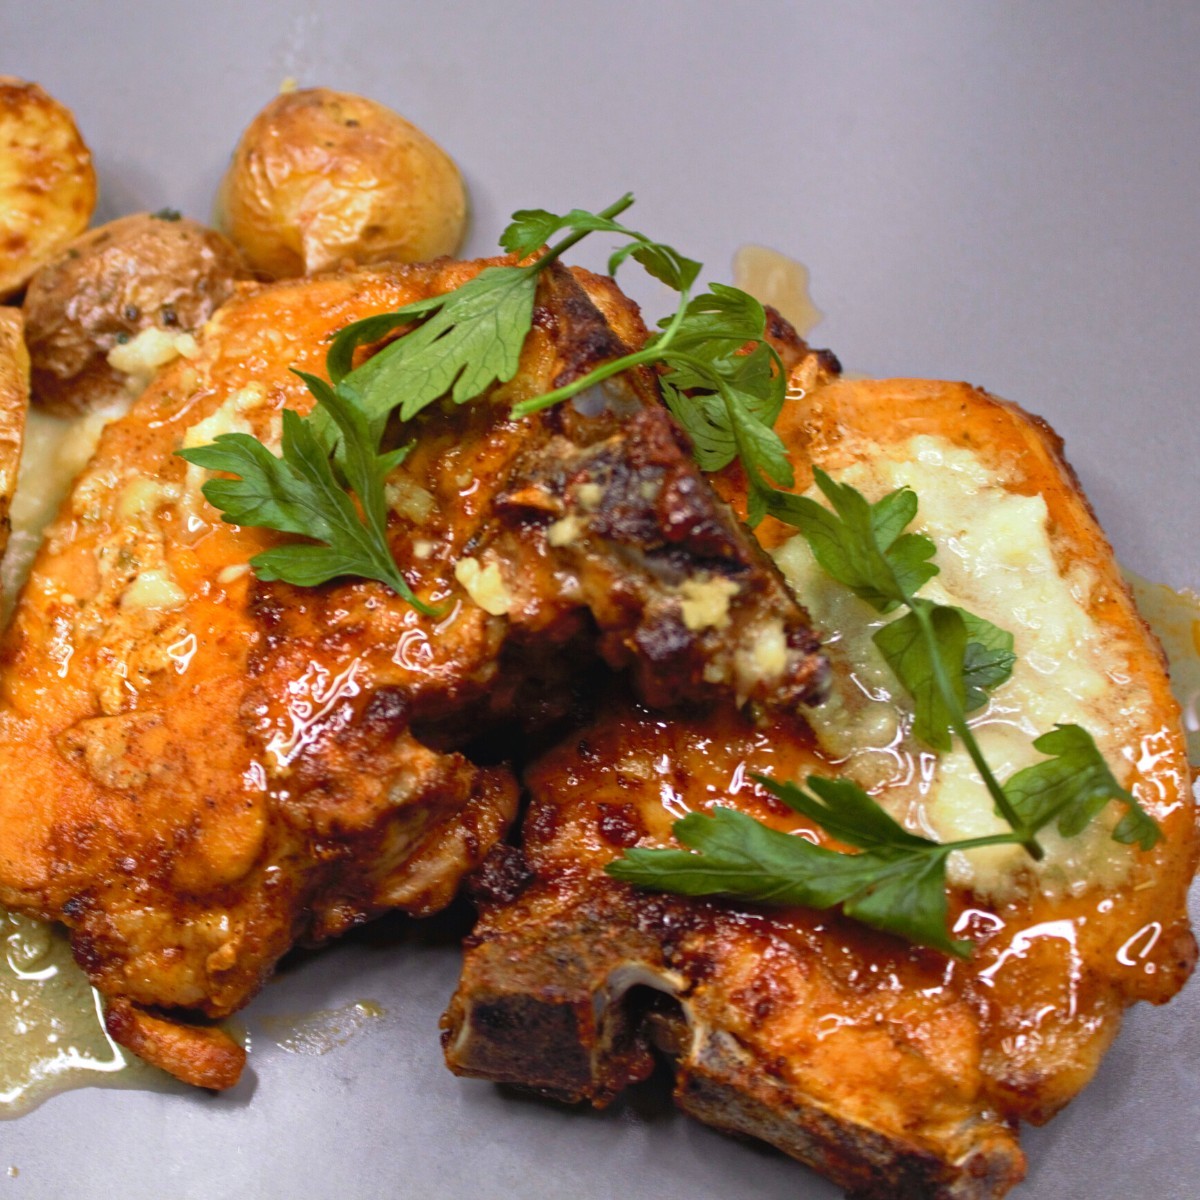
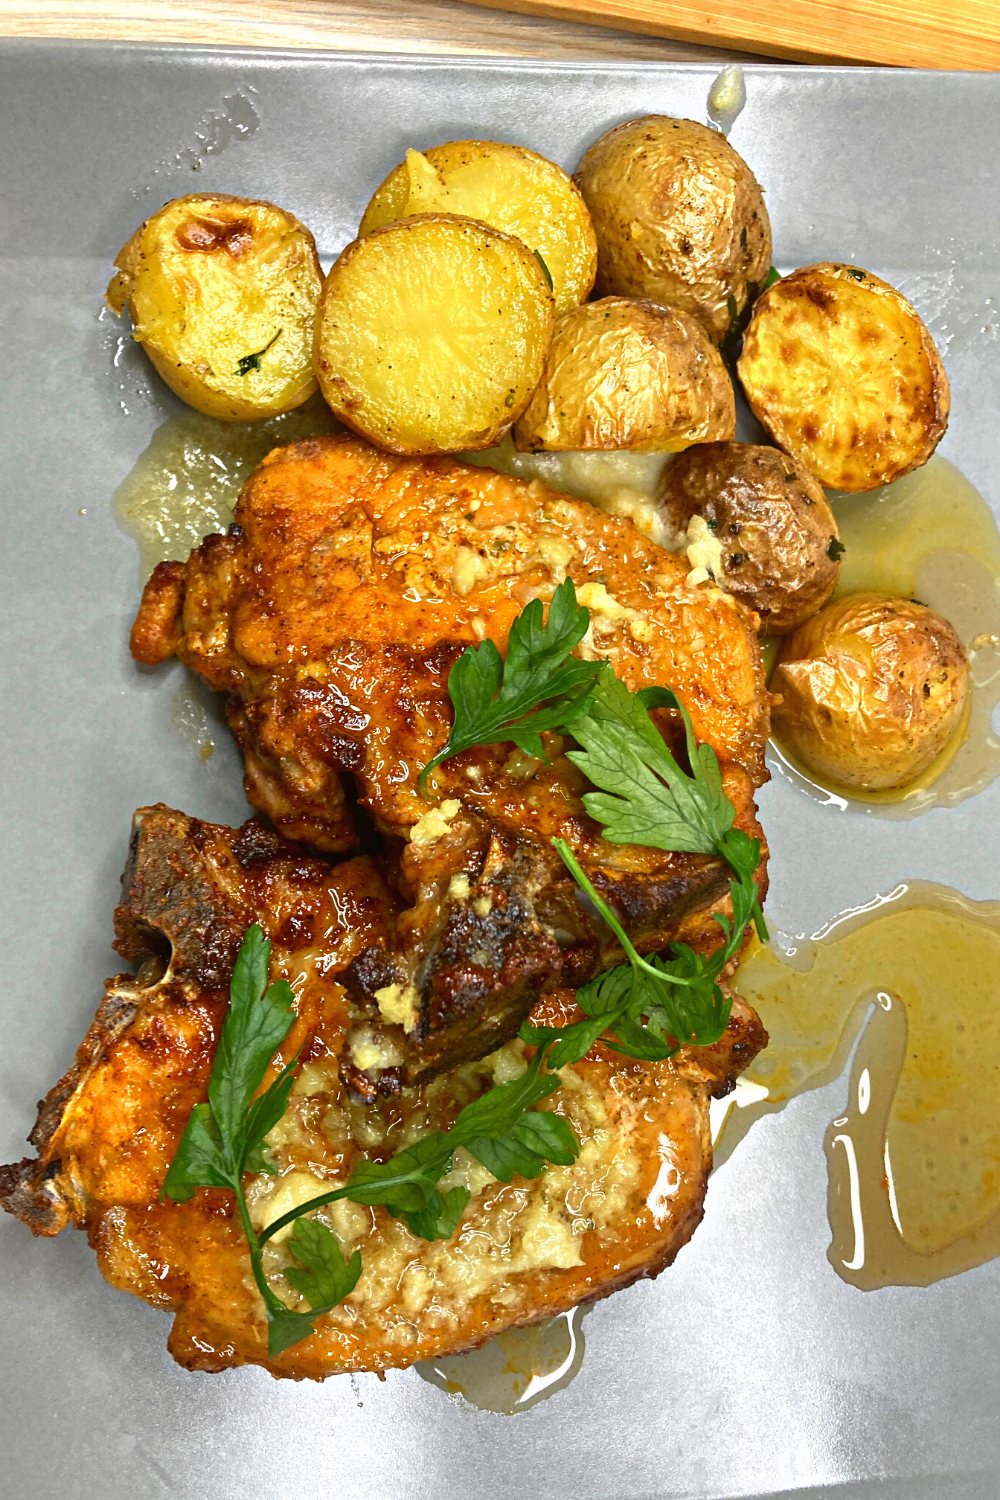
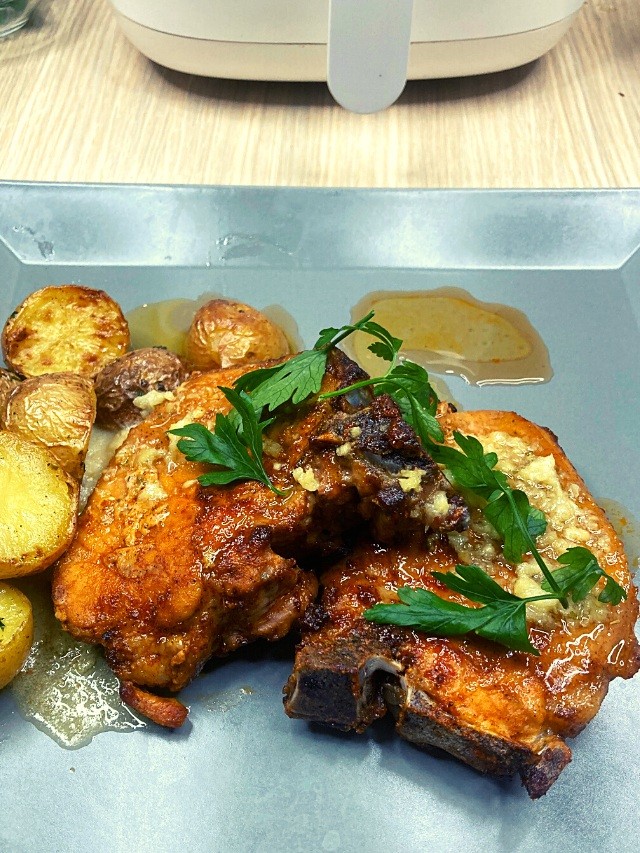
Easy and Delicious Recipes

Author: Sarah Berthold

Delicious Macaroni Pudding Recipe

Delicious Macaroni Pudding Recipe

Here’s a recipe for the tastiest and creamiest macaroni pudding you’ll ever try. If you like mac and cheese but want to try something new, this recipe is just what you need. This macaroni pudding will become a household favorite because of its smooth sauce Read More

Classic Louisiana Hot Sauce (Easy-to-Follow Recipe)

Classic Louisiana Hot Sauce (Easy-to-Follow Recipe)

This authentic Louisiana hot sauce recipe is sure to ignite your taste buds. This sauce is not for the faint of heart; it is made with a blend of fiery jalapeño peppers and powerful, delicious ingredients. But if you like your meals with a little Read More

Moist Egg-Free Banana Muffins with Crunchy Walnuts

Moist Egg-Free Banana Muffins with Crunchy Walnuts

Instead of relying on eggs, these egg-free banana muffins with walnuts are made with a combination of ripe bananas and milk (use plant-based milk for the vegan version) for a delicious and moist texture. The addition of crunchy walnuts not only adds a delightful nutty flavor but also provides a satisfying crunch in every bite.

Plus, these muffins are super easy to make and only require a few simple ingredients. So why not give them a try and indulge in a tasty and satisfying treat that’s free of eggs? You won’t be disappointed.

Egg-Free Banana Muffins in No-Time

If you’re in the mood for a quick and delicious treat that’s egg-free and easy to make, this muffin recipe is for you. With just ten minutes of prep time and two bowls, you can whip up a batch of delicious and fluffy banana muffins that are sure to impress.

The secret ingredient in this recipe is vinegar, which helps the muffins rise and gives them a light and airy texture. The banana acts as a binding agent and natural sweetener, taking the place of eggs. And the most useful part?

These muffins will stay fresh for up to two days when stored in an airtight container, so you can enjoy them anytime you want.  So why not try this recipe and witness how high your muffins can soar?

Moist Egg-Free Banana Muffins with Crunchy Walnuts

Allergy-Friendly Banana Muffins: Delicious, Nutritious, and Safe to Eat

If you’re looking for a delicious and allergy-friendly muffin recipe, look no further! Our eggless banana muffins are perfect for those with common food allergies, including dairy, gluten, and nut allergies. If you have a nut allergy, leave out walnuts. You can even adjust the sugar content to suit your taste and dietary needs. 

For a dairy-free option, simply replace the milk with your favorite milk alternative. When not using regular milk, we love using Oatly Oat Milk for its rich flavor and versatility in baking. To make these muffins gluten-free, simply use gluten-free flour and oats. 

Our go-to is Bob’s Red Mill Gluten-Free 1-to-1 Baking Flour. And for a low-sugar option, try using less sugar and letting the natural sweetness of ripe bananas shine through. However, if you’re in the mood for a sweeter treat, feel free to use up to a full cup of sugar. No matter how you make it, this recipe is sure to be a triumph!

Moist Egg-Free Banana Muffins with Crunchy Walnuts

Egg-Free Banana Muffins Recipe

Here’s a delicious and versatile recipe for eggless banana muffins! Whether dealing with food allergies or being out of eggs, these muffins are a tasty and satisfying treat. Plus, they’re easy to make gluten-free, dairy-free, vegan, and low in sugar. Simply follow the recipe below and enjoy a tasty, eggless treat!

Ingredients

  • 2-3 bananas, mashed
  • 1 cup milk (use plant-based milk for vegan muffins)
  • 1/3 cup of Canola oil
  • 1 Tbsp of Vanilla extract
  • 1 cup of granulated sugar
  • 2 cups All-purpose flour (For gluten-free, use Bob’s Red Mill Gluten-Free 1-to-1 Baking Flour)
  • 1 Tbsp of baking powder
  • ¾ cups of walnuts (leave out if you have a nut allergy)
  • 1 pinch salt
  • 2 tsp of vinegar (you can also use lemon juice)

Instructions

  • First, get the oven preheated to 350F (175C). Prepare a regular muffin tray and lightly grease it.
  • Mash the bananas and add sugar, baking powder, chopped walnuts, milk, oil, vanilla extract, salt, apple cider vinegar, and brown sugar in a medium bowl.
  • Mix all the ingredients until they are fully combined. (Don’t overmix)
  • Distribute the batter evenly between the muffin tins.
  • For the best results, bake the muffins for 25-30 minutes, rotating the pan halfway through or until a tester inserted in the center comes out clean.
  • To cool the muffins faster, remove the pan to a wire rack and leave it there for 5 minutes. Place muffins on a rack and refrigerate for at least an hour.

Egg-Free Banana Muffins Video Recipe

One more thing! We’ve created an awesome new image that we think would be ideal for your Pinterest board. Help us spread the word by sharing it with your followers! Just click on the image below to add it to your board. Thanks for your support!

Moist Egg-Free Banana Muffins with Crunchy Walnuts

Quick and Easy Air Fryer Brats Recipe

Quick and Easy Air Fryer Brats Recipe

If you like brats and like how easy it is to use an air fryer, you’re in for a treat. Today, we’ll show you how to make tasty, easy air fryer brats. This recipe is great for a quick and tasty meal and a great Read More

A Delicious and Traditional Beef Olives Recipe

A Delicious and Traditional Beef Olives Recipe

Today, we’re sharing a delicious traditional beef olives recipe that will impress your guests and elevate your dinner parties. This recipe is easy to follow and produces succulent and flavorful beef olives that are sure to become a favorite.  So, let’s get started and learn Read More

Apple Curd Easy Recipe

Apple Curd Easy Recipe

Rich, delicious and easy to make, this Apple Curd is overflowing with apple flavor. There are only six basic ingredients in our straightforward recipe, and no additional tools are needed.

This luscious apple spread is a favorite in our home all year. We spread it on just about everything we eat. This tasty apple curd recipe eliminates the need for a double boiler or pressure cooker, making it more convenient than other apple curd recipes.

Apple Curd

Have you ever tasted curd made from apples? Apple curd is another flavorful spread that may be used in place of lemon curd, which is perhaps more well-known among the general public. This great adaptable spread is really affordable, especially if you have an abundance of apples in the fall when you can use them to make this spread.

It goes wonderfully with breakfast, whether on bread, toast, pancakes, Croffle, in a sandwich, or stirred into porridge; nevertheless, it also has a wide variety of other uses.

You can also use it to enhance this Italian lemon ricotta cake

Apple Curd Easy Recipe

Ingredients

  • 6 apples, peeled, cored, and chopped

  • ¼ cup water

  • 4 Tbsp lemon juice (or juice from 1 lemon)

  • 1 ½ cups sugar

  • 2 whole eggs + 2 egg yolks

  • ½ cup butter, cubed

  • 1 Tbsp cornstarch (optional, for extra thickness)

  • 2 Tbsp water (for cornstarch slurry, optional)


Instructions

1. Cook the apples
In a large saucepan, combine the water and lemon juice. Add the chopped apples, cover with a lid, and cook over medium heat for about 20 minutes, until the apples are very soft.

2. Purée the apples
Remove from heat and mash the apples with a potato masher. Let cool for 5 minutes, then press through a fine sieve for a smooth purée. Return the purée to the saucepan.

3. Prepare the eggs
In a separate bowl, whisk together the 2 eggs and 2 yolks until smooth.

4. Optional: make slurry
If you prefer a thicker curd, mix the cornstarch with 2 Tbsp water until smooth.

5. Combine ingredients
Add the butter, sugar, and whisked eggs to the apple purée. Stir continuously over low heat. If using the cornstarch slurry, add it now.

6. Cook to thicken
Continue cooking gently for 15–20 minutes, stirring constantly, until the curd thickens and coats the back of a spoon. Keep the heat low to avoid curdling the eggs.

7. Strain and cool
For an ultra-smooth curd, strain once more through a fine mesh sieve. Let cool to room temperature, then transfer to a jar or airtight container.

8. Chill
Refrigerate for at least 2 hours. The curd will thicken more as it cools.


Tips for Success

  • Use tart apples (like Granny Smith or Braeburn) for the best balance of flavor.

  • Always cook low and slow — rushing can scramble the eggs.

  • Straining twice makes a silky-smooth curd, perfect for spreading or filling cakes.


Storage

  • Refrigerator: Store in a sealed jar for up to 1 week.

  • Freezer: Freeze in small containers for up to 3 months. Thaw in the fridge overnight before using.

Prep Time: 15 minutes
Cook Time: 40 minutes
Total Time: 55 minutes
Yield: About 2 cups

Share the image below to your Pinterest board if you like this Apple Curd Recipe!

Apple Curd Easy Recipe

Apple Curd Easy Recipe

Why You’ll Love This Apple Curd

Flavor – Apple curd can be prepared in one pot and has the flavor of apple pie and caramel. The variety of tastes complements so many different dishes!

Texture – Apple curd has a somewhat thicker consistency than custard or jam, but it is still spreadable.

Ease – This recipe is simple and easy to follow, making it ideal for cooks of all skill levels.

Speed – Making apple curd takes only 30 minutes.

Apple Curd Variations

  • To enhance the flavor with a little touch of warmth, you may add cinnamon. Nutmeg can be substituted for cinnamon if you like a more delicate wood taste.
  • To give this apple curd an even more lemony flavor, add more lemon juice or zest. It tastes great to combine apple and lemon flavors.
  • The curd gains richness and sweetness with the addition of vanilla extract or vanilla bean paste. Use vanilla bean paste for a more potent vanilla taste.

Sterilize Jars Before Making Apple Curd

Sterilizing any jar you use for preserves is crucial since germs may grow there quickly and ruin the contents.

I frequently reuse jam jars and lids for preserves. It is best to avoid using a jar lid that has come into touch with vinegar since the seal is destroyed. By soaking in hot water, outdated labels and adhesives can be removed.

Set the oven temperature to 270 F. Soak the jars and lids with hot soapy water and a good rinse, but don’t let them dry. Put the jars on an oven tray with the lids flat on the tray—15 minutes of heating.

The jars (but not the lids) can also be sterilized in the microwave. Jars should be washed and left damp. Put in the microwave for 40 seconds at maximum power.

Also, any jar, lid, or seal can be sterilized in a dishwasher.


Authentic South Dakota Chislic Recipe

Authentic South Dakota Chislic Recipe

Chislic may be prepared with venison, lamb, or beef, but in my opinion, venison works best for this distinctive South Dakotan cuisine. Chislic is made with bite-sized pieces of meat that have been deep-fried and seasoned with Worcestershire sauce, garlic powder, salt, and pepper. Many restaurants Read More

Southern White Country Gravy Recipe

Southern White Country Gravy Recipe

A few basic ingredients are all you need to make this delicious White Country Gravy! I’m sure you have all of them in your kitchen. It is a wonderful gravy that is really simple to make in a matter of minutes and is creamy, smooth Read More

Homemade Italian Lemon Ricotta Cake Recipe

Homemade Italian Lemon Ricotta Cake Recipe

The Finest Italian Lemon Ricotta Cake recipe is here! It is the ideal Italian dessert since it is flavorful, fluffy, and lightweight. Ricotta cheese and lemon are used in this simple recipe.

You’ll like this recipe because it’s a rich, moist, and easy-to-make cake that is an authentic Italian delicacy made in your kitchen. It is filled with lemon flavor and creamy ricotta. Although this simple lemon ricotta cake appears modest, the flavor is incredible! Think of it as an Italian cheesecake!

What is Italian Lemon Ricotta Cake?

Lemon ricotta cake has a texture that is somewhat denser and less sweet than classic lemon cake. It is a typical Italian dessert that is frequently eaten as a dessert or with fruits for breakfast.

Even though the recipe’s origins are in Sicily, regional variations are common. It’s the ideal dessert for spring and summer since it’s so very moist and has a dense but fluffy texture, regardless of what part of Italy serves it.

This cake is typically kept on counters in Italian restaurants on glass pedestals. It’s a sociable cake that goes well with a warm cup of coffee or as a snack. In addition, the cake stays well both at room temperature and in the refrigerator. And the ricotta ensures that it stays moist and flavorful.

Homemade Italian Lemon Ricotta Cake Recipe

Ingredients you’ll need

The recipe card is located at the end of the post and contains the complete list of ingredients with measurements and instructions. Keep the ingredients at room temperature for the best results.

Ricotta cheese – Ricotta cheese from the grocery store is ideal since it has a creamy cheesecake feel and is made with whole milk and full fat. Furthermore, it is usually less watery; if yours is, check the notes about straining.

Lemon: Use the juice and the zest to get the most flavor out of those fresh lemons. And nothing beats the taste of fresh lemon juice!

Butter – Butter at room temperature will blend more efficiently and provide a smooth and creamy texture. I like salted butter, but unsalted butter may still be used; add an extra pinch of salt.

Sugar –  Although I prefer pure cane sugar, regular white sugar works just as well.

Eggs – Keep the eggs at room temperature before using them. If you forget, put the eggs in a bowl of warm (not hot) water for 6 to 7 minutes.

Sour Cream: Instead of sour cream, you can also use Greek yogurt for an even tangier taste.

Vanilla Extract – pure vanilla extract brings Ricotta cake’s lemon and other tastes to life.

Baking soda and salt – Baking soda and salt are essential aspects of every cake recipe.

All-Purpose Flour – I use all-purpose flour that is organic and unbleached.

Homemade Italian Lemon Ricotta Cake Recipe


Traditional desserts from Italy

One of the delectable traditional Italian sweets is this lemon ricotta cake. You’ll discover that a lot of Italian sweets have a cheese basis (like ricotta or mascarpone) and include citrus or fruit tastes. These pastries will also have an anise or almond (amaretto) flavor.

Here are some other traditional Italian desserts that are suitable for any celebration:

Traditional Sicilian Cassata Cake

Italian Sponge Cake Easy Recipe (Pan di Spagna)

Authentic Maritozzi (Italian Sweet Bun)

Famous Sicilian Cannoli Authentic Recipe

Italian Lemon Ricotta Cake Recipe

Italian Lemon Ricotta Cake is flavorful, fluffy, and lightweight. You’re going to like this classic Italian dessert made with fresh lemon and lovely ricotta cheese, which is particularly delicious when served as a morning or brunch treat.

Prep Time: 10 minutes

Cook Time: 50 minutes

Calories: 220 per serving

Ingredients

  • ½ stick (4 Tbsp) unsalted butter, softened

  • 1 ½ cups granulated sugar

  • 1 lemon, zested and juiced

  • 16 oz (about 2 cups) whole milk ricotta cheese

  • 3 large eggs

  • 1 tsp vanilla extract

  • ½ tsp baking soda

  • ½ tsp salt

  • 1 ½ cups all-purpose flour

  • Powdered sugar, for dusting (optional)

Instructions

  1. Preheat the oven to 350°F (175°C). Grease a 9-inch springform pan with butter, then dust lightly with powdered sugar or flour. Set aside.

  2. Cream the butter and sugar in a large mixing bowl until light and fluffy, about 2–3 minutes (a hand mixer makes this easy).

  3. Add the ricotta and beat for another 3–4 minutes, until the mixture is smooth and creamy.

  4. Mix in the eggs one at a time, beating well after each addition. Stir in the vanilla, lemon zest, and lemon juice.

  5. Sprinkle in the baking soda and salt, then add the flour. Mix gently just until combined—don’t overmix. Scrape the sides of the bowl as needed.

  6. Pour the batter into the prepared pan and smooth the top.

  7. Bake for 40–50 minutes, or until the cake is golden and a toothpick inserted in the center comes out mostly clean (a few moist crumbs are fine).

  8. Cool in the pan for about 15 minutes, then carefully run a knife around the edge and remove the sides of the pan. Let the cake cool completely on a wire rack.

  9. Dust with powdered sugar before serving, if you’d like. Slice and enjoy!

Notes & Tips

  • For an extra lemony flavor, add an extra half lemon’s zest.

  • If your ricotta is especially wet, you can drain it in a fine mesh strainer for 20–30 minutes before using.

  • This cake is great served chilled or at room temperature.

Share the image below on your Pinterest board if you like this Italian Lemon Ricotta Cake!


Homemade Italian Lemon Ricotta Cake Recipe 2 1

Fresh Mango Cake Recipe

Fresh Mango Cake Recipe

This mango cake has a sponge cake base, a fresh and juicy mango, and a light vanilla whipped cream frosting. You won’t find a cake as moist and wonderful as this Mango Cake. Mango Sponge Cake  Usually, when I’m in a hurry, my cake recipes Read More