Easy and Delicious Recipes

Author: Dragisa

Crispy Air Fryer Chicken Nuggets Recipe

Crispy Air Fryer Chicken Nuggets Recipe

Air Fryer Chicken Nuggets are a healthier option than cooking with other methods, and it’s way easier to prepare them this way. They cook perfectly crispy and have tender, juicy chicken inside. I will show you two versions, one with store-bought frozen chicken nuggets and Read More

Original Pakistani Chicken Tikka Recipe

Original Pakistani Chicken Tikka Recipe

This was a must! Recipes here on Cooking Frog needed to include a traditional Pakistani Chicken Tikka recipe. There are some recipes that have become so popular that there’s no right or wrong way to do them anymore. Chicken Tikka falls into that category. Even Read More

Crispy Onion Bhaji Recipe – Indian Kanda Bhaji

Crispy Onion Bhaji Recipe – Indian Kanda Bhaji

Step-by-step recipe for Crispy Onion Bhaji, Indian Kanda Bhaji Recipe. Onion Bhaji is fried onion fritters. These crispy fritters are made mainly from onion and gram flour (besan).

This street food is very popular in Maharashtra. There are many ways to prepare them. Here is my mom’s recipe, which she has been making for many decades.

Kanda Bhaji is quick and easy to prepare. It takes less than 30 minutes. Bhaji is also known for making pakoras in North India and bajji (South India).

Indians love pakoras so we see many varieties of Pakoda. This recipe only uses two ingredients to make the batter. However, you can make onion fritters from different parts of India using a variety of recipes.

Some variations of Onion Bhaji

  • North Indian Style: Classic Onion Pakoda
  • Vengaya Bajji (South Indian style)
  • Ulli Vada – Kerala style
  • South Indian Crispy Onion Bhaji Fritters 

Rice flour, curry leaves and other ingredients are added to South Indian-style onion fritters. Some places in Mumbai offer green chillies, coriander leaves, or crushed coriander seed additions to their fritters.

Kanda Bhaji usually has a crisper texture than other types of onion pakoda. This is because the ratio of gram flour and onions is lower. Kanda Bhaji also goes by the name Khekda Bhaji due to its similarity to crabs.

Kanda Bhaji is crispy, but you will still get a soft, sweet taste from the onions. These fritters taste great even though they don’t have any spices. Sometimes, simple recipes bring out the best flavor.

Kanda Bhaji can be served as a teatime snack with hot masala chai. This snack can also be made at home.

Kanda Bhaji can be served with spicy green chutney, tomato ketchup, and a few fried green chilies.

Pin the image below if you like this Onion Bhaji Recipe!

Crispy Onion Bhaji Recipe - Indian Kanda Bhaji

How to make Onion Bhaji

  1. Place 1 large onion in a bowl and slice it thinly. One cup should yield 1 cup of thinly-sliced onions.
  2. To the sliced onions, add 1/2 cup of gram flour (besan).
  3. You can add 1 teaspoon salt, or as much as you like. Although you can add less salt to these pakoras, they taste best when they are slightly salty. You can also add 2 teaspoons of coarsely ground coriander seeds to make a Mumbai-style version. In a mortar-pestle, crush the coriander seeds.
  4. This mixture can be made with 1 teaspoon oil. This oil helps make these pakoras crispy and reduces oil absorption while you fry the bhajis.
  5. Mix everything well with your hands. Allow the mixture to sit for at least 5-6 minutes to let the onion moisture evaporate. The mixture should not be too dry or moist. If the mixture appears too dry, add 1 to 2 teaspoons of flour/besan. Allow to cool for at least a few minutes.

Frying

  1. For deep-frying, heat oil in a kadai (or a deep skillet).
  2. Crispy bhaji is best fried in hot oil. A small test could be done by adding a little batter to the oil. Add a few spoonfuls of batter to the hot oil and see if it rises steadily. The bhajis should be fried on medium heat to ensure even frying.
  3. Flip the bhajis once one side has been cooked to a light golden color. Fry a few kanda-bhajis at once.
  4. Turn them a few more times and fry until they are crisp and golden.
  5. Place the kanda-bhajis on a plate and remove with a spoon. In the same manner, fry the remaining onion bhajis.
  6. Kanda Bhaji can be served hot with mint chutney, mint coriander or tomato ketchup. To fry the green chilies, cut them in half. To make sure they turn a golden brown, fry them in the same oil until they are cooked. Place them on absorbent napkins. Mix well with a pinch of salt.

Please rate this recipe if you have made it. For more inspiration on delicious cuisine, sign up for my email newsletter. You can also follow me on Pinterest.

Maharashtrian Kanda Bhaji | Onion Bhaji

Kanda Bhaji is a crisp, crunchy fritter made with onions and gram flour. Popular street food from Maharashtra.

Prep Time: 5 minutes

Cooking Time 20 minutes

Total Time: 25 minutes

Ingredients

  • 1 thinly sliced onion
  • ½ cup of flour (gram flour or chickpea flour)
  • 1 tsp of oil for bhaji batter mix
  • 1 tsp of salt
  • Oil for deep-frying

Instructions

Making Onion bhaji batter

  • Place the chopped onions in a bowl.
  • To the sliced onions, add 1/2 cup besan (gram flour).
  • Add 1 tsp of salt or as needed
  • Next, add 1 tsp of oil. Although you can add less salt to these pakoras, they taste best when they are slightly salty.
  • Mix the oil, besan and salt together with the onions using your fingers. Let the mixture rest for at least 5-6 minutes to let the onion moisture evaporate. You can add 1 to 2 teaspoons of flour to make the mixture more moist.

Frying Onion bhaji

  • For deep frying, heat oil in a pan.
  • Make sure the oil is hot for crispy bhajis.  A small test could be done by adding a little batter to the oil. If the oil rises quickly and smoothly, add a few spoonfuls of the batter. Otherwise, the kanda Bhajis won’t brown evenly.
  • Flip the bhajis while they are frying. Use a slotted spoon to flip them. Fry a few bhajis at once.
  • Toast them until they are golden brown and crisp.
  • Place the onion bhaji on a slotted spoon.
  • Continue to fry the onion bhaji in the same manner.
  • Hot with spicy green chutney, fried green chilies or tomato ketchup
  • On a medium flame, fry the kanda-bhajis. The bhajis can absorb too much oil and become soggy if the oil isn’t hot enough. They will brown quickly on the top if fried in hot oil, leaving the onions raw inside.
  • As the onions have released their juices, there is no need for you to add water to the pakora batter.

Crispy Onion Bhaji Recipe - Indian Kanda Bhaji


Smoked Chicken Breast Recipe – Glazed and Barbecued

Smoked Chicken Breast Recipe – Glazed and Barbecued

Here is a recipe for glazed and barbecued smoked chicken breast. So tender, so juicy. A nice crispy outer layer of the chicken breast and supper supple inner texture with an extraordinary amazing aroma turns out to be an amazing cuisine. Smoked chicken breast is Read More

The Best Blackstone Griddle Recipes

The Best Blackstone Griddle Recipes

Blackstone Griddle-Cook anything, Anytime, Anywhere! Blackstone griddle is just like a piece of magic equipment. It gives you endless possibilities to play with your culinary skills and make some extraordinary out of it. Here I’ve presented some of the best Blackstone griddle recipes that are Read More

Blackstone Griddle T-bone Steak Easy Recipe

Blackstone Griddle T-bone Steak Easy Recipe

The Blackstone Griddle T-Bone Steak is prepared on a griddle using propane. The versatile Blackstone griddle is an excellent choice for delicious meals, with an easy sear and crunchy crust.

Ingredients

  • 2 T-bone steaks (about 1–1 ½ inches thick, 12–16 oz each)

  • 1–2 Tbsp neutral oil (avocado, canola, or vegetable oil)

  • 1 tsp kosher salt, or to taste

  • ½ tsp freshly ground black pepper, or to taste

  • Optional: 1 Tbsp butter + 2 garlic cloves, smashed, for finishing


Instructions

Direct Sear Method (Fast & Classic)

  1. Preheat the griddle to medium-high heat (400–425°F). Lightly oil the surface.

  2. Season the steaks generously with salt and pepper on both sides.

  3. Sear the first side without touching for 3–4 minutes, until a golden crust forms.

  4. Flip and sear the second side for another 3–4 minutes.

    • For medium-rare: cook to 130–135°F internal temperature.

    • For medium: cook to 140°F.

  5. Optional: If steaks are thick, sear the edges by holding them upright with tongs.

  6. Remove from the griddle, rest 5 minutes, then slice and serve.


Reverse Sear Method (Slow & Juicy)

  1. Preheat a smoker or oven to 200°F.

  2. Season steaks with salt and pepper, then cook low and slow until internal temp reaches 120°F (about 45–60 minutes depending on thickness).

  3. Remove from smoker and let rest while heating the Blackstone to medium-high.

  4. Sear each side of the steak for 1–2 minutes to form a crust.

  5. Rest for 5 minutes before slicing.


Tips for Success

  • Always use a meat thermometer for perfect doneness.

  • Pat steaks dry before seasoning for better crust.

  • Add a pat of butter and garlic during the final minute for a steakhouse finish.

Pin the image below if you like this Blackstone Griddle Steak Recipe!

Blackstone Griddle T-bone Steak Easy Recipe

Cooking a steak using Blackstone Griddle

Blackstone Griddle is a fantastic way to cook a steak perfectly. This grill has enough space for all sides and can maintain the temperature for perfect searing.

A Blackstone griddle is a great way to cook steaks

The flat-top grill steak recipe uses propane and flat-top grills to sear the steak perfectly. This locks in the moisture and prevents the meat from drying.

More surface area is available for cooking, so you don’t have to worry about maintaining an even temperature. The griddle’s flat top surface distributes heat evenly.

How do you grill steak on a Griddle?

Cooking a steak on a Blackstone griddle grill is easy. You can cook most steaks by heating the grill to 450-500 degrees. Once the grill is hot, place the well-seasoned steaks on the grill and allow them to sear in order to develop that nice crust. 

As with all meats, steak should not be cooked according to the timer. Cook your meat according to its internal temperature.

Let your steaks rest for 5 minutes after removing them from the grill to allow the moisture to redistribute. This will allow the meat to continue cooking, so be aware of cooking times.

How to tell if a T-bone steak has been cooked

A meat thermometer can be used to help you know when your steak is cooked. You can feel its cooking temperature by pressing down on a steak measuring about 3/4 inches thick. It will cook faster if it is firmer, and less moisture is released when you press.

You will soon be able to use your tongs to check the doneness of the meat with a little practice. Don’t flip steaks with a fork. Stabbing the meat with tongs can cause all the internal moisture and flavorful juices of the meat to evaporate.

Blackstone Griddle Steak


Which cuts of steak are the best for grilling?

Although this recipe is for T-bone steak, you can use it with other steak cuts. Blackstone griddle steaks can be made from any cut, but I prefer certain cuts. For a few reasons, I prefer thicker cuts.

The thicker cuts of steak, such as Cowboy Ribeyes, are 1-2 inches thick and contain a lot more margarined fat. Blackstone griddles are great for evenly cooking the steak and melting the fat into the cut of meat. The temperature can also be easily controlled so that it doesn’t cook too long.

A cut such as a T-bone steak, New York Strip, or Grilled Flaming Steak, although it’s typically thinner, has excellent marbling. These cuts will cook quicker but will still be more controlled over the temperature.

Chateaubriand, Filet Mignon, or Chateaubriand can still be cooked on a flat top griddle, but these steaks will benefit from a lower cooking temp. This allows you to enclose the surface more easily.

What steak cuts would you not cook on a grill?

There aren’t many cuts that I wouldn’t cook on a flat-top grill. However, I prefer to use the reverse sear method to cook thicker cuts on my pellet grill. This allows me to take advantage of the lower temperature and lid to let the thickest cuts reach the desired internal temp without drying them out.

Reverse searing can be done with a Blackstone griddle

Blackstone Griddles can be used to reverse-seared steaks. This method can be used to cook steaks in many different ways.

What toppings are possible for a steak?

You can top the steak with many toppings, including crab meat, peppercorn sauce, steak sauce, and grilled onions.

If you are looking for some ideas on how to top your flat-top grill steaks, I have a few suggestions.

Do I cook steaks well?

If you prefer a well-done steak, I’m not going to tell ya that it is impossible to cook it properly. Most steaks that are well-done end up being tough and leathery after they’re cooked too long.

Many chefs and cooks, both professionals and amateurs, will tell you not to cook steaks at that temperature. It’s just too easy to ruin a perfectly cooked steak.

If the steak has enough margarine fat to preserve some of its juiciness, it can be cooked and eaten. Look out for cuts with a lot of fat, such as ribeyes.

Make sure to get the ketchup ready for your well-done steak.

What side dishes can I serve with my steak?

You can add whatever you like, but my option is a steak sauce, caramelized onions, mushrooms, and more.


Nando’s Spicy Rice Recipe Takeaway

Nando’s Spicy Rice Recipe Takeaway

Here’s my colorful, spicy rice recipe, a perfect clone of the famous Nando’s Spicy Rice Recipe. This rice tastes so amazing. The blend of various spices and vegetables gives your every bite a unique flavor. Nando’s Spicy Rice My love for this takeaway recipe inspired Read More

The Best Thunder Cake Recipe

The Best Thunder Cake Recipe

Without a doubt, this will be the best Thunder Cake Recipe! Not only does it have a unique name, but it also has a distinct flavor. When I first heard about this cake, I was so taken with the name that I had to make Read More

Salt and Pepper Chicken – Chinese Takeaway Recipe

Salt and Pepper Chicken – Chinese Takeaway Recipe

Simple and easy classical salt and pepper chicken- Chinese Takeaway recipe! A flavorful popular dish packed with lots of spices and fresh vegetables. With this recipe, you can cook at home better than your local Chinese takeaway.

The central aspect of this recipe is the spices, which work well with the fresh, tangy vegetables. This Chinese cuisine uses the harmonized flavors of the ingredients to pack a lot to your palate, from mixed chilies to spring onions to peppers; everything compliments each other.

Fried chicken is not only tasty but also high in proteins and vitamins, both of which are beneficial to your health.

Here I’ve presented this recipe with all successful tips and tricks so that you can enjoy restaurant-style homemade Chinese Salt and pepper chicken at home.

ngredients

For the Chicken

1.1 pounds boneless, skinless chicken thighs, cut into bite-sized pieces
1 cup potato starch, or enough to coat the chicken
Oil, for deep-frying

Chicken Marinade

1/2 teaspoon sesame oil
1/2 teaspoon salt
1/2 teaspoon ground black pepper
1 teaspoon ginger-garlic paste

Vegetables

1/2 sweet onion, thinly sliced
1 carrot, cut into thin matchsticks
1 red or green bell pepper, thinly sliced
4 green chilies, thinly sliced
3 garlic cloves, thinly sliced
3 thin slices fresh ginger, cut into matchsticks
2–3 spring onions, sliced

Salt and Pepper Seasoning

1/2 teaspoon salt
1/2 teaspoon ground black pepper
1/4 teaspoon Chinese five-spice powder
1/2 teaspoon chicken powder, optional

Instructions

1. Marinate the Chicken

Place the chicken pieces in a medium bowl. Add the sesame oil, salt, black pepper, and ginger-garlic paste.

Mix until every piece is evenly coated, then leave the chicken to marinate for at least 15 minutes. For a deeper flavor, cover and refrigerate it for up to 2 hours.

2. Prepare the Vegetables and Seasoning

While the chicken marinates, slice the onion, carrot, bell pepper, chilies, garlic, ginger, and spring onions.

In a small bowl, combine the salt, black pepper, Chinese five-spice powder, and chicken powder, if using. Set the seasoning aside.

3. Coat the Chicken

Add the potato starch to the marinated chicken and toss until each piece is completely coated.

Shake off any loose starch before frying. A thin, even coating will become crispier than a thick or clumpy one.

4. Fry the Chicken

Heat several inches of oil in a deep pan to 350°F.

Working in batches, carefully lower the chicken into the hot oil. Fry for 4–5 minutes, stirring occasionally to keep the pieces from sticking together. The chicken should be lightly golden and cooked through.

Transfer it to a wire rack or a plate lined with paper towels. Allow the oil to return to temperature before frying the next batch.

For an extra-crisp coating, increase the oil temperature to 375°F and fry the chicken a second time for 1–2 minutes, until deeply golden and crunchy.

5. Stir-Fry the Vegetables

Heat about 1 tablespoon of oil in a large skillet or wok over medium-high heat.

Add the sliced garlic and ginger and stir-fry for about 20 seconds, just until fragrant. Do not let the garlic brown.

Add the onion, carrot, bell pepper, and green chilies. Stir-fry for 2–3 minutes, keeping the vegetables slightly crisp.

6. Toss Everything Together

Add the fried chicken and spring onions to the pan. Sprinkle the prepared salt and pepper seasoning over everything.

Toss over high heat for 30–60 seconds, until the chicken and vegetables are evenly coated.

Serve immediately while the chicken is still hot and crisp.

Salt and Pepper Chicken - Chinese Takeaway Recipe

Tips & Tricks for Perfect Salt and Pepper Chicken

  • Our goal is to make salt and pepper chicken that is juicy on the inside while crispy on the outside. I’ve used thighs to make this recipe. The thigh cut is super-soft and moist. It gets fried in just 2 to 3 minutes. If you fry for longer, you will end up with a dry texture.
  • Fry the marinated chicken in well-heated oil on medium flame. If you add the chicken to cool oil, the coating will fall apart, hence losing its crispiness.
  • You can also carry out the frying process in one round. I recommend you fry the chicken twice to enjoy some extra crunch in your mouth.
  • Fry the chicken in small batches instead of getting it all done in one round. It will result in perfect crispy salt and pepper chicken better than any local Chinese takeaway.
  • Once you dished out the chicken with veggies, you can sprinkle some salt and pepper over the top and toss the chicken well. This step is completely optional and depends on your personal preferences.
  • Don’t forget to use fresh vegetables in this recipe, as the real beauty of your plate lies in the texture and flavor your veggies will add to the crispy chicken.
Blackstone Griddle Perfect Chicken Wings

Blackstone Griddle Perfect Chicken Wings

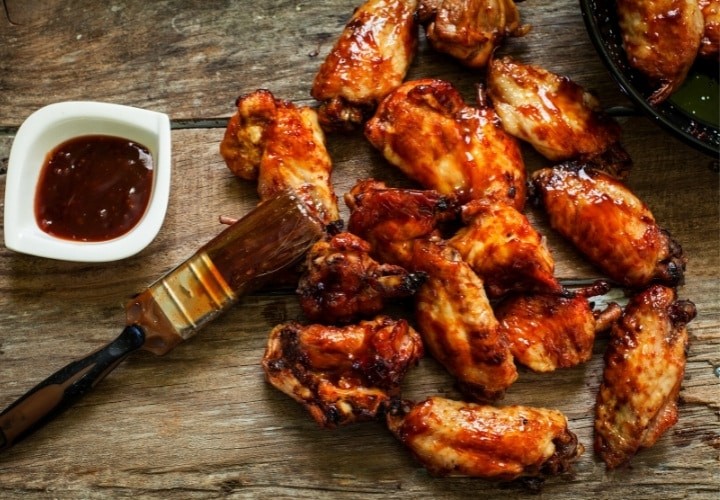
Per your request, we’ve started making a lot of recipes for Blackstone Griddle. This one is for Perfect Chicken Wings cooked on a Blackstone griddle. You can cook almost anything on the Blackstone Griddle or any other outdoor griddle that is available in most markets, Read More