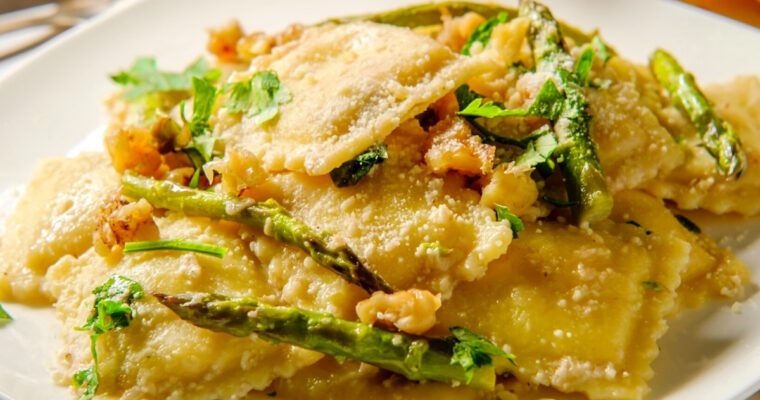
Easy and Delicious Recipes

Recent Posts

How to Make Authentic Maritozzi (Italian Sweet Bun)

How to Make Authentic Maritozzi (Italian Sweet Bun)

Greetings, folks! Today, we’ll show you how to make Maritozzi Con La Panna, or sweet buns with whipped cream, a traditional Italian sweet bun. Maritozzi are beautiful and tasty Italian cream buns. It’s a brioche-style soft and light bun that’s divided in half and filled Read More

The Best Hennessy Chicken Wings Recipe

The Best Hennessy Chicken Wings Recipe

Are you ready for the most delicious Hennessy chicken wings?  You will be surprised how orange and Henny go well together, just like bacon and eggs or pasta and tomatoes. This is a delicious combination that’s fantastically tasty. The combination is a match made in Read More

Italian Pink Sauce Pasta Best Recipe

Italian Pink Sauce Pasta Best Recipe

Have you tried pink sauce? Or how about pink sauce pasta? It’s the right blend of superb, robust tomato sauce plus a few crucial ingredients to make it luscious, rich, and oh-so-lovely.

This pink sauce pasta is a perfect comfort meal; with its ideal balance of tomato and cream sauce, it is one of our favorite recipes to cook and pulls together in no time! With only a few ingredients and a short preparation time, you can have lunch or supper on the table in no time.

What is Pink Sauce Pasta?

As the red and white colors make the pink, depending on the amount of each color will affect the shade of pink you want in this pink sauce. The pink sauce pasta is an Italian invention, of course. It’s made from tomato sauce and a cream base or Alfredo sauce. This blend gives it its famous “pink” color. It’s also known as Parma Rosa or rose pasta sauce.

Pasta with pink sauce is among the most famous restaurant meals in Italy. Because it’s a combination of tomato and cream sauce, the final pasta sauce is pink. It’s very wonderful; it’s rich without being too heavy! It has tomato sauce’s sharpness and white sauce’s creaminess without being overly thick and heavy. It makes creamy spaghetti sauce more appealing!

You might also like Gigi Hadid’s viral TikTok pasta recipe!

Frequently Asked Questions

Is it possible to make the pink sauce from the marinara sauce?

Yes, the pink sauce could be made using marinara sauce, milk, and cream (heavy or half and half). If the marinara is too acidic for you, add around 1 teaspoon of sugar to help counteract the acid.

What is the difference between Vodka sauce and pink sauce?

The vodka sauce has the same components as the pink sauce, except with the inclusion of vodka. However, for personal or religious considerations, many people today prepare vodka sauce without alcohol.

Can you combine Alfredo and tomato sauce for this recipe?

Yes, if you’re pressed for time, blending Alfredo sauce with marinara sauce or passata will result in a rich tomato pink sauce.

Can I use milk instead of cream in Pink Sauce?

Yes, you can use milk for the pink sauce. This substitution is easier to make if the sauce does not contain acid, such as an Alfredo sauce. For the creaminess and flavor, whole milk would be my preference.

Whole milk is best if you use it in a sauce containing acidic ingredients like tomatoes or lemon juice. Whole milk has more fat, which helps to prevent the sauce from clumping.

Heavy cream is less susceptible to separation than milk, so let it simmer before making pasta sauce, and don’t let your milk boil.

How does Pink Sauce taste?

It is tangy from the Passata de tomatoes, while heavy cream balances it. Because the cream balances the flavors, it is slightly less acidic than a typical marinara. This sauce perfectly combines both, creating a creamy pasta sauce.

This is a very popular dish. The tomato sauce gives it a fresh, tomato-y flavor, but the creaminess and cheesiness make it even more delicious.

Italian Pink Sauce Pasta Best Recipe

Pasta with pink sauce has the following ingredients:

Pasta: I like to use penne because it’s the most common noodle used in pink sauce pasta; however, you may utilize any pasta you choose.

Passata de tomatoes: This is not to be confused with tomato paste. Passata jars can be found in the same department as canned tomatoes and sauce. It’s just uncooked or minimally cooked tomatoes that have been blended and filtered. If you can’t locate it, use tomato puree or tomato sauce instead.

The creamy element is a combination of heavy cream or whipping cream and milk. This is another excellent option to prevent the pasta from becoming overly heavy with heavy cream.

The seasoning: The sauce begins with an olive oil and butter foundation in which we saute onion and garlic. This starts the flavoring process.

The spices are just dried basil (you can substitute Italian seasoning if you prefer), red chili flakes, salt and pepper, and a bit of sugar to aid with the acidity of the tomatoes. The crushed bouillon cube (or vegetarian stock) adds another layer of flavor, richness, and salt to the meal.

The cheese: I prefer mozzarella that is added to the sauce at the last end, making it gooey and wonderful. If desired, garnish the finished dish with additional Parmesan or more mozzarella.

Pink sauce pasta preparation:

Cook the pasta first. You’ll prepare it as per the package directions until the pasta is al dente, then drain it but save a little pasta water. Be watchful not to overcook the noodles since they will be put back into the pink sauce to cook even more.

In a wide enough skillet to hold all of the pasta components, melt the butter and olive oil over medium heat.

After that, add the chopped onion and cook until softened. After the onion has softened, add the garlic and cook for another minute or until aromatic.

Simmer for a couple of minutes after adding the tomato passata and all of the herbs.

Then you will whisk in the milk, cream, and shredded mozzarella cheese until a rich pink sauce develops.

Return the cooked pasta to the skillet and toss until thoroughly covered in the sauce if it’s too thick, thin it with a sprinkle of pasta water.

That’s all! In a jiffy, you can have a great lunch!

Tips for making the Sauce:

Be careful not to overcook the pasta, as it may become too soft when added back to the sauce.

Completely cook the onions till tender. Once you add the tomato passata, they won’t cook anymore.

Customize the seasonings to your preference. Because the bouillon cube will increase the saltiness, taste it before adding more salt.

Make it as rich and gooey as you want it. The quantities shown are my ideal balance.

If you’ve liked this Pink Sauce Pasta recipe, please share it to your Pinterest board and spread the word! Thank you!

Italian Pink Sauce Pasta Recipe

List of Ingredients

  • pinch of sugar
  • a sprinkle of red chili flakes
  • salt and pepper to taste
  • 1 tsp dried basil
  • 1 tbsp olive oil
  • 1 chicken bouillon cube, crumbled
  • 2 tbsp butter
  • 4 garlic cloves, minced
  • 1 small red onion, minced
  • 1/2 cup heavy cream
  • 1/2 cup milk
  • 1/3-1/2 cup shredded mozzarella cheese
  • 5 cups of tomato passata (or puree or sauce – don’t use tomato paste)
  • 10 oz of penne pasta, (rigatoni or ziti)

Directions

  1. Cook the pasta until al dente per the package directions, then drain and set aside some pasta water.
  2. Melt and combine the butter and olive oil in a large pan over medium heat. When the butter has melted, toss in the onion and simmer for about 4-5 minutes, or until softened. Sauté for another minute or less after adding the garlic.
  3. To taste, stir in the tomato passata, dried basil, chicken bouillon cube crushed, sugar, red chili flakes, and salt and pepper. Once a couple of minutes have passed, add in the cream, milk, and shredded mozzarella.
  4. Mix in the cooked pasta and heat through for a few minutes. If the sauce is overly thick, thin it with a dash of pasta water. Enjoy it straight away!

Conclusion

Pink sauce pasta is a creamy, comforting dish that is easy to make, it takes only about 20 minutes, and it’s ready to be served. It’s a perfect last-minute dinner idea that everyone will enjoy. Also called Rosa Sauce, it has an appealing look, which makes it even more appetizing. 

If you’ve liked this pink sauce pasta recipe, please share it with your friends on social media. If you have any questions or suggestions regarding this Rosa Sauce, please let me know down in the comments section, and I’ll reply. Thank you!

Ultimate Kare-Kare Recipe (Filipino Oxtail Stew)

Ultimate Kare-Kare Recipe (Filipino Oxtail Stew)

Have you ever had Kare-Kare? This is a traditional Filipino oxtail stew. Kare Kare is a rich and thick peanut sauce-based Filipino dish. It is a classic meal eaten on special occasions in the Philippines. The customary recipe requires a cow tail. There are several Read More

Famous Sicilian Cannoli Authentic Recipe

Famous Sicilian Cannoli Authentic Recipe

There are a lot of recipes you can improvise with, but when it comes to Sicilian Cannoli, it has to be authentic. That’s why I’ve spent a fair amount of time experimenting and researching, and on this journey, I’ve realized that to share the recipe, Read More

Authentic Ensaymada Recipe (Filipino Buns)

Authentic Ensaymada Recipe (Filipino Buns)

These may be the greatest homemade Ensaymada you’ve ever cooked. Who can ignore this fluffy and delicious sugary dough cooked into pillowy buns? Slathered with buttercream icing and covered with a generous amount of shredded cheese. It is the ideal complement to coffee or tea. But be warned: one slice will never suffice.

What exactly is Ensaymada?

Ensaymada is a delicate Filipino, sweet dough delicacy coated with butter and sugar and served with a generous amount of shredded cheese.

It was inspired by the Spanish Ensamada but has changed through time to be what it is today that so many Filipinos like. It is basically Filipino Brioche buns

We used to go on holiday in the Philippines when we were kids; when our parents took us to Bulacan for a trip, they would bring us some exceptional Ensaymada.

This delicacy is accessible at any local bakery as well as well-known bakeshop chains in the Philippines. This pastry dish is one of my favorites. I like to have it as a mid-afternoon treat with a cup of freshly prepared coffee.

Back when I was a kid, Ensaymada was just coated in butter, dusted with sugar, and covered with cheese. They were made much more remarkable with the introduction of sliced salted eggs.

Presently, the most preferred Ensaymada is the incredibly soft and fluffy variety. They are typically covered with shredded cheese and buttercream icing. They are really wonderful, and this dish is no exception.

I’ve combined my knowledge, and I did a lot of reading on how to make the best soft Ensaymada, and I am very pleased with the results of this technique. 

If you follow my blog, you already know how much I love Filipino cuisine. You can check some of my recipes in the links below:

Filipino Beef Caldereta

Maja Blanca Easy Recipe

Homemade Sisig Recipe

Beef Tapa Filipino Recipe

Pork Siopao Asado Recipe

Chicken Tocino Recipe 

Authentic Ensaymada Recipe (Filipino Buns)

Ingredients

For the Dough:

  • ¼ Tbsp (¾ tsp) salt

  • 1 packet active dry yeast (7–9g, about 2¼ tsp or 1 Tbsp)

  • ¼ cup warm water (for proofing yeast)

  • ⅓ cup sugar

  • ½ cup shortening, softened

  • 1 cup whole milk, warmed

  • 3 egg yolks

  • 3½ cups all-purpose flour (plus extra as needed)

  • ¼ cup butter, softened (for brushing)

For the Topping:

  • ½ cup butter, softened

  • ½ cup powdered sugar

  • 1 cup grated cheese (Kraft Eden, cheddar, or your favorite)


Instructions

1. Proof the Yeast

  • In a small bowl, dissolve the yeast in ¼ cup of warm water with a pinch of sugar. Let stand for 5–10 minutes, until bubbly.

2. Make the Dough

  • In a large mixing bowl, combine milk, shortening, sugar, and salt.

  • Add the proofed yeast and half of the flour. Mix on medium speed (or by hand) for 3–5 minutes, until a thick, sticky batter forms.

  • Mix in the egg yolks, then gradually add the remaining flour. Knead until a very soft, slightly sticky dough forms. If too wet, add a spoonful of flour at a time—but dough should remain tacky.

3. First Rise

  • Scrape down the bowl, cover with a kitchen towel, and let rise in a warm spot for 2–3 hours, or until doubled in size.

4. Shape the Ensaymada

  • Turn the dough out onto a lightly floured surface. Divide into 16 equal pieces.

  • Working with one piece at a time, roll each into a rope about 12 inches long, then coil into a spiral, tucking the end underneath.

  • Place each coil into a greased ensaymada mold or muffin tin.

5. Second Rise

  • Cover and let rise again for 30 minutes to 1 hour, until nearly doubled.

6. Bake

  • Preheat oven to 300°F (150°C).

  • Brush each roll lightly with softened butter.

  • Bake for 20–25 minutes, until lightly golden and cooked through.

  • Cool in the molds for a few minutes, then remove and let cool completely on a rack.

7. Make the Buttercream & Finish

  • Cream together ½ cup softened butter and ½ cup powdered sugar until fluffy.

  • Spread a generous layer of buttercream on each cooled ensaymada, then sprinkle with lots of grated cheese.


Tips:

  • If using instant yeast, mix it directly with the flour—no need to proof, and rise time may be shorter.

  • For extra-rich rolls, use whole milk and real butter.

  • Ensaymada are best enjoyed the day they’re made, but they reheat beautifully in the microwave for a few seconds!

If you like this Ensaymada recipe, please share the image below on your Pinterest board so you can spread the word! Thank you! 🙂

Authentic Ensaymada Recipe (Filipino Buns)

Homemade Sisig Recipe (Filipino Pork Belly)

Homemade Sisig Recipe (Filipino Pork Belly)

The simplest Sisig recipe you’ll ever prepare! Sisig is the most renowned Kapampangan dish of all time! Have this quick and straightforward Sisig dish with a grilled pig belly! Crispy and hot, exactly how it should be. What exactly is Sisig? Sisig recipe is the Read More

The Best Taco Bell Chalupa Copycat Recipe

The Best Taco Bell Chalupa Copycat Recipe

Do you enjoy Taco Bell Chalupa? Using this easy Taco Bell Chalupa recipe, you can prepare them at home in no time. The crunchy, puffy structure of the chalupa bread will transform your next Taco Tuesday into a family staple. This is a dish that Read More

BBQ Smoked Chicken Legs Easy Recipe

BBQ Smoked Chicken Legs Easy Recipe

Summertime calls for these Smoked Chicken Legs! On the exterior, the chicken is covered with a homemade dry rub, then roasted in aromatic smoke until the interior is juicy and tender. Of course, everyone will want seconds of the smoky, crackly skin, which is loaded with excellent taste.

It’s summer, and you’ll need chicken legs for your lunch! To take these to the next level, cook them on the smoker. These marvelous Smoked Chicken Legs are really tasty and simple to prepare.

They’re smoked after being drizzled with olive oil and seasoned with homemade BBQ seasoning. You could stop there and get incredible results. However, if you really want that thick sweet taste, smother them with BBQ Sauce, smoke them for another 10 minutes, and they’ll be finger-licking good. These are great for digging in and eating with your hands!

For a summer lunch, picnic, or party, make these quick Smoked Drumsticks!

How to Cook Chicken Legs in a Smoker

  • Preheat Smoker — Set your smoker to 275 degrees Fahrenheit, as directed by the manufacturer.
  • Prepare the chicken legs by drizzling them with olive oil and sprinkling them with BBQ Chicken Rub afterward. Make sure the chicken legs are well coated with the rub.
  • Smoke – Set drumsticks on the prepared smoker, shut the lid, and smoke for 60 to 90 minutes, or until the core temperature of chicken legs reaches 175°F. This will vary greatly depending on the size of your drumstick and the amount of meat on it.
  • Baste – Drizzle BBQ sauce over the chicken legs. Close the cover and smoke for another 10 minutes. If you don’t want to use BBQ sauce, that’s OK. We want our chicken legs to be between 180 and 190 degrees Fahrenheit. This will prevent any bloody flesh from forming around the bone.
  • Rest – Take the meat from the smoker, set it aside for 5-10 minutes, and then eat!

BBQ Smoked Chicken Legs Easy Recipe

Smoked Chicken Legs FAQs

How long do chicken legs need to smoke?

This will change based on the size and thickness of the chicken leg. It will take between one and one and a half hours to one hour and thirty minutes.

What is the ideal internal temperature for a chicken thigh?

The thickest section of the drumstick should be cooked to 165 degrees F. To keep track of this, ensure you have a computerized meat thermometer or a probe with a built-in thermometer. We really cook them to a temperature of 175-180 degrees Fahrenheit. They’re still incredibly soft and juicy, but there aren’t any bleeding areas around the bone this way.

Is it required to brush Smoked Chicken Legs with BBQ sauce?

No, the BBQ sauce isn’t required for smoked chicken legs. They’ll be flavorful enough without the rub, but we enjoy the sticky, sweet touch.

What is the best way to store extras?

Refrigerate any room temperature leftover chicken legs for up to 3 days in an airtight container.

What is the best way to reheat chicken legs?

You could reheat them in the microwave; however, the skin will get leathery, and they may dry up. Set your oven to 400 degrees F as another option. Put the legs on a wire rack over a baking tray. Bake for 15 minutes or until an internal temperature of 165 degrees F is reached. Another alternative is to prepare an Air Fryer to 400°F and bake the chicken legs for about 5 minutes, or until well cooked.

To smoke chicken, what kind of wood chips or pellets are best?

A Mesquite Hardwood would be ideal for achieving a strong smoky taste. However, if you’re looking for a lighter flavor, an Apple Hardwood is the way to go. When uncertain, we turn to a competition blend wood chip.

Share the image below to your Pinterest board if you’ve liked this Smoked Chicken Legs recipe!

BBQ Smoked Chicken Legs Easy Recipe

BBQ Smoked Chicken Legs Recipe

Ingredients

  • 1 tbsp olive oil
  • 1 tbsp BBQ Chicken Rub or your favorite seasoning/rub
  • ¼ cup BBQ sauce
  • 2 lb. chicken legs

Instructions

  • Set your smoker to 275 degrees Fahrenheit, as directed by the manufacturer.
  • Sprinkle olive oil over the chicken legs, then cover with BBQ Chicken Rub. Make sure the chicken legs are well coated with the rub.
  • Place drumsticks on the prepared smoker, cover, and smoke for 1 hour – 1 1/2 hours, or until the internal temperature of chicken legs reaches 175°F. This will vary significantly based on the thickness of your drumstick and the amount of flesh on it.
  • After that, brush the chicken legs with the BBQ sauce. Close the cover and smoke for another 10 minutes. If you don’t want to use the BBQ sauce, that’s OK. We want our chicken legs to be between 180 and 190 degrees Fahrenheit. This will minimize any bloody flesh from forming around the bone.
  • Take the meat out of the smoker, set it aside for 5-10 minutes, and then eat!
Authentic Pork Siopao Asado Recipe

Authentic Pork Siopao Asado Recipe

Siopao Asado is filled with delicious pork filling and may be found practically anywhere in the country, from bakeshops and street sellers to prominent Filipino restaurants. Siopao, whether made at home or purchased from a store, could be eaten at any time of day or Read More