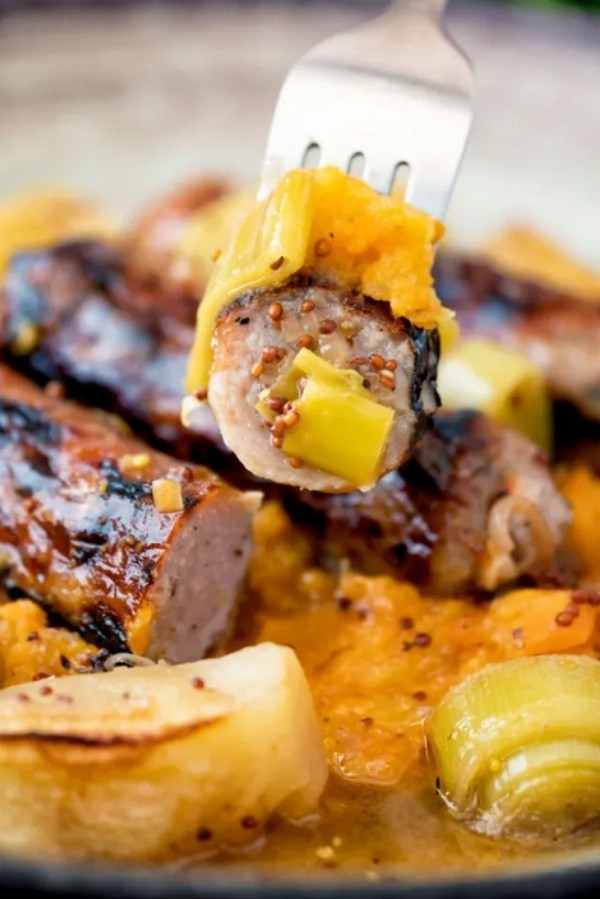
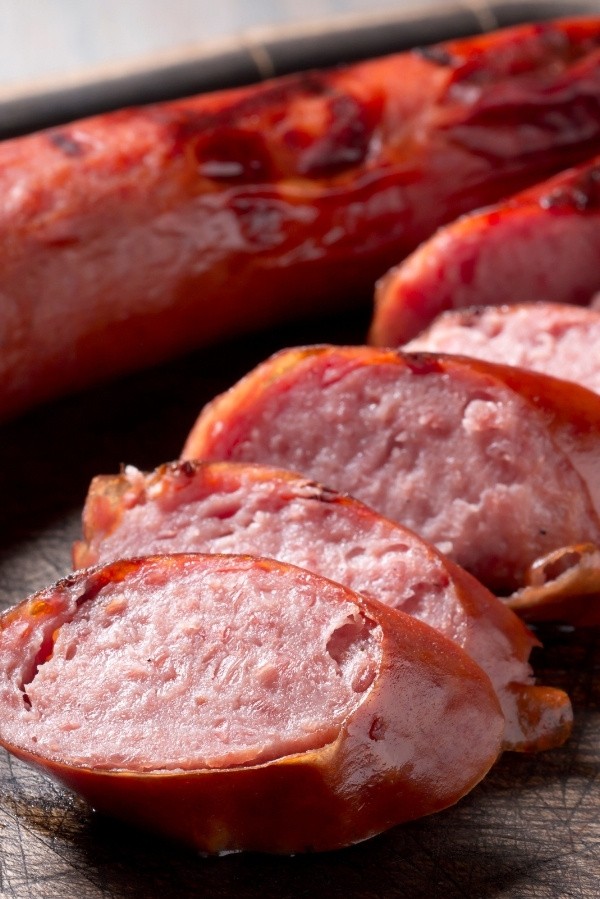
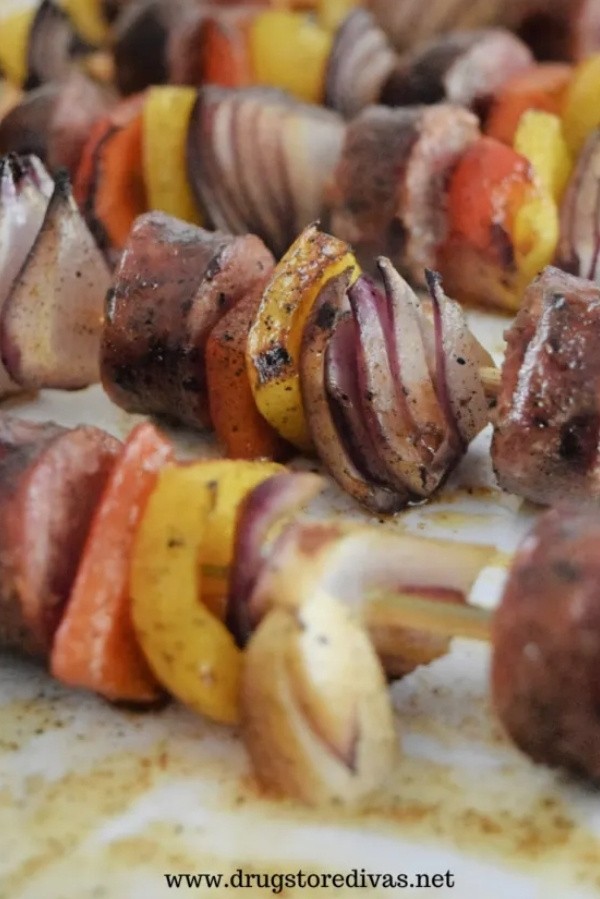
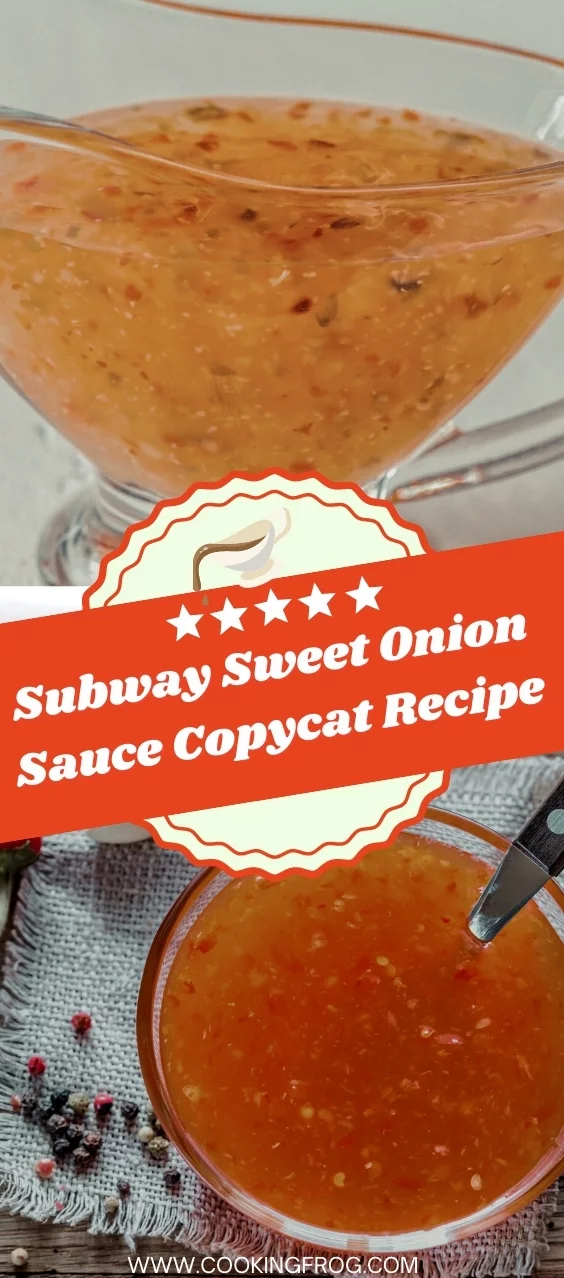
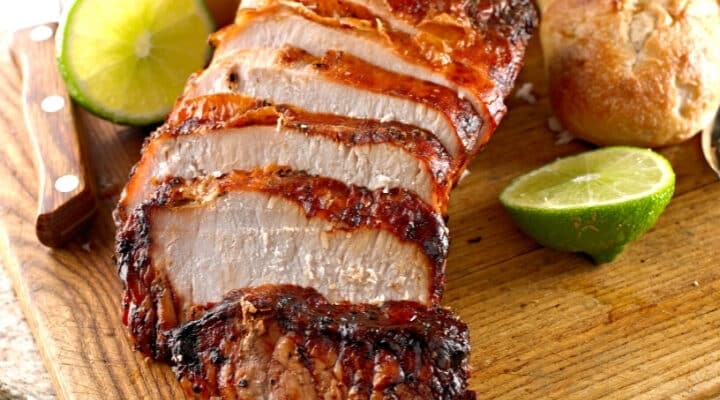
Easy and Delicious Recipes

Author: Sarah Berthold

What is a Blue Steak? (How to Cook, Safety, & More)

What is a Blue Steak? (How to Cook, Safety, & More)

Blue steak, commonly referred to as blue rare steak or extra rare steak, is a steak with a light outside searing and crimson inside. To achieve this, blue steak is cooked for a brief period. As a result, the steak is soft and supple, ideal Read More

Oven Braised Costco Short Ribs Recipe

Oven Braised Costco Short Ribs Recipe

Have you tried Costco short ribs? This dish will be a hit with meat lovers who adore the flavor of Costco boneless short ribs. Try preparing the Costco boneless short ribs recipe if you’re searching for a novel technique to prepare a wonderful meat dish Read More

Subway Sweet Onion Sauce Copycat Recipe

Subway Sweet Onion Sauce Copycat Recipe

Why leave your house when you can eat at home and homemade? It’s Absurdly simple to make this homemade version of Subway Sweet Onion Sauce. You’ll be perplexed as to why you didn’t begin preparing this flavorful sauce sooner. Excellent for enhancing your preferred handmade subs, sandwiches, chicken, salads, and more!

Don’t be intimidated by the lengthy ingredient list for this Subway menu item; making this sweet onion sauce only takes a few minutes and yields a condiment that practically never goes bad. It could not be simpler to make and makes a terrific addition to anyone’s sandwiches. It doesn’t contain any odd preservatives, which is just a plus.

As much as I enjoy dining out, I equally enjoy staying in and preparing my versions of well-known restaurant favorites. This simple recipe for a substitute for Subway’s sweet onion sauce is perfect for stashing in your refrigerator as a topping for homemade subs.

The Sweet Onion Sauce’s distinctive tang and sweetness define the Subway experience. So it only makes sense that I would try to recreate that distinctive flavor when preparing my own subs!

I’m sure you feel the same way if you enjoy this tangy sauce!

What Is Subway Sweet Onion Sauce?

Have you recently seen the sweet onion sauce on the Subway menu? Are you unsure what it is and what to expect if you get it in a Subway sandwich? So here’s everything you need to know.

What is sweet onion sauce from Subway? The low in fat, sweet, and tasty sweet onion sauce from Subway is prepared with onions and other seasonings. It is one of the restaurant’s distinctive sauces intended to be put on most of its sandwiches or used as a salad dressing.

Frankly, the title contains the key. Regardless, this sauce is quite well-liked. Although it might not be as adaptable as some of the other sauces on the menu, it is still worth a try.

But what exactly is in this sauce, how healthy is it, and what does it taste like? Let’s investigate!

Subway Sweet Onion Sauce Copycat Recipe

Subway Sweet Onion Sauce (Copycat Recipe)

You can easily whip up your favorite Subway-style sweet onion sauce at home! It’s the perfect balance of sweet, tangy, and savory, with a punch of onion flavor—just right for sandwiches, salads, or even as a dipping sauce.

Ingredients

  • 1 cup granulated sugar

  • ½ cup water (add a splash more if needed)

  • 6 Tbsp white vinegar

  • 4 tsp red wine vinegar

  • 1 tsp fresh onion, finely grated

  • 1 Tbsp Dijon mustard

  • ⅓ tsp sesame oil

  • 1 Tbsp cornstarch

  • 1 Tbsp dried minced onion flakes

  • 2 tsp dry mustard powder

  • 1 tsp salt

  • 1 tsp poppy seeds

  • ½ tsp celery seed

  • ⅓ tsp onion powder

  • ⅓ tsp paprika

  • ⅓ tsp ground black pepper

  • ¼ tsp garlic powder

Instructions

  1. Combine Ingredients:
    In a small saucepan, whisk together all the ingredients until smooth. (Tip: If you like, dissolve the cornstarch in a tablespoon of the water first for extra-smooth sauce.)

  2. Cook the Sauce:
    Place the pan over medium-high heat. Whisk frequently as the mixture comes to a gentle boil.

  3. Simmer and Thicken:
    Lower the heat and let the sauce simmer, whisking often, until slightly thickened and glossy, about 4–6 minutes. If the sauce seems too thick, add a splash of water and stir to loosen.

  4. Cool and Store:
    Remove from heat and let the sauce cool to room temperature. Pour into a clean jar or bottle with a tight-fitting lid.

  5. Chill:
    Refrigerate for at least a few hours before using (overnight is best for flavor). Use within 1 month, or freeze for longer storage.

Tips:

  • Sauce will thicken more as it cools.

  • Shake or stir well before each use.

  • Tastes just like Subway’s and is great on subs, wraps, grilled veggies, or as a dipping sauce!

Please share the image below to your Pinterest board if you like this Subway Sweet Onion Sauce Copycat recipe!

Subway Sweet Onion Sauce Copycat Recipe

You might also like this Popeyes Blackened Ranch Sauce Copycat Recipe!

Subway Sweet Onion Sauce Taste

The flavor of Subway’s sweet onion sauce is as implied by its name. It is highly sweet and leaves a mildly acidic taste in the mouth. It has a lot of flavors and is rather rich; therefore, a little makes a big difference. As a result, it goes exceptionally well with subs made of chicken, turkey, or fish meats, like this blackened tuna steak.

Together with the honey mustard sauce appears to be another dish that Subway consumers enjoy putting together. You won’t want to include it in your steak and cheese, meatball marinara, or pizza sub melt.

But aside from that, it does appear to complement the other menu items really nicely.

Additionally, its combination with chicken and lean meats, in general, is demonstrated by the sweet onion Teriyaki chicken!

Can you Purchase Subway Sweet Onion Sauce?

Unfortunately, it is not possible to purchase Subway Sweet Onion sauce. It can only be ordered in-store and added right to your salad or sandwich. While some shops sell sauces, it’s uncommon to find sweet onion.

In reality, some Subway locations offer a ” Subway Grocery service.” Essentially, this enables clients to purchase specific sauces in a sauce bag. Though, only the mustard, mayonnaise, marinara, ranch sauce, teriyaki, or chipotle sauce are usually available.

You can always specifically request more sweet onion sauce, but the staff’s decision in doing so is final.

However, another sauce brand is sold online and has a flavor profile similar to that of Subway.

You might also like this Arby’s Bronco Berry Sauce Copycat Easy Recipe!

How to Store Subway Sweet Onion Sauce

Allow cooling entirely before transferring, labeling, and placing in an airtight container. Use within one month of storing in the refrigerator; otherwise, freeze for longer storage.
You can store it in a squeeze bottle with an airtight cap if you want.

Subway Sweet Onion Sauce Substitutions

Keto, Sugar-Free, and Diabetic Friendly: Use a low-carb sweetener that measures cup for cup like sugar in place of the sugar. Stevia, Lakanto or Swerve are my top picks.

Verify the individual ingredients (such as sesame oil, red wine vinegar, and Dijon mustard) are free of gluten and other impurities. In all other respects, the recipe, as described, is gluten-free.

Dairy-Free: The recipe, as written, contains no dairy products.


FAQs

Is Subway Sweet Onion Sauce Keto-Friendly?

Whereas Subway’s original version of sweet onion sauce is prepared with a lot of sugar, you may have a delicious version of sweet onion sauce as part of your keto diet if you make it at home with sweetness. You can use Stevia, Swerve, or other keto-friendly sweeteners instead of sugar. 

For how long will sweet onion sauce last?

Depending on the components, homemade sauces may last anywhere from a few days to a few months. The best sauce will have a vinegar and spice foundation (like this Subway sweet onion sauce) and keep for two to a month. A sauce made with mayo or eggs might only keep for a few days.

The Best Italian Sponge Cake Easy Recipe (Pan di Spagna)

The Best Italian Sponge Cake Easy Recipe (Pan di Spagna)

A simple Italian sponge cake, “pan di Spagna” is flavored with lemon zest or vanilla. Eggs, sugar, and flour are the only components needed to make it. No dairy products, butter, oil, or baking powder! You will consistently produce a superb sponge cake if you Read More

Air-Fryer Kielbasa – Polish Sausage Recipe

Air-Fryer Kielbasa – Polish Sausage Recipe

Your Air-Fryer Kielbasa can be ready to serve fast and effortlessly in less than 10 minutes of preparation and cooking! No oil is used in this fast, easy, hands-off method of cooking Polish sausage, which can be eaten as an appetizer or combined with other Read More

Traditional Homemade Mooncakes Easy Recipe

Traditional Homemade Mooncakes Easy Recipe

The flavor of homemade mooncakes is unrivaled. This recipe demonstrates how to create classic mooncakes with simple instructions and lots of expert advice.

Every Chinese holiday indeed has a connection to one or more specific foods. I’m presenting a recipe for traditional mooncakes to celebrate the forthcoming Mid-Autumn Festival, which falls on Saturday, September 10, 2022.

What Are Mooncakes? 

Chinese cakes called mooncakes (or Yue bing) can have a sweet or savory filling. It is usually consumed with tea. They are often consumed gently during the Mid-Autumn Festival while observing the moon.

However, yue bing, as they are known in Mandarin, has also spread throughout Asia and is now a pretty popular dish. Yue bing is offered everywhere in September (when the event is held), from street sellers to Cafes.

Mooncakes are well-known across Asia as a result. Their costs have recently increased dramatically due to their growing popularity and the custom of purchasing them as gifts for acquaintances, coworkers, and family members.

Making mooncakes at home is not only cheaper but also healthier! This is because you can choose which artificial colorings and preservatives are used in your mooncake.

The traditional dough used to make mooncakes’ outer shells includes ordinary flour, lye water (alkaline water), vegetable oil, and golden syrup (or invert syrup). For dusting and brushing, more flour and egg wash are employed.

Cornstarch and baking soda are used in other, more contemporary mooncake recipes. Our recipe will concentrate on how mooncakes are traditionally made. However, some contemporary improvements will be included for accessibility.

Several fillings are frequently utilized in Yue bing. White lotus seed, red bean paste,  green tea, wu ren (mixed nuts), salted egg yolk, and yam are a few of the most popular ones.

Other contents for mooncakes include shrimp, durian, chicken floss, ice cream, and ground pork.

Traditional Homemade Mooncakes Easy Recipe

Mooncakes Recipe

Celebrate with homemade mooncakes—golden, glossy, and filled with the classic flavor of your choice. Here’s a step-by-step guide to getting perfect results, even if you’ve never tried before.


Ingredients

For the Mooncake Dough (Skin):

  • 2 cups + 4 tsp all-purpose flour (235g), sifted

  • 130g (about 2.7 oz + 1 tsp) golden syrup

  • 3 Tbsp vegetable oil (plus a bit more if needed)

  • ½ tsp baking soda

  • ½ tsp water

For the Filling:

  • 35 oz (about 1 kg) sweet filling of your choice (lotus seed paste, red bean paste, chestnut paste, black sesame, etc.)

  • 16 salted duck egg yolks

For the Egg Wash:

  • 1 egg yolk

  • 1 tsp egg white

  • ¼ tsp sesame oil

  • ¼ tsp golden syrup

  • 1 tsp water


Instructions

1. Make the Dough (Mooncake Skin)

  1. In a small bowl, mix the baking soda and water until dissolved.

  2. In a large bowl, combine the flour, golden syrup, vegetable oil, and baking soda mixture. Stir with a spatula, then use your hands to knead gently until a shaggy dough forms.
    If the dough feels dry, add a tiny splash of oil; if sticky, add a bit more flour.

  3. Shape into a rough ball, wrap in plastic, and let rest at room temperature for 1 hour.

2. Prepare the Filling

  1. Cut the salted egg yolks in half (if they’re whole).

  2. Portion your filling: For each mooncake, use about 75g total filling (including 1–2 egg yolk halves inside each). Flatten a portion of filling, place the egg yolk(s) in the center, and wrap the paste around the yolk. Roll gently into a ball.
    Tip: Use a kitchen scale for accuracy. You’ll need 8 portions total.

3. Assemble the Mooncakes

  1. Preheat your oven to 350°F (175°C). Line a baking sheet with parchment paper.

  2. Divide the rested dough into 8 equal pieces (about 50g each). Roll each into a ball.

  3. Flatten each dough ball between two sheets of plastic wrap to a disk large enough to wrap your filling ball.

  4. Place a filling ball in the center of the dough. Carefully wrap the dough around the filling and pinch to seal. Roll gently between your hands to smooth.

  5. Lightly grease your mooncake mold (about 100g/3.5oz size). Place each wrapped ball into the mold, press gently to shape, then unmold onto the baking sheet, smooth side up. Repeat with the rest.

4. Bake and Glaze

  1. Bake the mooncakes for 5–6 minutes. Remove from oven and let cool for about 5 minutes.

  2. Meanwhile, mix all egg wash ingredients together in a small bowl.

  3. Lightly mist the mooncakes with water (this helps prevent cracking). Using a small pastry brush, gently brush the tops with a thin layer of egg wash—don’t flood the design.

  4. Return to the oven and bake for another 5–6 minutes.

  5. Remove and brush a second thin layer of egg wash on top.

  6. Raise the oven temperature to 390°F (200°C). Bake for an additional 8–10 minutes, or until the tops are deep golden and glossy.

5. Rest and Serve

  1. Cool the mooncakes completely on a wire rack.

  2. Once cooled, store in an airtight container at room temperature for 1–2 days before eating. This “resting” time lets the skin soften and the flavors meld—your mooncakes will become glossy and perfect.

  3. Mooncakes keep at room temperature for up to a week.


Tips

  • For clean designs, use a soft, small brush for egg wash and keep it light.

  • If using commercial salted egg yolks, soak in a little rice wine for 5–10 min and bake at 325°F for 5 min before using (optional, improves texture).

  • Mooncakes freeze well—wrap tightly and thaw overnight in the fridge before serving.

Share the image below to your Pinterest board if you like this Mooncakes Recipe!

Traditional Homemade Mooncakes Easy Recipe

Molds for Mooncakes

You’ll note that the mooncakes have a detailed design on their top because a mooncake mold was used to make them! Molds are widely accessible online. However, they come in various designs and sizes.

Molds are often wood and feature replaceable designs, but plastic molds are also available. They not only add to the enjoyment since you can switch up the design, but they also include an easy release method that makes it simple to remove the mooncakes from the mold.

It all depends on the size of the mooncake you want to produce when it comes to dimensions. Two egg yolks and a sizable filling fit my 3.5 ounces (100 grams) mooncake form well. However, you’re welcome to utilize a little mooncake mold and make more miniature mooncakes out of a salted egg yolk.

Traditional Homemade Mooncakes Easy Recipe

Expensive Mooncakes

Buying mooncakes as gifts for family, friends, and coworkers to mark the Mid-Autumn Festival has also grown popular. As a result of the strong demand, the cost of mooncakes has increased yearly.

Compared to the materials’ price, the selling price is significantly higher. So, I decided to create a straightforward recipe that anybody can use to make it at home since I felt it was almost silly.

Additionally, if you give them your homemade mooncake as a present, they will appreciate your honesty, diligence, and effort because mooncake has been overly commercialized in recent years.

Making mooncakes from scratch is time-consuming and requires some expertise. This mooncake recipe, which uses pre-made filling and streamlined processes to save time, explains how to prepare classic Cantonese mooncakes.

Traditional Homemade Mooncakes Easy Recipe

Not using lye water when making mooncakes

Lye water is frequently used to produce the skin on mooncakes. The mooncakes acquire a rich golden brown hue because to the alkaline qualities of lye water. However, it might be challenging to locate lye water, particularly now that it’s illegal in Australia.

Lye water is extremely potent and toxic in excess! Instead of using baking soda, this recipe yields results that aren’t inferior. There is no need to bake baking soda; nonetheless, many people do so to make it more alkaline.

To add to the dough, just combine 1/2 teaspoon baking soda with the same quantity of water. Although the dough becomes more crumbly as a result, mooncakes may still be formed with ease.

Salted Egg Yolks

Usually, an egg is cured in the shell before being salted to give it a nice, deep umami flavor. In order to achieve this flavor, more expensive and opulent duck eggs are typically utilized during Mid-Autumn celebrations.

Salted egg yolks may be bought in bulk packets expressly for use in mooncake fills like this, and salted eggs can be bought whole or raw. Look at your neighborhood Asian market or buy them online.

Important Tips for Making The Best Mooncakes

Here are some suggestions to help you make the ultimate mooncake and astound your loved ones!

Weigh the filling and dough 

The dough and skin for the mooncakes must be divided up precisely to suit your mold; thus, you must accomplish this. Additionally, it ensures that the skin and filling are perfectly balanced.

If you use less, it may be challenging to cover the filling without splitting. If there is excessive skin, the pastry on the mooncake will be very thick.

Add baking soda

I substitute baking soda for the customary lye water, and it performs fantastically to produce gorgeously golden brown mooncakes.

Oil your molds very lightly.

It’s crucial to grease your molds since the pastry might stick there when you build the design. For a simple mooncake release, gently cover the interior of the mold with a pastry brush dipped in vegetable oil.

Spray some water on your mooncakes

After the initial baking, giving your mooncakes a small mist of water brings moisture back into the skin, prevents it from breaking, and helps the dough color evenly.

When glazing your mooncakes, use a fine brush.

Use a fine brush to apply the egg wash. This aids in getting between the details and removing any extra egg wash that may have become trapped there. The intricate designs may fade and lose character if the glaze is cooked in between them.

You should glaze and re-bake your mooncakes.

To get the ideal golden hue, repeat the glazing and baking procedure as many as necessary. Remember that the color of your mooncakes will intensify after they sit for a few days.

Give your mooncakes time to mature

After baking, store your mooncakes at room temp in a sealed container. This makes it possible for the skin to absorb the filling’s oils. The ideal mooncake is produced as a result, with increased flavor, color, and glossiness.


FAQs

For how long will my mooncakes last?

Due to the composition of its components, mooncakes may last a fair amount of time. The mooncakes’ water content is removed after baking, which extends their shelf life. When kept at room temperature in a sealed container, freshly prepared mooncakes can last up to a week.

They can survive even longer if you keep them in the refrigerator! Before eating them, I would take them out of the refrigerator and let them get to room temperature. Allow them to remain at room temperature for two days before putting them in the refrigerator if you’re storing them there since doing so brings out the oils in the skin.

How to store mooncakes?

Mooncakes should be kept at room temperature in an airtight container. The skin might soften while absorbing the oils from the filler when they are preserved in this way.

The mooncakes’ distinctive glossy golden brown hue is a result of this.

How about other fillings for these mooncakes?

You may replace the filling with many other flavors, like white lotus seed paste, chestnut paste, taro paste, mixed tree nuts, black sesame paste, and many more! They can be utilized as long as they have the right consistency for rolling the filling into a ball.

Can I make Mooncakes without the mold?

Yeah! You can create them even if you do not possess a mooncake mold. It is possible to use a tart mold or even a cupcake plate in place of pushing the formed mooncakes into a mold. Although they won’t have that special pattern, they will still be wonderful.

Nutrition

Serves 20

Serving Size: ¼ of a Mooncake

Calories Per Serving: 288

  • Fat 10.2g
  • Cholesterol 185.2mg
  • Sodium 254.1mg
  • Total Carbohydrate 36.9g
  • Dietary Fiber 1.3g
  • Sugars 5.8g
  • Calcium 98.1mg
  • Protein 10.9g
  • Vitamin A 77.1µg
  • Vitamin C 0.1mg
  • Iron 1.6mg
  • Potassium 82.3mg
Authentic Taiwanese Souffle Castella Cake Recipe

Authentic Taiwanese Souffle Castella Cake Recipe

The famous sponge cake known as Taiwanese castella cake often referred to as Taiwanese soufflé castella, is renowned for its soft, fluffy texture and distinctive bounce. It is wonderful on its own or when topped with whipped cream and fruits. It is delicately sweetened. Taiwanese Read More

The Best Creamy & Spicy Chipotle Sauce Recipe

The Best Creamy & Spicy Chipotle Sauce Recipe

Chipotle sauce is a quick and simple method to give any dish a smoky taste, spiciness, and zest. It can be used as a creamy dip or poured over tacos. In either case, you only need a few ingredients from your kitchen to make this Read More

The Best Homemade Swiss Roll Cake Recipe

The Best Homemade Swiss Roll Cake Recipe

This recipe for the ultimate Swiss roll cake yields a dessert that is not overly sweet and is delicate, fluffy, and spongy. Use whipped cream, jam, or ganache to fill this chiffon-style cake, which is easy to make with the advice I’ve provided below.

Childhood favorites are among the best dishes, as is well known. This recipe for airy, tender Swiss roll cake is fantastic! It’s a stunning cake that would amaze any gathering and isn’t as difficult to make as it seems!

This is the best Swiss roll cake recipe—I don’t intend to sound arrogant! Not only does it taste fantastic, but it also looks stunning and is really simple to make! Valentine’s Day, Mother’s Day, Christmas, or any other special occasion, this Swiss roll cake would be ideal!

This Homemade Swiss Roll Cake is one of my favorite desserts to bake and enjoy. Personally, I love airy cakes, and it’s not a secret they are my favorite. As long as you adhere to the advice I’ve provided below, making Swiss roll cakes is actually fairly simple.

What is a Swiss Roll Cake?

Roll cake, Jelly roll cake, cream roll cake, and Swiss log cake are further names for Swiss roll cake. (A variant that normally occurs around Christmas is the “Buche du Noel” or yuletide log.) In essence, it is a sponge cake wrapped up with whipped cream, chocolate ganache, fruit or jelly as the filling.

The Best Homemade Swiss Roll Cake Recipe


Swiss Roll Cake (European-Style Roll Cake)

Light, airy, and filled with fresh whipped cream, this Swiss Roll cake is a showstopper for any occasion. Follow these detailed steps for a perfect, crack-free roll.


Ingredients

For the Cake:

  • 3 large eggs, separated, at room temperature

  • 4 Tbsp (32g) cake flour, sifted

  • 4 Tbsp (50g) granulated sugar, divided

  • 2 Tbsp avocado oil or any neutral oil

  • 2 Tbsp whole milk

  • ½ tsp vanilla extract

  • ¼ tsp cream of tartar (or ½ tsp lemon juice/vinegar)

For the Filling:

  • ½ cup heavy whipping cream, cold

  • 1 Tbsp powdered sugar

  • Optional: thinly sliced fruit (like strawberries, mango, banana)


Instructions

1. Prep & Pan

  • Preheat your oven to 375°F (190°C).

  • Line a 9×13-inch baking sheet or Swiss roll pan with parchment paper, letting the paper hang over the sides for easy removal.

  • Sift your cake flour and set aside.

2. Make the Batter

  • In a large mixing bowl, whisk the egg yolks and 2 Tbsp sugar until pale and creamy.

  • Whisk in the oil, milk, and vanilla extract until smooth.

  • Sift the cake flour directly over the yolk mixture and gently whisk until just combined (no lumps).

3. Whip Egg Whites

  • In a clean, grease-free bowl, start whipping the egg whites on low speed.

  • When they turn foamy, add the cream of tartar (or lemon juice/vinegar).

  • Gradually add the remaining 2 Tbsp sugar, increasing mixer speed to medium-high. Beat until glossy, soft peaks form (the tip curls over but holds shape).

4. Fold

  • Gently fold about one-third of the whipped whites into the yolk batter to lighten it (use a spatula and a gentle “scoop & fold” motion).

  • Fold in the next third, then the final third, just until combined. Do not overmix—stop as soon as there are no streaks.

5. Bake

  • Pour the batter onto the prepared baking sheet and spread evenly with an offset spatula. Tap the tray on the counter to release large air bubbles.

  • Bake for 13–15 minutes, until the top is golden, the edges pull slightly from the sides, and the cake springs back when gently pressed.

6. Shock & Cool

  • Remove from the oven and immediately drop the pan from about 1 foot onto the counter (prevents shrinking).

  • Let cool for 3–5 minutes, just until barely warm.

7. Pre-Roll (Prevents Cracks)

  • While still warm, flip the cake (parchment and all) onto a clean kitchen towel or new parchment paper. Gently peel off the baked-on parchment.

  • With the short side facing you, loosely roll the cake (with towel or paper inside) while it’s still warm. Leave to cool completely rolled up—about 1 hour. (This “memory” step prevents cracking.)

8. Whipped Cream Filling

  • In a chilled bowl, whip the heavy cream and powdered sugar until firm peaks form (don’t overbeat or it will turn grainy).

9. Assemble

  • Carefully unroll the cooled cake. If it resists, let it relax a few minutes more.

  • Spread the whipped cream evenly over the surface (add fruit if you like), leaving a ½-inch border.

  • Re-roll the cake (without the towel), using parchment to help guide a tight spiral.

  • Place seam-side down, wrap in parchment or plastic, and chill at least 4–6 hours (overnight is best).

10. Finish & Serve

  • Trim the ends with a serrated knife for a clean look, wiping the blade between cuts.

  • Slice thickly and serve chilled.


Tips

  • Rolling the cake while warm and before filling helps prevent cracks.

  • Don’t overbake—the cake should be just set.

  • Always use a clean, grease-free bowl for whipping whites.

  • Chilling the rolled cake makes it slice cleanly and the flavors meld.

Share the image below to your Pinterest board if you like this Swiss Roll Cake Recipe!

The Best Homemade Swiss Roll Cake Recipe


How to Roll Swiss Roll Cake?

  • Place the upper side of the slightly warm cake down on a large sheet of parchment paper (the browned exterior). It goes without saying if you’d like, you may decide to roll it the other way.
  • Place some whipped cream on top of the cake. The whipped cream should be applied to the whole cake using an offset spatula.
  • Roll up the cake carefully, beginning at the short end using the parchment paper as support.
  • To get the roll taut, use the parchment paper to push it slowly.
  • Seal the parchment paper ends after ensuring the seam side is downward.
  • In order to firm up, place the cake on a pan and refrigerate for at least 5 hours.

How to Serve Swiss Roll Cake?

The Swiss cake portions should ideally be sliced when you are ready to eat. Slice the ends of the cake with a sharp serrated knife after removing it from the refrigerator. With a warm, wet cloth, clean the knife.

Slice the cake into pieces that are about an inch thick, wiping the knife between each slice. Serve the cake plain or with fresh fruit. If you added a scoop of ice cream, that would be fantastic.

How to Store Swiss Roll Cake?

The Swiss roll cake should be refrigerated in an airtight container. If a filling besides whipped cream is being used, the cake can be kept at room temperature for up to 48 hours (in an airtight container).

Cake slices can also be sliced into pieces and frozen in separate freezer bags. For up to three months, freeze. Simply let the cake come to room temperature before serving if serving from the freezer.

Swiss Roll Cake Variations

Whenever I make a new kind of cake, I always turn to this Amazing Swiss Roll Cake recipe and play with the ingredients.

  • Raspberry Roll Cake
  • Earl Grey Blackberry Cream Roll Cake
  • Chocolate Roll Cake
  • Chocolate Mousse Cake Roll
  • Cream-Filled Roll Cake
  • Hojicha Roll Cake
  • Swiss Roll Cake – Snow White

Change the flavor of the vanilla extract or experiment with the filling flavors. There are countless options!

In the past, I’ve made blackberry cream and a filling using fresh mango fruit.

It would be excellent to make blueberry jam, chocolate ganache, or even matcha chocolate cream.

FAQs

Why did my Swiss Roll Cake crack?

You could have overwhipped the egg whites, in which case. When you pull out the whisk, the egg meringue should have a “tail,” which indicates that the peaks are soft.

There’s also a chance that you overbaked the cake. Simply continue to bake the top until it seems dry and springy. A cake that has been overbaked will be dry and may crack as a result.

How much cream do I need for the Swiss Roll Cake?

For the filling, you’ll need roughly 12 C (125ml) of heavy whipping cream. If you like a thicker cream layer, you may add extra without a doubt.

The top layer of my cake is stuck to parchment paper. 

If the top layer of your cake gets stuck on parchment, it may indicate that the cake needs a few extra minutes in the oven to finish baking.

Dry and resilient when softly pushed, the surface should not be moist.

Homemade Cowboy Candy Recipe (Candied Jalapenos)

Homemade Cowboy Candy Recipe (Candied Jalapenos)

These candied jalapenos (also known as cowboy candy) are the ideal sweet-and-spicy condiment to spice up your favorite cuisine. They are fiery jalapeno slices in a sugary glaze. Serve with cream cheese and crackers, over sandwiches and hamburgers, or even in salads, grilled meat and Read More