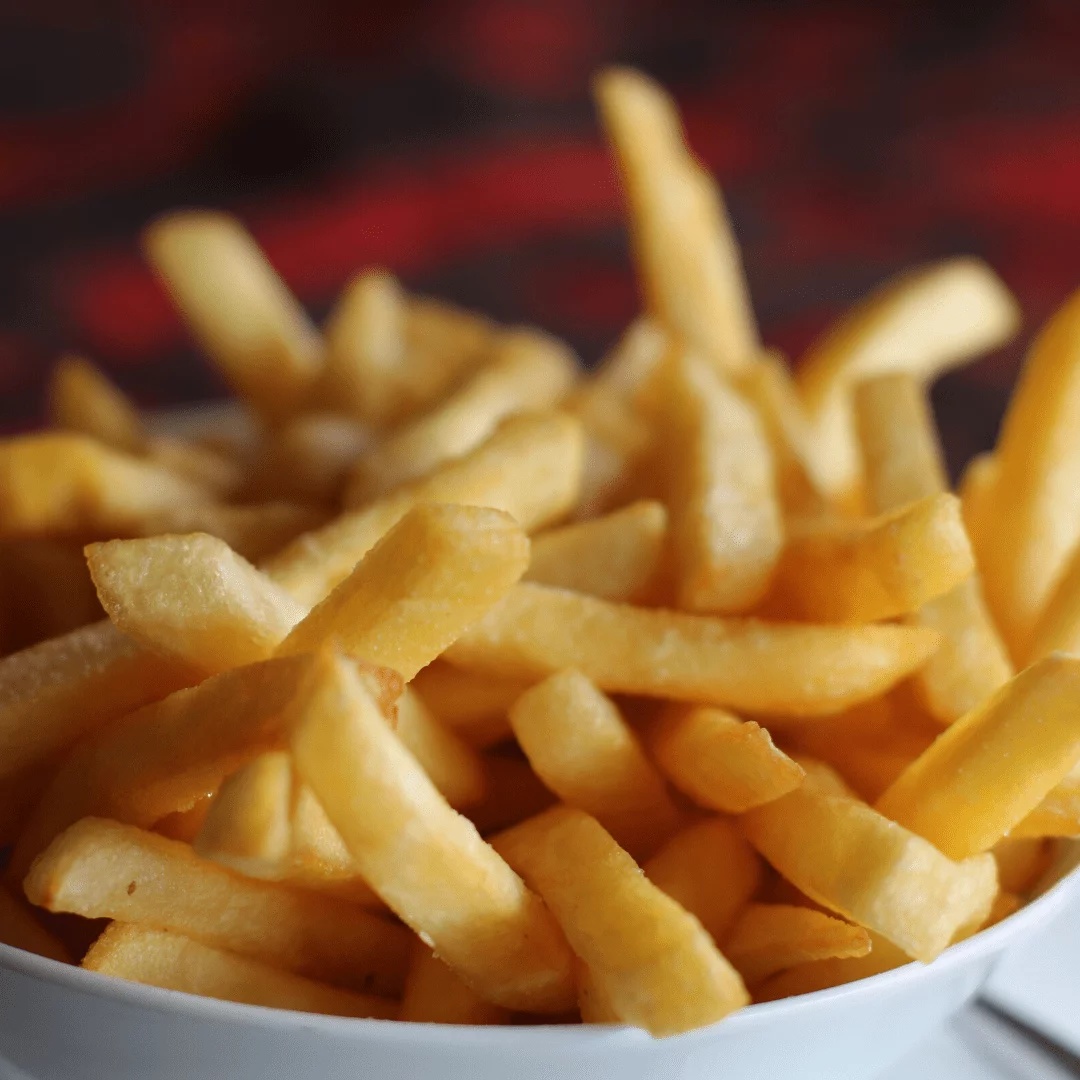
Easy and Delicious Recipes

Author: Sarah Berthold

Pancakes Without Eggs Recipe

Pancakes Without Eggs Recipe

Hello, it’s Sarah again! Today I’m going to show you how to make light, fluffy, and delicious pancakes—without using eggs. Once you try this recipe, you might not want to go back to the traditional version. I used to think pancakes without eggs or milk Read More

Black Bean Spaghetti Recipe

Black Bean Spaghetti Recipe

Do you wish to try a healthy version of spaghetti? If that’s the case, I have an easy Black Bean Spaghetti Recipe made out of vegetables. If you enjoy Mexican food and you prefer pasta, this can be a match made in heaven. This black bean Read More

The Best Frog Legs Recipe

The Best Frog Legs Recipe

Who says that only fancy French restaurants serve top-quality frog legs? With this simple recipe, you can make tender, crispy frog legs right in your own kitchen.

The Best Fried Frog Legs

Before you fry frog legs, you need to cover them in a layer of the flour mixture. This will make sure they are cooked just right. This makes the texture juicy, and the taste explodes in your mouth with every bite. The recipe can be made in less than 30 minutes, which makes it a great starter for a dinner party or a quiet night at home.

These fried frog legs are not only tasty, but they are also a fun and interesting way to start a conversation.

Think about how your guests will react when you tell them that the appetizer is tasty, fried frog legs. You’ll be the talk of the party, and everyone will want to be you.

And just think of all the fun you can have with your dinner guests as they appreciate these yummy bites. You can tease them by asking if they’ve ever kissed a frog in the hopes of turning them into a prince or princess.

Or you could make jokes about frog legs, such as “These legs are hopping great!” There are a lot of options.

The Best Frog Legs Recipe

Ingredients

For the Frog Legs:

  • 16 oz frog legs

  • 1 cup all-purpose flour

  • ½ tsp baking powder

  • ½ tsp dried oregano

  • ½ tsp black pepper

  • ⅓ tsp cayenne pepper

  • 2 Tbsp lemon juice

  • Vegetable oil, for frying

For the Garlic Herb Sauce:

  • ¼ cup olive oil

  • 2 Tbsp lemon juice

  • 2 garlic cloves, minced

  • 2 Tbsp fresh parsley, finely chopped

  • 1 Tbsp fresh dill, finely chopped

  • Salt and pepper, to taste


Instructions

Prep the Frog Legs

  1. Pat the frog legs dry with paper towels to remove excess moisture. This helps the coating stick better.

  2. In a large bowl, whisk together the flour, baking powder, oregano, black pepper, and cayenne.

Coat & Fry

  1. Toss the frog legs in the seasoned flour mixture until evenly coated.

  2. Heat about 4 inches of vegetable oil in a heavy-bottomed pot to 350°F. (Test by sprinkling in a little flour—if it sizzles, the oil is ready.)

  3. Using tongs, carefully lower a few frog legs into the hot oil at a time. Fry for about 3 minutes, or until golden brown and crispy.

  4. Transfer to a wire rack set over a paper towel to drain. Immediately sprinkle with salt and a squeeze of lemon juice.

  5. Repeat with the remaining frog legs.

Make the Garlic Herb Sauce

  1. In a small bowl, whisk together olive oil, lemon juice, garlic, parsley, and dill.

  2. Season with salt and pepper to taste.


Serve

Arrange the crispy frog legs on a platter, drizzle with garlic herb sauce, and serve with extra lemon wedges on the side.

If you like this tasty recipe for fried frog legs, don’t keep it to yourself. Share the image below on your Pinterest board to let everyone know how much you like this tasty dish. It will not only give your followers something tasty to eat, but it will also make them want to try new things. So, jump to it and share this recipe now! 🙂

The Best Frog Legs Recipe

What do frog legs taste like?

Frog legs have been a treat in many cultures for hundreds of years, but France is especially known for its love of them. But if you have never tried them before, you might be wondering what to anticipate.

Firstly, it’s important to know that a frog’s legs are usually very small, about the size of a human finger. People often say that their flavor is light and subtle, kind of like that of chicken or turkey. Some people say they taste like a mix of chicken and fish, with a slightly sweet and nutty flavor.

The texture of frog legs is one of the things that makes them stand out. They are soft and moist, and their texture is light and slightly crunchy, similar to chicken wings. When cooked right, they should be juicy and tender, with flaky, tender flesh.

Frog legs can be cooked in many different ways, but they are usually fried or sautéed. They can also be grilled or baked, and they are often served with a wide range of dipping sauces or seasonings. Garlic butter, lemon juice, or a spicy chili sauce are all popular choices.

So, to sum up, frog legs are a delicacy with a light, delicate taste and a soft, juicy texture. People often say they taste like chicken or turkey because they are a little sweet and nutty.

Where to buy frog legs?

Frog legs are a delicacy in many destinations all over the world, and you can find them in several places. You can buy them at Walmart and on Amazon, but here are some additional options for where to buy frog legs:

Specialty markets: You can usually find frog legs in specialty markets that sell unusual or international foods. These could be Asian or European markets, or they could be markets that only sell game meat.

Online stores: There are a lot of online stores that sell frog legs and other kinds of specialty meats. These stores usually have a wide range of frog legs from different parts of the world. They may be fresh or frozen.

Local farms: Some local farms raise frogs for their meat and may sell frog legs directly to customers. You can look online for farms near you that sell frog legs or call your local agriculture department to find out more.

Restaurants: Frog legs may be on the menu of some restaurants, especially those that serve French or Chinese food. You can also call restaurants near you to see if they serve frog legs or if they can get them for you.

The Best Frog Legs Recipe


Are Frog Legs safe to eat?

First of all, it’s important to know that it’s safe to eat frog legs. People have been eating them for a very long time because they are low in fat and high in protein.

In fact, frog legs have been considered a specialty in France for more than a thousand years. They are also popular in China, Indonesia, Italy, Vietnam, and Thailand. So, if you’re wondering if it’s safe to eat frog legs, the answer is a resounding yes!

So, if you want to eat frog legs, there are a few things you should keep in mind. You should make sure that the frog legs you eat come from a reliable source.

Just like any other animal, frogs can carry diseases, so it’s important to make sure that the frogs used for food are raised in a clean, healthy place. This will help make sure your frog legs are as safe as possible.

It’s also important to cook frog legs the right way before you eat them. This means cooking them well enough to kill any bacteria or parasites that could make them sick.

Most people like their frog legs fried or on the grill, but you can also boil, sauté, or bake them. Just make sure they’re cooked to at least 145 degrees Fahrenheit on the inside to make sure they’re safe to eat.


Creamy Ravioli with Mushroom Sauce

Creamy Ravioli with Mushroom Sauce

Ravioli with mushroom sauce are a very rich first course, perfect for Sunday lunches or special dinners with guests. They are very tasty, creamy, and really irresistible. Ravioli with Mushroom Sauce is ideal for the autumn season, in which mushrooms are the masters; they are Read More

Chicken Recipe with Coconut Milk and Curry

Chicken Recipe with Coconut Milk and Curry

Let me just say that this amazing Chicken Recipe with Coconut Milk and Curry is here to change your nights off. It’s ready in just 30 minutes. A spicy sauce of red curry paste, coconut milk, garlic, and lime juice is used to cook tender Read More

Homemade Brioche French Bread Recipe

Homemade Brioche French Bread Recipe

Are you craving buttery, soft bread that will melt in your mouth? You’re at the right place! This recipe for homemade French brioche is certain to fulfill your appetite.

And the coolest thing is that it’s easy to make; just pay close attention to the kneading and rising times. They’re vital to the end product, trust me.

I know what you’re thinking: this dish is likely not the healthiest one around. And you are correct, it is not exactly quinoa and spinach. But occasionally, it is acceptable to indulge in a small piece (or two, or three…. it’s difficult to stop at just one, isn’t it?).

Try it for yourself, and you’ll realize how incredible this French brioche is. And if you want to improve the experience even more, add this wonderful apple curd on top.

You will be astounded by how beautifully it mixes with the brioche since it is the ideal blend of sweet and salty flavors.

What is French Brioche?

This rich and flavorful French bread has been enjoyed for centuries. It is hardly surprising that this bread has endured the test of time, given its fine, sensitive crumb and buttery flavor. In fact, the term brioche was first recorded in 1404!

Despite the fact that it was initially produced with a sourdough starter and wild yeast, modern recipes frequently rely on commercial yeast for convenience.

But what makes brioche bread so exceptional?

Well, this is due to the “enriched” dough that was used to manufacture it. This type of dough contains fats and proteins, such as butter and eggs, which give French brioche its distinctive flavor and texture.

The high-fat content of enriched dough might inhibit gluten development and make the initial kneading of the dough more difficult than with ordinary bread dough.

Nevertheless, with a little patience and work, you can create a beautiful and rewarding loaf of brioche bread that can be used in both sweet and savory recipes.

If you like brioche, I am sure you will love these Italian Maraitozzi sweet buns! Or perhaps these buttery brioche cinnamon rolls

Homemade Brioche French Bread Recipe

Ingredients

For the Dough

  • ½ cup + ½ Tbsp lukewarm milk (95–105°F / 35–40°C)

  • 2 ½ tsp instant yeast (or active dry yeast)

  • 4 Tbsp granulated sugar (divided)

  • 5 cups all-purpose flour

  • 1 ½ tsp salt

  • 5 large eggs (or 6 smaller eggs), room temperature

  • 1 cup unsalted butter, room temperature, cut into cubes

For the Egg Wash

  • 1 egg

  • 1 Tbsp water


Step 1: Prepare the Dough

  1. In the bowl of a stand mixer fitted with a dough hook, whisk the warm milk with 1 Tbsp of sugar and the yeast. Let sit for 5–10 minutes, until foamy.

  2. Add the remaining sugar, eggs, flour, and salt. Mix on low speed until a sticky dough forms (about 5 minutes).

  3. Add the butter gradually, a cube or two at a time, making sure each piece fully blends before adding more.

  4. Increase speed to medium and knead for 15 minutes, until the dough is smooth, elastic, and passes the windowpane test (stretch a small piece until thin enough to see light through without tearing).


Step 2: First Rise

  1. Transfer the dough to a clean, lightly greased bowl and cover with plastic wrap or a damp towel.

  2. Let rise at room temperature until doubled in size (1 ½–2 hours).

  3. Punch down gently, reshape into a ball, and cover again. Refrigerate overnight (8–12 hours) for best flavor and easier shaping.

(Shortcut option: chill at least 2 hours if you don’t want to wait overnight.)


Step 3: Shape the Dough

  1. Remove the dough from the fridge and divide into two equal portions for standard loaves. Place each into an 8.5×4.5 inch (21×11 cm) loaf pan lined with parchment.

Shaping Variations:

  • Pull-Apart Style – Cut each portion into 8 small pieces, roll into balls, and place in the pan in two rows.

  • Braided Brioche – Divide into 3 ropes (about 10 in / 25 cm long each), braid, tuck the ends, and place in the pan.

  1. Cover and let rise in a warm spot until doubled again (about 2 hours).


Step 4: Bake

  1. Preheat the oven to 390°F (200°C).

  2. Whisk together 1 egg and 1 Tbsp water. Brush over the tops for a glossy finish.

  3. Bake for 30 minutes, covering loosely with foil after 20 minutes if the tops are browning too quickly.

  4. The brioche is done when it sounds hollow when tapped and the internal temperature reaches 190°F (88°C).


Step 5: Cool & Store

  1. Let cool in the pan for 10 minutes, then transfer to a wire rack to cool fully before slicing.

  • Store brioche at room temperature in an airtight container for up to 3 days.

  • Freeze slices or whole loaves well-wrapped for up to 2 months. Thaw at room temperature or warm gently in the oven.

If you like this recipe for French brioche bread as much as we do, share it on Pinterest with your friends and followers. Just click on the image below to add it to your board. Your followers will be grateful that you shared something so tasty. And if they’re feeling especially thankful, they might even bring you a jar of homemade jelly to go with your freshly baked bread. Bon appétit!

Homemade Brioche French Bread Recipe

Brioche dough

Brioche dough is a rich, decadent pastry dough prepared with butter and eggs, which provides its distinctive soft, airy texture. As a result of combining all of the ingredients except for the butter, the dough will be first thick and slightly sticky.

After that, the butter is added in small portions and gradually integrated into the dough. While the butter is mixed in, the dough will become even stickier and looser due to the added moisture and fat.

After all of the butter has been added, the dough must be worked, and the gluten developed. Typically, this is accomplished using a mixer with a dough hook attachment.

As the dough is kneaded, it will become shiny and sturdy, neatly separating from the bowl’s sides. This may take some time, but have patience since the dough will finally acquire the right consistency. The French brioche dough should be smooth, flexible, and somewhat sticky when it is done.

Kneading brioche by hand

Prepare to roll up your sleeves and get your hands a little dirty, as we will be hand-making some delicious brioche! This recipe demands a great deal of perseverance and some physical strength, as the dough is extremely sticky. However, we have a few suggestions to aid you through the procedure.

As you mix and knead the dough, you may start to wonder whether or not it is too sticky. Trust us; it’s definitely not. The dough should be on the wetter side regardless of the amount of butter. Therefore, however how tempting it may be, do not add additional flour.

Instead, try utilizing the “slap and fold” approach to manage the dough. Simply place the dough on a flat surface and fold it over on itself.

This helps to stretch and strengthen the gluten and distribute the butter evenly throughout the dough. Work rapidly so that the dough does not become too sticky on your hands.

With a little time and work, you will have a deliciously soft and fluffy brioche loaf that is ideal for toasting or utilizing as a base for sweet or savory sandwiches.

Don’t be frightened by the dough’s stickiness; it’s all part of the process.

Homemade Brioche French Bread Recipe

Homemade Brioche French Bread Recipe


Also, if you have any leftover Brioche bread that is about to expire, you can use it to make this fantastic Creme Brulee French toast!


Best Recipe For French Macarons

Best Recipe For French Macarons

Meringue-like, Light, airy, and delicious this recipe for French macarons have already been on my baking bucket list for a couple of years. I’ve been learning, testing, and driving myself mad in my kitchen for months, hoping to get these perfect. I’ve never been more Read More

Peanut Free Pad Thai Recipe

Peanut Free Pad Thai Recipe

This Peanut Free Pad Thai Recipe is as tasty as the version that includes peanuts. Keeping all the flavors of original Pad Thai Recipe, is a treat to all that have allergy to peanuts, as well as for those that don’t. Peanut Free Pad Thai Read More

Dairy Free Chicken Pot Pie Casserole

Dairy Free Chicken Pot Pie Casserole

This Healthy Dairy Free Chicken Pot Pie recipe goes far beyond any debate, “who cooked it best”. Because this casserole chicken pot pie is so delicious that you will forget about the competition and enjoy a healthy chicken plate.

It represents what I strive to accomplish with so most of my recipes: a healthier version of well-liked comfort food that’s just as delicious and enjoyable as the original.

I’m often asked what recipes on this blog are typically the most used, which healthy recipes I make for lunch or for supper when I’m not sure what to cook. The clear answer many of these is today’s recipe for Healthy Chicken Pot Pie.

Everyone loves this healthy pot pie since it tastes like his childhood favorite, made more grown up. I like it because it’s very easy to make and healthy. I’ve also made this recipe for a lot of my friends and new moms because it’s a fantastic freezer meal.

Actually, when I cook it for myself, I often proceed to double the recipe, freeze one, then anticipate the day I’ll find a healthy chicken pot pie frozen and primed for baking for lunch or for supper!

Dairy Free Chicken Pot Pie Casserole

The Very Best Dairy Free Chicken Pot Pie

I am aware that I’m occasionally susceptible to exaggeration, but I feel my claim with this healthy pot pie’s “best EVER Pot Pie ” has it’s merit. This Healthy Chicken Pot Pie made its recipe debut at my friend’s place after I brought it over for an unplanned dinner party. After that day a lot of my friends asked me for this recipe, and it was kind of a confirmation that is that good.

Secrets to Perfect Healthy Chicken Pot Pie

My tricks and tips for making a healthy chicken pot pie filling that’s creamy and delicious without the usage of butter or heavy cream arise from several key ingredients.

  • Unsweetened Almond Milk. It’s only about 30 calories per cup but is very creamy, so it generates a perfect base for cream sauces and fillings like this in a chicken pot pie. If you want the pie to be dairy-free and have been looking for a milk replacement for chicken pot pie, almond milk is a perfect choice.
  • Lots of Veggies. Celery, carrots, peas, and pearl onions are classic vegetables for pot pie. For the onions and peas, use frozen no need to be brave and put yourself through the preparation of peeling a large number of small onions. If you wish to accelerate the recipe, even more, you are able to swap the carrots and other veggies for a case of mixed frozen veggies, though I still advise keeping the fresh celery. Even though it’s irritating to get a whole bundle of celery when you only require a few stalks, celery has a way of making pot pie taste like the pot pie should taste.
  • Mushroom. Because of the general insufficient mushroom enthusiasm that one encounters when one posts recipes online, I realize mushrooms really are a controversial ingredient, but they are sooo amazing in HEALTHY CHICKEN POT PIE. They provide the filling an abundant, savory depth. Now when I eat pot pie, when it doesn’t contain mushrooms, I really feel they are missing.
  • Shredded Chicken. Very healthy protein! You are able to speed the recipe up by utilizing shredded store bought rotisserie chicken.
  • Fresh Thyme. Absolutely worthwhile with this pot pie recipe. You are able to swap dried, but it just won’t be as awesome, and awesome is what I’m hungry for when I crave chicken pot pie.
  • Cut the Crust. While I can’t envision a healthier chicken pot pie without crust, I discovered that not merely is sticking with the top one alone a substantial calorie savings, but I preferred the pot pie in this manner!

Pin the image below if you like this healthy pot pie recipe!

Dairy Free Chicken Pot Pie Casserole

Ingredients

  • 1 Tbsp of extra-virgin olive oil
  • 1 cup of carrots, diced
  • 1/2 cup of celery, diced
  • 1 1/2 tsp of garlic powder
  • 1/2 tsp of kosher salt
  • 1/4 tsp of black pepper
  • 1/4 cup of flour, all-purpose
  • 2 cups of almond milk, unsweetened
  • 2 cups of cooked and shredded chicken breasts — about 8 ounces or 2 small breasts, boneless
  • 1/2 cup of peas, frozen
  • 1/2 cup pearl onions, frozen
  • 1 Tbsp of chopped fresh thyme
  • 1 prepared pie crust — dairy free
  • Egg — beaten lightly with a tablespoon of water for an egg wash

Instructions

  1. Heat the oven to 430 F. and coat lightly a 9-inch pie dish using cooking spray. Leave aside.
  2. Heat a big Dutch oven or similar, heavy-bottomed pan on medium-high heat.
  3. Pour the oil in the pan and when it’s hot, add the mushrooms and cook for 7 – 8 minutes, till mushrooms are just starting to brown, stirring slowly.
  4. Add in the celery, carrots, garlic powder, pepper and salt. Cook till the mushrooms have browned more and the carrots start to soften, about 3-4 more minutes.
  5. Sprinkle the flour on the top of vegetables and cook 2-3 minutes. Pour in the almond milk slowly, adding a couple of splashes at a time, stirring continuously.
  6. Bring to a boil (low), scrape any brown bits from the bottom of the pan. Continue steadily to let bubble till it’s thickened enough, it should take about 4 to 5 minutes.
  7. Add in and stir in the chicken, onions, peas, and thyme and spoon the chicken mixture in to the previously prepared pot pie dish.
  8. Roll the dough for the pie into a circle big enough to cover the dish. Take egg wash and brush the sides of the pie, and lay the dough over the top so that it hangs on the sides of the dish. Trim the overhang to a 1/2 in bigger than edge of the dish. Slightly press the dough onto the sides of the dish such that it sticks nicely, then brush everywhere with the rest of the egg wash. Using a sharp knife, cut 3 slits on the top.
  9. Bake till hot and bubbly internally and the crust has a deep golden color, for about 25-30 minutes. Let it rest a couple of minutes and serve hot.
Texas Roadhouse Rolls With Honey and Cinnamon (Copycat)

Texas Roadhouse Rolls With Honey and Cinnamon (Copycat)

Texas Roadhouse Rolls with honey and cinnamon are buttery-sweet rolls that are loved everywhere. And for a good reason, because they’re so delicious. And now, with this copycat recipe, you are able to enjoy a fresh, warm batch in your home anytime you like. Texas Read More