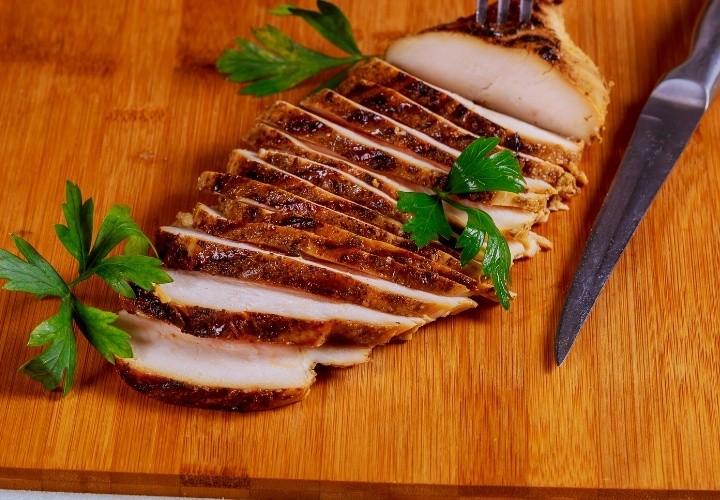
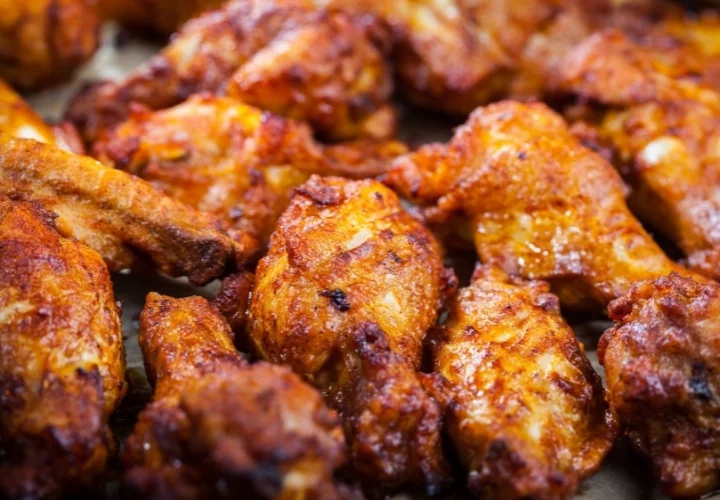
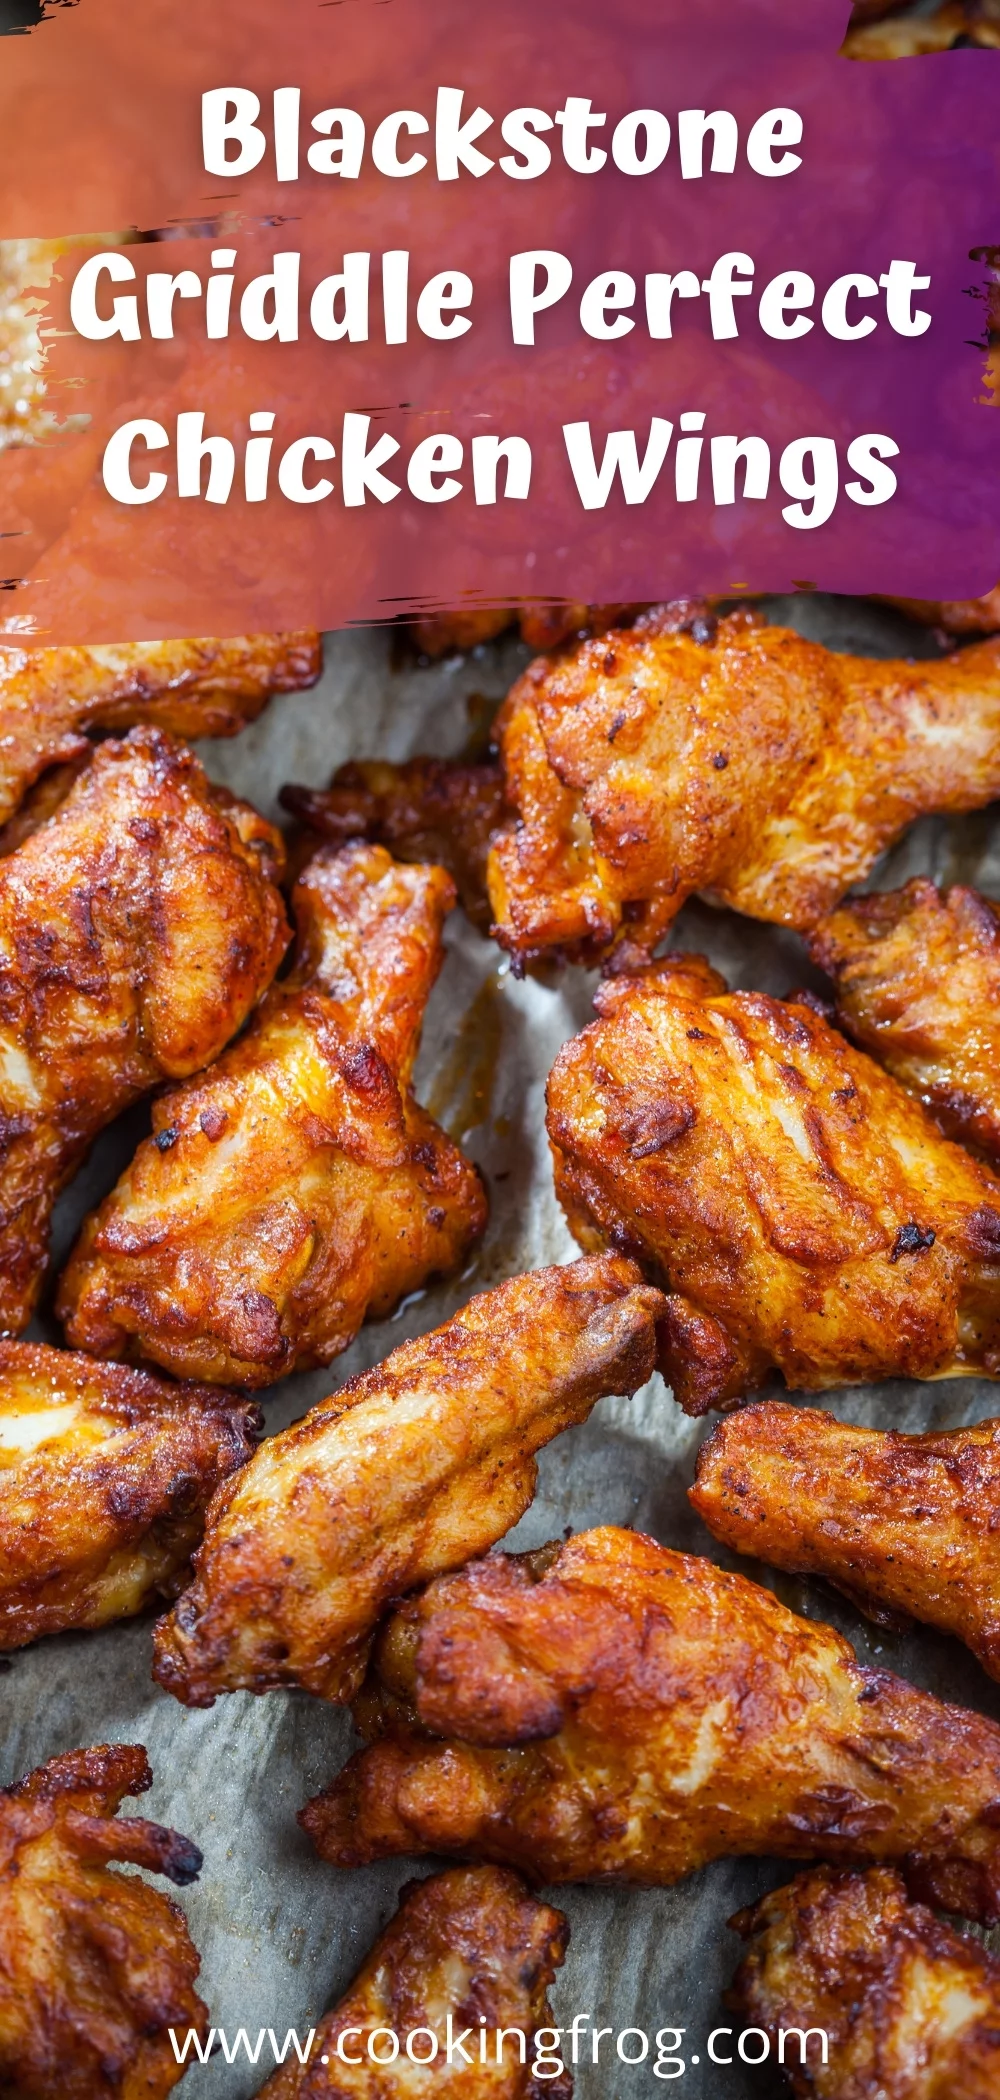
Easy and Delicious Recipes

Recent Posts

Chicken of the Woods Recipe

Chicken of the Woods Recipe

Are you looking to venture into our Chicken of the Woods recipe? Well, if you enjoy delicious wild mushrooms that have a similar texture and taste to chicken, then this is a recipe worth digging your teeth into during the coming week!   Chicken of Read More

Easy Popcorn Chicken Recipe

Easy Popcorn Chicken Recipe

Craving a takeout but resenting the cost and the unhealthiness? Well, I’m here to help! Sure, it may still be more on the cheat day side of life, but my delicious and easy popcorn chicken recipe will have the whole family coming back for more. Read More

Roasted Beef Shank Recipe

Roasted Beef Shank Recipe

Fancy something different for dinner tonight? Our delectable roasted beef shank recipe, topped with a gorgeous vegetable medley, is the ideal comfort food for those looking to warm up during the week with a fragrant and flavourful meal!

Whether you prefer to slow cook or just use your regular oven, our recipe can be adapted to suit your facilities to ensure that no matter how it is cooked, your roasted beef shank will be unlike any other meal you’ve had before.

I see your interest is piqued. Let me guide you through how to make this beautiful meal!

What is a Beef Shank

Unlike any other beef cut, beef shanks originate from the legs of a cow. However, there is also a range of other meat shanks, including veal, which can be turned into a beautiful Osso Bucco.

Shank meat is relatively volatile, and if not cooked correctly, the meat can become tough and lose the beautifully rich flavor that the cut is credited for. However, with slow and careful preparation, using techniques such as braising, you can lock in the delicious juices and create a gorgeous meal oozing with flavorful juices.

When it comes to beef shanks, they are ideal for those of us with busy days. Due to them being the ideal cut to roast for several hours on low heat, you can go about your day and save yourself some waiting time by being productive!

Additionally, beef shanks are cost-efficient cuts and often come with soup bones, with bones smothered in meat, and are ideal for making beautiful stock to use across your other dishes. With them being so full of flavor, they are a steal at your local meat counter.

Roasted Beef Shank Recipe

Ingredients

For the Beef Shanks

  • 2 lbs (900g) beef shanks, trimmed if needed

  • ½ tsp salt

  • ½ tsp black pepper

  • 1 cup all-purpose flour

  • ½ tsp salt

  • ¼ tsp paprika

  • 2 tbsp vegetable oil

For the Braise

  • 1 cup chopped onions

  • 4 large celery stalks, chopped

  • 1 cup carrots, chopped

  • 3 cloves garlic, minced

  • ½ cup dry Sherry

  • 16 oz low-sodium chicken broth

  • 2 tsp ground cumin

  • ½ tsp smoked paprika

For the Gremolata

  • 1 large lemon, zested

  • 1 cup fresh parsley, finely chopped

  • 3 cloves garlic, minced


Instructions

  1. Season & Dredge the Beef
    Trim any excess fat from the beef shanks. Season with salt and pepper. In a shallow dish, mix flour, salt, and paprika. Lightly coat each beef shank in the seasoned flour, shaking off the excess.

  2. Brown the Shanks
    Heat the oil in a large skillet over medium heat. Brown the beef shanks for 4–5 minutes per side until golden. Transfer to a plate and set aside.

  3. Sauté the Vegetables
    In the same skillet, add the onions, celery, and carrots. Cook for about 5 minutes, stirring occasionally, until softened and lightly browned. Add the garlic and cook for 1–2 minutes more.

  4. Deglaze & Season
    Pour in the Sherry and scrape up any browned bits from the bottom of the pan. Stir in the cumin and smoked paprika.

  5. Braising Methods

    Slow Cooker:
    Transfer vegetables to a slow cooker, place the browned beef shanks on top, pour in the chicken broth, cover, and cook on low for 4–6 hours until the meat is fork-tender.

    Oven:
    Preheat oven to 250°F (120°C). Transfer vegetables and beef shanks to a Dutch oven, add the chicken broth, cover, and bake for about 4 hours until tender.

  6. Make the Gremolata
    While the beef cooks, mix the lemon zest, parsley, and garlic in a small bowl.

  7. Serve
    Once the beef is tender, place on a serving platter with the vegetables and sprinkle generously with gremolata. Serve hot with crusty bread or mashed potatoes.

Storage Tip: Leftovers keep well in the fridge for up to 3 days or can be frozen for 2 months.

Roasted Beef Shank Recipe

Extra Tips and Tricks for Beef Shank

  • You may be wondering: ‘What is the best wine for cooking?’. Well, I personally opt for either a dry Sherry, when white wines can help blend my medley of flavors, or a dry Marsala, when red wines can do the job. Too often, I open a bottle of wine and am left with the dilemma of having to consume it immediately – however, I’ve learned that if I keep a dry bottle of wine loitering about, then I can use it when cooking! Costs typically between 8 to 15 dollars per bottle – which is fantastic considering the amount of dishes you can make.
  • This dish is beautifully flavored with a traditional mirepoix, which is a blend of chopped celery, carrots, and onions, which is a classic mix used to enhance many dishes.
  • Do you want to bring this dish to new heights and experiment more? Top this dish with gremolata, chopped parsley, lemon zest, and finely chopped garlic mixed together, which adds a lovely finishing touch to your dish.


How To Cook Mahi Mahi Easy Recipe

How To Cook Mahi Mahi Easy Recipe

Hey People!!! Today I’m here with another exciting recipe on how to cook Mahi Mahi perfectly suitable for the chilly winters. Mahi-Mahi is a widely famous fish found in tropical, subtropical, and temperate off-shore waters worldwide. Its name, “Mahi-Mahi,” comes from the Hawaiian language and Read More

Ghirardelli Brownie Mix Easy Recipe

Ghirardelli Brownie Mix Easy Recipe

Want to give a Ghirardelli chocolate twist to your Classic brownies? Then look no further! I am here with another fun and exciting recipe that will be quite special for the ones who love sweets and desserts. By the way, who doesn’t love classic brownies? Read More

Subway Bread Copycat Recipe

Subway Bread Copycat Recipe

Subway is a famous American restaurant chain that sells the best sandwiches, salads, and beverages around the globe. Their sandwiches are so good that you instantly become a fan. The good thing is you can make sandwiches like theirs at home too.

But first!!! Let’s talk about their tasty Subway bread loaf because the perfect sandwich starts with ideal bread! Right? So, I’m here with a fantastic Subway bread copycat recipe that will surely give you the perfect bread, just like the Subway sandwich bread.

This is the best recipe for making delicious subway bread at home. It contains all the natural ingredients. It’s the easiest and simplest recipe and would make your bread better than the subways bread. The bread you make with this recipe is soft, light, spongy, and has a beautiful brown crispy crust.

Subway Bread Copycat Recipe

Subway Bread Copycat Recipe

If you’ve ever wanted to recreate that soft, flavorful Subway bread at home, this recipe will get you incredibly close — perfect for loading up with your favorite sandwich fillings.


Ingredients

  • 2 ½ – 2 ¾ cups all-purpose flour

  • 1 tbsp dry active yeast

  • 1 tbsp sugar

  • 1 ½ tsp salt

  • 4 tbsp olive oil

  • 1 cup warm water

  • Butter (for brushing, optional)


Instructions

  1. Activate the Yeast

    • In a large mixing bowl, combine warm water, sugar, salt, yeast, and olive oil.

    • Stir gently, then let it sit for about 5 minutes until bubbly and frothy.

  2. Make the Dough

    • Add 1 cup of flour and mix with a stand mixer (or by hand) for 4–5 minutes.

    • Gradually add the remaining flour, ¼ cup at a time, until a soft, slightly sticky dough forms. (It should stick to the bottom of the bowl — don’t over-flour.)

    • Total mixing time should be around 8 minutes.

  3. Knead & First Rise

    • Turn the dough out onto a lightly floured surface. Knead until smooth and elastic.

    • Shape into a ball, place back in the bowl, cover with a clean towel or plastic wrap, and let rise for 30 minutes.

  4. Shape & Second Rise

    • Punch down the dough and divide it into 4 equal pieces.

    • Shape each piece into a loaf about 9–10 inches long.

    • Place loaves on a parchment-lined baking sheet, spacing them at least 2 inches apart.

    • Cover and let rise for 1 hour, or until doubled in size.

  5. Bake

    • Preheat oven to 350°F (175°C).

    • Remove cover and bake loaves for about 25 minutes, or until golden brown.

  6. Finish & Serve

    • For softer, more flavorful bread, brush hot loaves with melted butter right out of the oven.

    • Let cool for at least 30 minutes before slicing.

    • Fill with your favorite meats, cheeses, and veggies, and enjoy your homemade Subway-style sandwich.

Subway Bread Copycat Recipe

Crustless Creamy Cheesecake Recipe

Crustless Creamy Cheesecake Recipe

Hello people! Today I’m going to share another exciting recipe, and it’s Crustless Creamy Cheesecake. This recipe is not only unmatchable in taste but low on carbs as well. Because of its low-calorie content, this recipe fits best in a keto diet plan. So, if Read More

Oven Baked Beef Jerky Easy Recipe

Oven Baked Beef Jerky Easy Recipe

Today I’m here with another delicious and mouthwatering easy recipe, and that is… Oven Baked The Beef Jerky. It’s totally different from the regular recipes and serves as the best snack for everybody.  What is Beef Jerky? Beef Jerky is basically dried lean beef strips Read More

Gluten-Free Sourdough Bread Easy Recipe

Gluten-Free Sourdough Bread Easy Recipe

Today’s recipe is Gluten-Free Sourdough Bread Easy Recipe, and it’s very special, especially for the ones who are gluten-intolerant or are on a diet. Only because you can’t intake gluten, doesn’t mean you are going to miss all of your favorite foods because they have gluten in them.

You can be on a gluten-free diet and still enjoy all the baked items like bread, buns, pizza, etc. Yes, that’s true. You can easily make all these items gluten-free and satisfy your cravings.

I am going to share a great sourdough bread recipe with you. The best thing about this bread is that it is not only gluten-free but is remarkably tasty and healthy as well. The plus point is that baking gluten-free sourdough bread is a lot easier than regular sourdough bread.

You can bake gluten-free sourdough bread in much lesser time by following a few simple steps. This recipe doesn’t require any baking expertise, and even a newbie can make an amazing sourdough bread out of it 😉

Ingredients

  • 16 oz of Gluten-Free Flour (recommended blend: brown rice flour and sorghum flour as the base, with some potato starch and tapioca starch for lightness)

  • 4 oz of Active Gluten-Free Sourdough Starter

  • 3 tbsp. of Psyllium Husk

  • 2 tsp of Salt

  • 2 cups of Water

  • 1 tbsp. of Honey (Optional)

Instructions

  1. Activate Your Starter

    • Feed your sourdough starter twice before making the dough to ensure maximum activity.

  2. Mix the Dough

    • In a large mixing bowl, whisk together the flour, psyllium husk, and salt.

    • Add the water, honey (if using), and active sourdough starter. Stir until a smooth, sticky dough forms.

    • Shape into a round dough ball — no kneading needed.

  3. First Rise

    • Cover the bowl with a damp cloth and let it rest at room temperature for 3–5 hours.

  4. Prepare for Proofing

    • Lightly flour a banneton basket or line it with a cloth.

    • Transfer the dough into the basket, cover with a damp towel, and let rest for 1 hour.

  5. Cold Proof

    • Refrigerate the dough for 7–12 hours, or overnight, to enhance flavor and texture.

  6. Preheat the Oven

    • Place a Dutch oven or combo cooker in the oven and preheat to 475°F (245°C) for at least 1 hour.

  7. Bake

    • Carefully remove the hot Dutch oven from the oven.

    • Transfer the cold dough into it (a cutting board can help with the transfer).

    • Score the top with a bread lame.

    • Cover and bake for 60 minutes.

  8. Finish & Cool

    • Remove the cover and bake for an additional 5 minutes for a golden crust.

    • Transfer the bread to a wire rack and let it cool at room temperature for several hours before slicing.


Tips:

  • Scoring helps the bread expand evenly while baking.

  • Cooling completely before slicing ensures the crumb sets properly.

  • For a crisper crust, leave the bread uncovered while cooling.

Choosing the Right Gluten-Free Flours
For the best texture and flavor in gluten-free sourdough, use a balanced flour blend:

  • Brown Rice Flour – mild flavor and a sturdy base.

  • Sorghum Flour – adds a subtle sweetness and tender crumb.

  • Potato Starch – helps keep the bread light and moist.

  • Tapioca Starch – adds elasticity and chew.

You can make your own blend using these flours or purchase a high-quality pre-mixed gluten-free bread flour that includes similar components. Avoid using a single flour alone, as it can make the loaf too dense or crumbly.

Gluten-Free Sourdough Bread Easy Recipe

Does gluten-free sourdough bread taste bad?

Many of you, who haven’t ever tried gluten-free bread, must have in mind or may have heard from someone that gluten-free bread is nothing like regular bread. It’s thick, dense, gummy, and has a terrible taste.

That’s why you may be reluctant in trying out gluten-free bread. But to your surprise, that’s nothing but just a misconception. Gluten-free sourdough bread is a lot tastier than you think.

A poorly-baked gluten-free bread may turn out as a gummy loaf with a terrible taste. But a well-baked gluten-free bread, having a perfect balance of all the ingredients, will definitely satisfy your taste buds.

Yes, I admit. A gluten-free sourdough is not that much spongy and tall as regular bread, but it’s also not like a dense, lofty, and ill-flavored loaf. This recipe will give you perfectly-baked sourdough bread with a beautiful golden-brown texture and a great taste.


Can you store the sourdough bread?

Yes, you can definitely store the gluten-free sourdough bread. For this purpose, wrap the sourdough bread in a dry, cloth towel. Make sure the towel is lint-free. Now place this cloth-wrapped bread into the brown paper bag. This way, the bread stays fresh for up to 3 – 4 days.

You can also revive a few days old stale breads by toasting or lightly broiling it. It is recommended to store it in the freezer if you wish to store the bread for more the 3 – 4 days,

Homemade Peasant Bread Easy Recipe

Homemade Peasant Bread Easy Recipe

Hello guys! Today I’m here to share another exciting recipe with you, and that is “The Homemade Peasant Bread” recipe. This is one of the best bread recipes out there. The best thing about this recipe is that you don’t have to knead the dough Read More