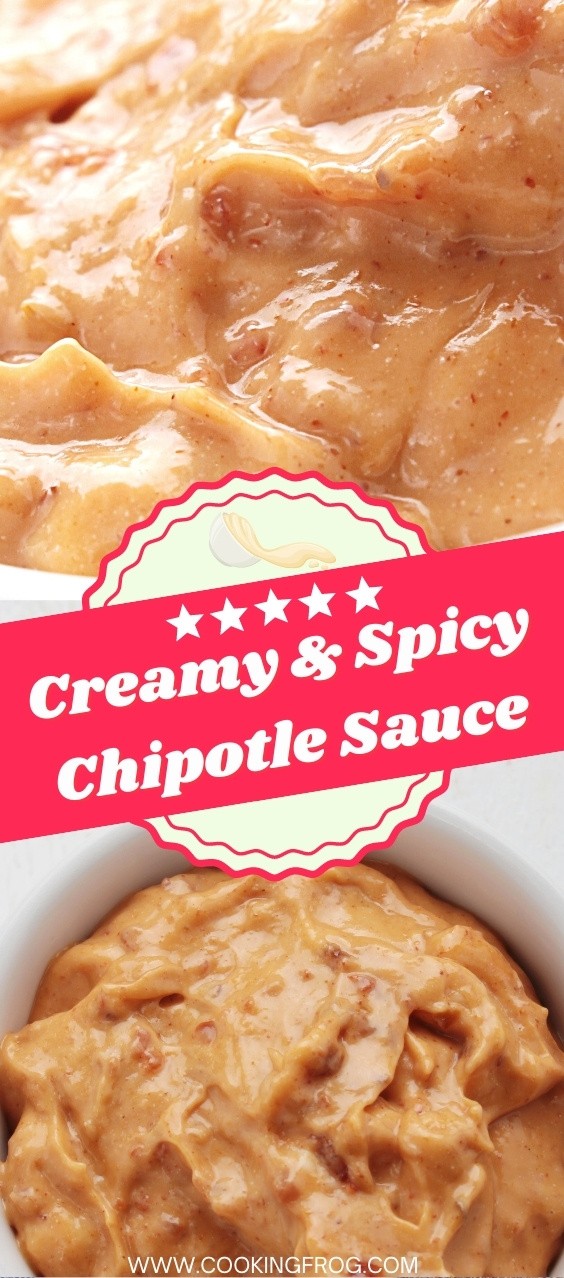
Easy and Delicious Recipes

Recent Posts

Lazy Chocolate Chip Cookie Bars Easy Recipe

Lazy Chocolate Chip Cookie Bars Easy Recipe

All you need is a boxed cake mix, butter, eggs, and chocolate chips to make Lazy Chocolate Chip Cookie Bars. So delicious and soft! The easiest cookies you’ll ever make are these lazy chocolate chip cookie bars! Nothing beats a chocolate chip cookie with a Read More

The Ultimate Venison Burger Recipe (With Smoked Paprika Aioli)

The Ultimate Venison Burger Recipe (With Smoked Paprika Aioli)

Depending on your preference, this venison burger meal can be made on the stovetop or the grill. I gave each of them directions. I have included cooking durations and internal temperatures to assist you in achieving your ideal level of doneness! My friend likes his venison burgers Read More

Homemade Polish Kluski Noodles Easy Recipe

Homemade Polish Kluski Noodles Easy Recipe

Kluski Noodles are a style of egg pasta popular in Poland. They’re produced with wheat flour dough that hasn’t been leavened and is blended with eggs before being boiled. This type of noodle is commonly seen in a variety of Polish soups.

If you love Polish recipes, you can check out these Original Polish Paczki Recipe and  Homemade Polish Cabbage Pierogi Recipe!

What’s the Difference Between Egg Noodles and Kluski Noodles?

The ingredients and process for creating kluski noodles and egg noodles are nearly identical, except that kluski egg noodles require more eggs. A standard kluski egg noodle recipe calls for two eggs for every cup of flour. So, you use four eggs to make two cups of flour. To create egg noodles, multiply the number of eggs by the number of cups of flour.

Is it possible to prepare Kluski Noodles beforehand?

Yes, absolutely! To begin, follow the directions until the kluski dough is cut into noodle forms.

Put the kluski dough in a sealed container and refrigerate until ready to cook if you intend on making the noodles in the next two to three days.

Place the uncooked kluski noodles in a freezer-friendly bag and freeze them if you don’t plan on cooking them within the next 2-3 days. Raw kluski noodles can be frozen for up to three months.

You might also like this recipe: Air-Fryer Kielbasa – Polish Sausage Recipe.

Is it possible to make gluten-free Kluski Noodles?

You can use gluten-free flour instead of all-purpose flour if necessary. Please note that using gluten-free flour will change the consistency of your kluski noodles somewhat, but they should still be tasty!

This recipe yields approximately 1 pound (400-450 g) of cooked Kluski Egg Noodles. That’s not much, but it’s plenty to go with four soup dishes. If you have extra guests to serve, feel free to double or triple this recipe.

Is there anything particular you’ll need to create these Kluski Egg Noodles?

No, you should be able to find all of the ingredients at any grocery shop.

If you can get “00” flour (sometimes known as “pasta flour”), use it instead of standard all-purpose flour in the dish.

A big cutting board (preferably a pasta/pastry board), rolling pin, sharp knife, and a large cooking pot (I use a 3-quart/3-liter saucepan) are all required. Using a stand mixer and a pasta maker is optional, although they make the procedure go more smoothly.

Homemade Polish Kluski Noodles Easy Recipe 1

Homemade Kluski Noodles

Hearty, chewy, and comforting, Kluski noodles are perfect in soups, stews, or as a pasta base for your favorite sauce. This simple dough comes together with just a handful of pantry staples—no special equipment required!

Ingredients

  • 1½ cups (180g) all-purpose flour

  • ⅓ tsp salt

  • 1 tbsp clarified butter (or canola/olive oil)

  • 1 large egg

  • 2 egg yolks


Instructions

  1. Make the Dough:
    In a large mixing bowl, combine the flour and salt. Make a well in the center.
    Add the whole egg, egg yolks, and clarified butter (or oil) into the well.
    Use a fork to gently mix, gradually pulling flour into the wet ingredients until a shaggy dough forms.

  2. Knead:
    Switch to kneading by hand. Knead on a lightly floured surface until the dough becomes smooth, supple, and elastic—about 20–30 minutes (or up to 1 hour if you’re taking your time).
    If the dough seems dry, add a teaspoon of water; if too sticky, add a bit more flour.
    (Stand mixer option: Use the dough hook and knead on low, adding a spoonful of flour as needed until you have a smooth, pliable dough after about 20 minutes.)

  3. Rest:
    Shape the dough into a ball and wrap it in plastic wrap. Chill in the fridge for at least 1 hour (up to overnight).

  4. Roll and Cut:
    Dust your work surface with flour. Divide the dough into three pieces; keep the unused pieces wrapped to prevent drying.
    Working with one piece at a time, roll the dough as thin as possible using a rolling pin (or a pasta machine, if you have one).
    Lightly dust the dough with flour, then roll it up loosely and slice into noodles about ½ inch (1.25 cm) wide.
    Unroll the strips and toss gently with a little more flour.

  5. Dry (Optional):
    Spread the noodles out on a floured surface or clean towel. Let dry for an hour if you’ll be cooking within two days; then transfer to an airtight container or zip-top bag and refrigerate.
    To freeze for later, place the cut, floured noodles in a freezer-safe bag, label, and freeze for up to 2–3 months.

  6. Cook the Noodles:
    Bring a large pot (at least 3 quarts/liters) of salted water to a boil.
    Add the noodles and stir gently. Lower the heat to a gentle boil and cook, stirring occasionally, until the noodles float to the surface and are tender but slightly firm (about 3 minutes, depending on thickness).
    Taste for doneness, then drain in a colander.

  7. Serve:
    Enjoy in your favorite soups, with butter and herbs, or topped with sauce, cheese, or sautéed vegetables.

Share the image below to your Pinterest board if you like this Kluski Noodles Recipe! 

Homemade Polish Kluski Noodles Easy Recipe

Traditional Greek Lemon Rice Recipe (Greek Rice Pilaf)

Traditional Greek Lemon Rice Recipe (Greek Rice Pilaf)

This convenient and simple Greek Lemon Rice recipe makes four servings of delicious Greek Lemon Rice (also known as Greek Rice Pilaf). This meal is zesty, summery, and filled with flavor from sautéed onions, garlic, Mediterranean herbs, seasonings, and lemons! It’ll be ready in half Read More

The Best London Broil Easy Recipe

The Best London Broil Easy Recipe

After being marinated in a liquid combination with spices and seasoning, London Broil is a wonderfully soft piece of beef that is broiled in the oven. A sumptuous supper that’s simple to prepare! London Broil is a quick, budget-friendly, hands-off supper that’s excellent for weekday Read More

The Best California Burritos with Carne Asada

The Best California Burritos with Carne Asada

Are you ready for one of the best burritos ever? California Burritos with Spicy Mexican French Fries, carne asada, and all the other ingredients are in my top 10 street foods list!

California Burritos is undoubtedly one the best burritos anywhere in the world. These burritos are filled with Mexican French Fries, tender, marinated Carne Asada, cheese, and salsa.! These California Burritos can also be frozen for a quick and easy dinner. I’m going to include the recipes both for Mexican French Fries and Carne Asada, so you don’t have to go elsewhere for these recipes.  🙂

What are California Burritos, you ask?

California Burrito is made with a large tortilla, which is then topped with juicy, marinated, and spice-rubbed, grilled Carne Asada beef. Then, it’s piled high with Mexican Street Fries and filled with cheese, sour cream, and Guacamole. Imagine fiesta, cheesy steak, and potatoes with all the goodies!

I knew I had to make California Burritos as soon as I perfected my favorite carne asada recipe.

Everyone loves Burritos with carne asada, but this variation with Mexican Fries is the most popular version of California Burritos. These burritos are considered the best in San Diego and are an essential part of San Diego’s food culture.

Who is the inventor of the California Burrito?

Even if you reside in California, you’re not alone if you’ve never heard of a California Burrito. California burritos emerged in San Diego in the 1980s at one of -Berto’s diners and are distinctly San Diego. The Fresh MXN (previously Santana’s) franchise also claims to be the inventor of the California Burrito, but I’m sticking with -Berto’s.

You can make your own California Burrito recipe at home, regardless of who invented the original California Burrito. It will make your family and friends adore you.

What kind of tortilla to use for California Burrito?

This California Burrito recipe works well with a large to an extra-large flour tortilla. In a smaller shell, you won’t be able to fit everything. I favor extra big tortillas, but unless I order in bulk, I can typically only find large tortillas.

The tortilla size for the burrito range from 10′inch to 12inch in diameter; those are large to extra large ones. When cooking burritos, flour shells are significantly better than corn shells. They’re a lot more durable and therefore hold everything together better.

Which cut of beef to use for California Burritos?

Skirt steak is most commonly used in California Burrito recipes; however, If you can’t find skirt steak, you can use flank steak instead. For carne asada, these are the two most popular steak selections. If neither of those is available, ribeye would be my third option. It has a lot of texture and is delicious.

It’d be a delectable, flavorful, and juicy choice. When slicing skirt steak, flank steak, or ribeye steak, keep in mind that you should cut against the grain. This dish asks for raw beef cubes to be sliced before cooking. You can cook a skirt or flank whole, but to make it soft, you’ll need to slice it against the grain.

Ingredients you’ll need for California Burritos.

Tortillas: For the complete California Burrito experience, use large flour burrito-sized tortillas. For lesser amounts, you can always divide these burritos in half. Tortilla Land, for example, has raw/uncooked tortillas in the refrigerated section, which I like (I buy mine at a local store). They crisp up beautifully since they are lighter!

Carne asada: Carne asada is one of the main ingredients for California burritos. I’ve included the recipe for the best Carne Asada in this recipe, so you don’t have to look elsewhere! You could use skirt or flank steak, which is marinated in lime juice, orange juice, soy sauce, and a drop of liquid smoke before being rubbed with chili powder, cumin, smoked paprika, garlic, and onions for a delicious, buttered, and dissolve in your mouth feel.

Cheese: Add around 3 cups of cheese, perhaps more, if you want to experiment; I don’t think you’ll go wrong with a bit more. I love to use a blend of pepper Jack and the sharpness of cheddar cheese, but if you don’t have either, use only cheddar.

French fries: seasoned with garlic powder, ground cumin, chipotle pepper, salt, and pepper; the French fries are addictive on their own.

Salsa: For California Burritos, it is almost unimaginable to make without salsa. You can make your salsa with my recipe here or use a store-bought one.

Avocado crème: I make a wonderful Avocado crema with avocados, sour cream, mayonnaise, lime juice, cumin, salt, and garlic powder rather than sour cream and guacamole. It’s one of my all-time favorite sauces. You can substitute guacamole or sour cream if you don’t want to use cream.

How to make the best California Burritos

There are several parts to these California Burritos, but they are all simple to prepare. While the carne asada is marinating, you may make the avocado crema, French fries, and any other preferred toppings.

First, marinate the carne asada

Ground cumin, smoked paprika, garlic powder salt, onion powder, chili powder, pepper, and cayenne pepper are mixed in a bowl. Add around 3-4 Tablespoons to a freezer bag, and save the rest for late use. 

Next, Low sodium soy sauce, olive oil, orange juice, lime juice, brown sugar, and liquid smoke are mixed in a bowl. Seal the bag after adding the steak and eliminating any excess air. Refrigerate for 5 to 12 hours to marinate.

Make the avocado cream.

Next, make the avocado cream. Blend together 2 avocados, mayonnaise, sour cream, lime juice, salt, cumin, and garlic powder until smooth and creamy, and Keep it chilled in the fridge until you’re ready to use it.

3rd step: prepare the french fries

Combine sliced potatoes, cornstarch, olive oil, and seasonings in a mixing bowl. Distribute potatoes equally on a prepared baking sheet and bake for twenty minutes, and toss, stir, and rearrange fries in a single layer on a baking sheet and bake for another ten min. Broil the French fries till brown and crispy if you prefer crispier fries.

Prepare pineapple and carne asada on the grill. 

Grill the pineapple until lightly browned and caramelized; it should take 7-8 minutes. Remove the cores from the pineapple and chop it up. (Grill pineapple alongside carne asada if you have room on your grill.) Next, grill previously marinated and rubbed Carne asada for 6-7 minutes on each side or until an internal temperature reads 135-140 F for medium and around 130F for medium-rare.

The length of time on the grill depends depend on the thickness of your steak and the amount of doneness you desire. Wrap your extra-large tortillas in foil and put them in a preheated oven (350F) for ten minutes to make them warm and flexible (this is just a recommendation).

Finally, assemble your California Burritos.

To assemble your California Burrito, start with the carne asada in the middle of each burrito, then add fries, cheese, avocado crème, salsa, and finally, pineapple. The top and bottom folds are folded in, and the burrito is rolled securely.

Optional: Lightly coat a skillet with olive oil and cook over medium-high heat to brown burritos. One at a time, add burritos, rotating as each side goes golden.

To taste, top tortillas with more salsa, avocado cream, and hot sauce if you like.

Tips for making the Best California Burritos

Make California Burritos ahead: If you transfer the crème to an airtight container and place a piece of plastic wrap directly on the surface of the crème before applying the lid, the avocado crema may be made and stored in the refrigerator for up to 3-4 days. The oxidation/browning that occurs when the surface of the dip/avocado comes into touch with air will be delayed as a result of this.

Also, French Fries can be cooked ahead of time and preserved in an airtight container in the fridge, but they will lose their crispiness; however, they could be reheated in the air fryer.

Don’t marinate for too long: Because the carne asada marinade is so acidic, you won’t want to leave the steak in it for as long as you would in a marinade with less citrus. If you leave the meat to marinade for more than 12 hours, the muscle fibers will break down and become gooey. 

On the other hand, be sure to marinate carne asada enough; this will bring an explosion of flavors to your taste buds. 

What Is the Best Way to Freeze California Burritos?

Cool the filling: If you don’t let the carne asada and French fries cool, the tortillas will become soggy. Assemble the burritos according to the instructions. Wrap individual burritos in foil to keep them warm—freeze burritos on a baking sheet in a single layer.

This will allow them to freeze more quickly and avoid being squashed. Fill a big freezer-friendly bag halfway with frozen burritos, remove any excess air, and seal—freeze burritos for up to three months in advance.


Share the image below to your Pinterest board if you like this California Burrito Recipe!

The Best California Burritos Recipe!

Ingredients

  • 8-10large size tortillas
  • Carne Asada
  • 3 cups Pepper Jack Sharp cheddar per burrito
  • French Fries
  • Salsa (to your liking)
  • 1peeled and sliced pineapple

For Carne Asada

Carne Asada Marinade
  • 2 TBSP of olive oil
  • 1/4cup of soy sauce
  • 1/4cup of orange juice
  • 2 TBSP of lime juice
  • 1 TBSP of brown sugar
  • 1 tsp of liquid smoke
Carne Asada Spice Mix
  • 1 TBSP of ground cumin
  • 1 TBSP of garlic powder
  • 2 tsp of smoked paprika
  • 1 tsp of salt, chili powder, and onion powder, each
  • ½ tsp of pepper, cayenne pepper, each

For the Avocado Cream

  • 2 avocados
  • 1 cup of sour cream
  • 1/4 cup of mayonnaise
  • 2 TBSP of lime juice
  • 1/2tsp of salt

Directions

For Carne Asada

  • Mix the Spice Mix using a small plastic bag (or another sealed container). Place aside.
  • Whisk the marinade ingredients together before adding them to a large ziplock bag.
  • Whisk 3 TBSP of the Spice Mix into the Marinade. Steak should be placed in the bag, and air removed completely.
  • Chill the marinade for at least 3 and a maximum of 12 hours.
  • When it’s time to cook, create a Spice Rub by combining the leftover Spice Mix with 2 teaspoons of olive oil.
  • Take out the marinade and pat the steaks dry using a paper towel (only to prevent wetness, not to eliminate the marinade or seasonings).
  • Spice Rub the steak evenly all over, then let it rest for 30 to 50 minutes at room temperature. 
  • The outdoor grill should be greased and heated to medium-high.
  • For medium-rare or medium, grill steak for 5 to 6 minutes on each side or until an internal temperature registers 130 to 135 degrees F.
  • The length of time needed to grill a steak depends depend on its thickness and desired degree of doneness. *If you prefer your steaks rare, utilize HIGH heat to achieve the charred exterior in less time.
  • After removing the steak, give it 10 minutes to rest before slicing it thinly and diagonally across the grain.
Carne Asada on the Stove

You can pan-sear carne asada, but your steak won’t fit unless you have a huge grill pan, in which case you’ll need to chop it in half and cook it in two batches.

  • In a large cast-iron pan set over medium-high heat, warm 1 tbsp of olive oil. Fry for 6 to 9 minutes on each side, or until the desired temperature is reached.

For California Burrito

  • Blend the ingredients for Avocado Crème until they are completely smooth. Keep Avocado Crème chilled in the fridge until you’re ready to use.
  • Prepare the French fries and leave them aside. Heat the grill to medium after greasing it.
  • Grill the pineapple for 7 to 9 minutes on each side or until it is slightly browned and caramelized. Remove the pineapple’s cores before chopping.
  • Cook the carne asada that has been marinated or rubbed as directed in the recipe above (also grill pineapple if there is space on your grill).
  • To get the tortillas warm and flexible, wrap them in foil and bake them for 10 minutes at 350 degrees F. (this is just my recommendation, this step is optional).

Assemble the California Burrito

  • Each burrito should start with carne asada in the middle, accompanied by fries, cheese, avocado crème, salsa, and pineapple. Wrap tightly in a burrito fashion by folding the top and bottom in.
  • Optional: Use a small amount of olive oil to gently coat a skillet and heat it over medium-high heat before browning the burritos, just a little bit on both sides, until they turn golden brown. Add more hot sauce, avocado cream, and salsa as desired to the burritos as a garnish.
The Best Authentic Meat Jelly Recipe (aka Aspic)

The Best Authentic Meat Jelly Recipe (aka Aspic)

Today we’re making a meat jelly recipe, yay! In our household, the holiday season, particularly Christmas, are a time to bring the entire extended family around the table and enjoy delectable seasonal foods. One of them, in my opinion, is the best meat jelly recipe. Read More

Motor City Pizza Costco Instructions (Effortless in 3 Ways)

Motor City Pizza Costco Instructions (Effortless in 3 Ways)

Today I will explain how to cook Motor City Pizza Costco in the oven, air fryer, and microwave. Together with the directions, I will go over some suggestions and tricks to guarantee you get that great pizza with a crispy crust. To use the air Read More

The Ultimate Blackened Tuna Steak Recipe

The Ultimate Blackened Tuna Steak Recipe

This Blackened Tuna Steak is ready in about 10 minutes and is bursting with flavor! Serve it with your favorite side dishes, in tacos, or on a sandwich! I enjoy any type of blackened fish. Every time I go to a seafood restaurant, I order it in this style.

I began to experiment at home with various spices to replicate restaurant-style Blackened Tuna in my kitchen. It took me several attempts, but I eventually got it! Let’s get started on making delicious Blackened Tuna Steaks!

Blackened Tuna Steak Recipe

What is blackened tuna steak?

A Cajun dry rub is rubbed onto all sides of a raw tuna steak to make blackened tuna. The tuna is then cooked and sliced.

How to Thaw Tuna Fish?

Begin by thawing your frozen tuna. The best approach to defrost your seafood is to place it in the refrigerator the night before you prepare your tuna fillet dish.

Are you in a rush? Place the sealed tuna steaks in a dish of cold water to thaw to expedite the defrosting phase.

Blackened Tuna Steak Recipe

Blackened Tuna Steaks Recipe

The Blackened Tuna Steak is covered with a spicy dry rub, seared, and then quickly cooked in a pan, yielding a stunning blackened tuna steak that is medium-rare on the interior, or if you like it well done, keep it in your skillet a few minutes more.

Paul Prudhomme, a famed chef, invented pan-blackening. He proposed coating redfish in melted butter, dredging it in Cajun seasonings, and cooking it in an extremely hot cast iron skillet. He suggested pan-blackening outdoors on a BBQ grill because the technique creates so many stinging eyes from the smoke.

Tuna steaks, like beef steaks, are served blood-red and rare. This Cajun-type dish includes blackening spices and a remoulade sauce. In the middle is a stunning rare tuna with an explosive, spicy crust.

Paprika, Garlic Powder, Cayenne, Onion Powder, Oregano, Salt, and Pepper are all you need for the blackened tuna flavor. This approach works with almost any sort of seafood. You could also use it on chicken or beef!

Simply combine and rub the spices and distribute them equally over both sides of the tuna. Heat the cooking oil in a big cast iron pan over medium to medium-high heat.

Once the oil has heated and is shimmering, add the Tuna Steaks. Cook for a couple of minutes on each side for rare, or 3-5 minutes on each side for medium to well done. Take away from the pan and serve right away.

Ingredients

For the Cajun Remoulade

  • 1 cup mayonnaise

  • 4 Tbsp Creole or grainy mustard

  • 2 Tbsp prepared horseradish

  • 2 Tbsp lemon juice (fresh is best)

  • 2 Tbsp Worcestershire sauce

  • 1 Tbsp ketchup

  • 2 Tbsp hot sauce (or to taste)

  • 1 Tbsp sweet paprika

  • ½ tsp ground black pepper

  • ⅓ tsp sugar

  • 1 large shallot, peeled and finely diced

  • 2 Tbsp celery, finely diced

  • 3–4 Tbsp fresh parsley, finely chopped

  • 1 scallion (green and white parts), finely chopped

  • Coarse salt, to taste

For the Blackened Tuna

  • 2 ahi tuna loin steaks

  • 1 tsp salt

  • 1 tsp black pepper

  • ½ tsp cayenne pepper (or to taste)

  • ½ tsp garlic powder

  • ½ tsp paprika

  • ¼ tsp dried thyme

  • ¼ tsp celery salt

  • 1–2 tsp cooking oil (plus melted butter for grilling, if desired)


Instructions

Make the Cajun Remoulade

  1. Mix the Sauce:
    In a bowl, combine the mayonnaise, mustard, horseradish, lemon juice, Worcestershire, ketchup, hot sauce, paprika, black pepper, sugar, shallot, celery, parsley, and scallion.

  2. Adjust Seasoning:
    Taste and season with salt and more hot sauce if you like it spicier.

  3. Chill:
    Transfer to a jar or airtight container and refrigerate for at least 30 minutes to let the flavors meld. Keeps in the fridge for up to a week.


Blackened Tuna (Stovetop or Grill)

Pan-Searing Method
  1. Prep the Tuna:
    Pat tuna steaks dry with paper towels.

  2. Mix the Rub:
    In a small bowl, combine the salt, black pepper, cayenne, garlic powder, paprika, thyme, and celery salt.

  3. Coat the Tuna:
    Rub the spice mixture all over the tuna steaks, pressing gently to adhere.

  4. Sear:
    Heat 1–2 tsp oil in a cast-iron skillet over high heat until shimmering.
    Sear the tuna for about 60 seconds per side, or until a crisp crust forms and the outside is just opaque, but the center remains pink and rare.

  5. Slice & Serve:
    Transfer to a cutting board, let rest a minute, then slice into ¼-inch pieces. Serve with a generous drizzle of Cajun remoulade and garnish with sliced scallions.


Grilled Blackened Tuna (BBQ)
  1. Preheat Grill:
    Heat your grill to high for direct grilling. Place a cast-iron skillet on the grates to preheat as well.

  2. Oil & Butter:
    Brush the skillet with oil. For extra flavor, brush one side of each tuna steak with melted butter.

  3. Grill & Sear:
    Place tuna butter-side down in the hot skillet. Sear for about 2 minutes, then flip and brush the other side with more butter.
    Sear another 2 minutes, until a deep crust forms but the center stays rare.

  4. Rest & Serve:
    Let rest a minute, then slice and serve with the remoulade.


Tips:

  • For the most authentic “blackened” flavor, cook the tuna quickly over very high heat.

  • Don’t overcook! Tuna is best served with a rare center.

  • Cajun remoulade is also great with shrimp, crab cakes, or fries.

Trust me, your Pinterest followers are craving this tuna magic. Pin it and be the culinary hero they didn’t know they needed!

BBQ Blackened Tuna Steak Recipe

Blackened Tuna Steak on Blackstone Griddle

You can also make this blackened tuna steak on your Blackstone griddle. To make blackened tuna using a griddle, simply use the same rub technique explained earlier and add 1 Tablespoon of sesame oil to the griddle and cook 5-6 oz tuna steak for 1 – 1.5 minutes on each side, or until it’s blackened nicely. 

Once the blackened tuna steak is done, place it on the cutting board, slice it into 1/4 inch pieces, and serve with Cajun Remoulade or with whatever you prefer. 

Last words

Well, I hope you’ve enjoyed this blackened tuna steak recipe; as you can see, I’ve also added Cajun Remoulade sauce within the same article, so you don’t have to go elsewhere because this sauce goes amazingly with tuna. If you have any questions or concerns, or maybe you have some great suggestions regarding this tuna recipe, please let me know in the comments section, and I’ll be happy to assist. 

Copycat Chick-Fil-A Mac and Cheese Recipe

Copycat Chick-Fil-A Mac and Cheese Recipe

Chick-fil-A Mac and Cheese, a last year’s addition to the Chick-fil-A menu, has swiftly gone to the top of the favorite menu item list. While nothing beats buying it at the restaurant, we’ve created a Chick-Fil-A mac and cheese recipe that will quickly become a Read More