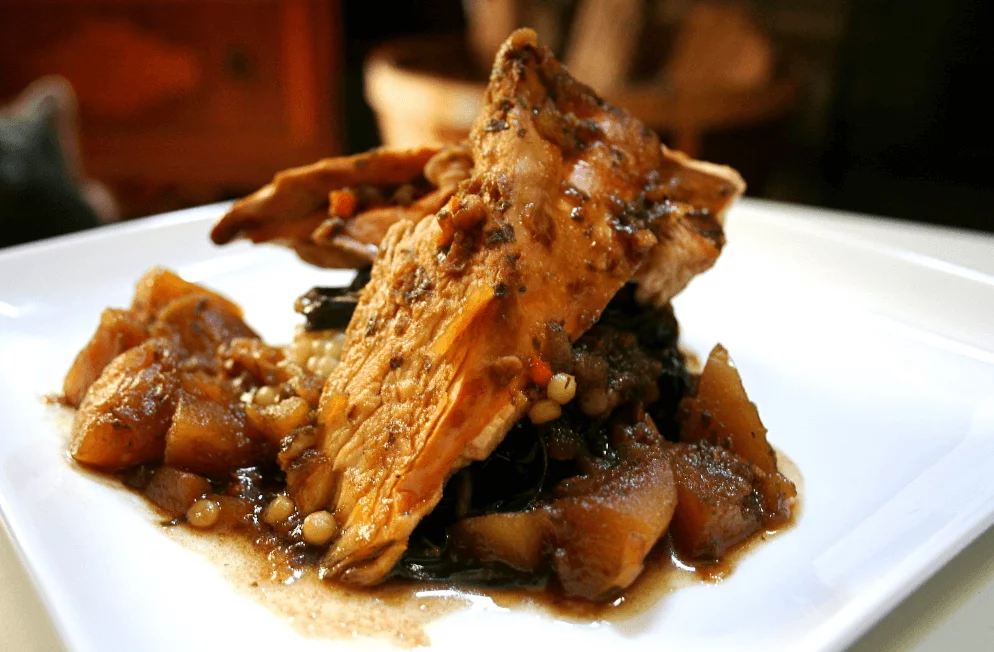
Easy and Delicious Recipes

Recent Posts

Elk Burger Easy Recipe

Elk Burger Easy Recipe

As my friend Mark says, Elk is undoubtedly one of the best exotic game meats, and It’s in the quality range with moose and bison meat. So, when preparing to make this Elk Burger and getting the recipe from my friend Mark, I knew it Read More

Easy Air Fryer Hamburgers Recipe

Easy Air Fryer Hamburgers Recipe

Air fryer hamburgers are delicious, juicy, fast, and easy to make! Having an air fryer to make hamburgers is a super-fast way to make this classic. Don’t get me wrong, I still enjoy grilled burgers, also. But perhaps there isn’t a grill available, or the Read More

Dr.Pepper Short Ribs (Braised)

Dr.Pepper Short Ribs (Braised)

So juicy and tender Dr.Pepper short ribs braised in the oven slowly on a low temp for a lovely, spicy, shredded beef dinner. A fast stovetop simmer and sear of the ingredients, then several hours within the oven, will break apart braised boneless short ribs into a fantastic sauce.

I really like braised meat. There’s something special about slow-cooked meat, falling to pieces at the touch of your finger and soaked in a rich sauce. What surprises me is how costly an excellent braise may be when you eat in a restaurant. Boneless braised short ribs cost $35 or maybe more for a tiny portion. I can simply make precisely the same for a three times lower price.

Being good at braise is a vital skill for a home chef. It can make a lovely, upscale dinner for cheap! It also makes cheaper, tougher cuts of meat into something juicy and unique without the cost of premium rib cuts.

This specific braising recipe additionally uses a component you’d probably dispose of – and it’s leftover cola! You’ve heard me right; with that which was left of a 2 liter, I made this meal Dr. Pepper short ribs, and it’s swiftly become a favorite.

Check out these Oven-Baked Baby Back Ribs

Dr.Pepper Short Ribs

Ingredients

  • 1 lb boneless beef short ribs

  • 1 tsp salt

  • 1 tsp black pepper

  • 2 Tbsp grapeseed oil (or another high-heat oil)

  • 1 red onion, diced

  • 4 garlic cloves, minced

  • 2 medium carrots, sliced

  • ¼ cup pepperoncini peppers, sliced

  • 2 Tbsp tomato paste

  • 1 Tbsp molasses

  • ¼ cup soy sauce (use gluten-free if needed)

  • 2 whole cloves + ¼ tsp ground cloves

  • 1 tsp paprika

  • 1 cup Dr. Pepper soda

  • 1 cup beef stock


Instructions

1. Preheat the Oven

Preheat your oven to 300°F (150°C).

2. Season & Sear the Ribs

Pat the short ribs dry with paper towels. Season generously with salt and pepper.
In a Dutch oven or other oven-safe heavy pot over medium-high heat, add grapeseed oil.
Once hot, sear the short ribs on all sides until deeply browned (about 2–3 minutes per side).
Remove the ribs and set aside.

3. Sauté the Vegetables

In the same pot, add the diced onion, sliced pepperoncinis, and carrots.
Cook for about 4–5 minutes, stirring occasionally, until the onions start to take on some color.
Add the minced garlic and sauté for another 30 seconds until fragrant.

4. Build the Sauce

Stir in the tomato paste, paprika, molasses, and soy sauce until the vegetables are well coated.
Pour in the Dr. Pepper and beef stock, then add both the whole and ground cloves.
Stir well, scraping up any browned bits from the bottom of the pot.

5. Braise the Ribs

Return the short ribs to the pot, nestling them into the liquid.
Bring to a gentle boil, then cover with a tight-fitting lid (or foil).
Place in the oven and braise for 3½ to 4 hours, or until the ribs are fork-tender.

6. Serve

Serve the ribs hot with their braising liquid spooned over the top.
They pair beautifully with creamy mashed potatoes, polenta, or crusty bread for soaking up the sauce.


Tips & Variations

  • Deeper Flavor: For an extra rich taste, sear the carrots separately for 2–3 minutes before adding the onions.

  • Spice Level: Add a pinch of red pepper flakes with the paprika for subtle heat.

  • Pepperoncini Swap: Banana peppers or mild pickled peppers also work.

Freezer-Friendly Instructions

These short ribs freeze beautifully, making them a great make-ahead meal.

  1. Cool Completely: After cooking, let the short ribs and sauce cool to room temperature.

  2. Portion: Transfer ribs and sauce into freezer-safe containers or heavy-duty freezer bags, removing as much air as possible.

  3. Label & Freeze: Label with the date and freeze for up to 3 months.

  4. Reheat: Thaw overnight in the refrigerator. Reheat gently on the stovetop over low heat, or in a 300°F (150°C) oven until heated through. If the sauce has thickened too much, add a splash of beef stock or water to loosen it.

💡 Tip: Freeze in individual portions for quick single-serve meals, perfect for lunches or busy weeknights.

Dr. Pepper Short Ribs

Dr. Pepper Braising Liquid

So just why cola, you ask? Well, for one significant factor, it’s the one drink my family and I can’t ever seem to give up on totally. From time to time, that craving for Dr. Pepper comes. So, we’ve seen that purchasing a case means we’ll actually drink the entire case, so rather than that, we choose for an inexpensive 2-liter, knowing it’ll go empty before we finish it and saving ourselves the money.

Also, I really don’t like wasting any food—even leftover cola. I spent money on that, which adds up faster than one thinks. So instead, I began considering ways to make use of it. It’s all things considered a sweet liquid with an enormous number of flavors in it. I knew those legendary 23 flavors In Dr.Peppers would be beautiful when enhanced and caramelized on a tender bit of beef.

And it’s done! Allow it to cook, take out, and serve! Cooking longer in comparison to the 4 hours might need extra liquid and diluting the braise flavors, which explains why 3.5 hours is my ideal time. It will undoubtedly be tender and fall to pieces when it’s taken out. Just spoon the meat, carrots, and some liquid over your chosen side dish. I  like rice and grits and love it with polenta.

 
Easy Hibachi Chicken with Fried Rice Recipe

Easy Hibachi Chicken with Fried Rice Recipe

This Hibachi Chicken with Fried Rice is a full chicken dinner that is delicious! With vegetables made restaurant-style, fried rice, and very tender chicken, this hibachi recipe is served with a mustard dipping that is a spicy sauce that teleports you to the Japanese kitchen! Read More

Easy Keto Mason Jar Ice Cream

Easy Keto Mason Jar Ice Cream

Who can resist the allure of ice cream? Equally, finding someone who doesn’t appreciate a simple and quick recipe is rare. We’ve ingeniously combined these universal loves into our Keto Mason Jar Ice Cream, delivering both delight and convenience right to your kitchen. A Fusion Read More

Air Fryer Pork Tenderloin Recipe

Air Fryer Pork Tenderloin Recipe

Pork tenderloin is better than ever with air fryer style! Fast and high-temperature cooking of the air fryer pork tenderloin makes it brown on the exterior but still juicy inside!

Pork tenderloin is really an excellent lean cut of pork. But because of this, you do not wish to overcook it. Over time, I’ve found approaches to cooking pork tenderloin to ensure that it’s brown externally while still being juicy and delicious on the inside.

When I made this air fryer pork tenderloin, I was more delighted than ever about a recipe I’ve made recently. The seasoning rub flavors are perfect, and it also worked wonderfully with these pork steaks. The pork is juicy; you can see just how juicy it is in the video instructions I’ve added at the end of the article!

What is Pork Tenderloin?

If you have ever asked yourself what filet mignon of pork, it is pork tenderloin. It is a very tender and lean piece of pork. It can be made in numerous ways and works excellently with various seasoning mixtures.

If you want to smoke your pork, I suggest you use pork lion cut (check out the recipe) because it’s thicker and more suitable for smoking. 

Preparing Air-Fryer Pork Tenderloin

Pork tenderloin cooked in the air fryer is a delicious, wholesome, homemade choice that is ideal for a hectic weekday.

Indeed, one of my favorite ways to prepare pork recipes is by using a seasoning rub mixture of brown sugar, onion powder, smoked paprika, garlic powder, ground mustard, pepper, and salt. And possibly just a splash of cayenne for only a little heat.

The seasoning mix, combined with the simplicity of an air fryer, will create a pork tenderloin you will enjoy eating and sharing with others. The exterior of pork tenderloin will crisp up, and the brown sugar will caramelize to make an explosion of flavors.

High-speed circulating heat from the air fryer and near the heating element is ideal, so your pork tenderloin stays juicy and delicious inside.

Pork tenderloin may be prepared in the oven, a pan, or — my newest favorite — the Air Fryer. With this simple air-fryer recipe, that’s what we’re doing today.

The tenderloin is quickly coated with a delicious mustard and spice mixture before being placed directly into the air fryer basket. Dinner is ready in around 20 minutes!

What do our readers think about this recipe

We care about our readers and want to help them easily make the best recipes. You’re under no obligation to believe me. Many readers have tried this dish and have talked about it. Below are just some testimonials that we’ve gotten from Pinterest users.

Air Fryer Pork Tenderloin Recipe

Air Fryer Pork Tenderloin Recipe

Ingredients

  • 1 whole pork tenderloin (about 1–1.5 lbs)

  • 2 Tbsp brown sugar

  • 1 Tbsp smoked paprika

  • 1 ½ tsp salt

  • 1 tsp ground mustard

  • ½ tsp onion powder

  • ½ tsp ground black pepper

  • ⅓ tsp garlic powder

  • ¼ tsp cayenne pepper (optional, for heat)

  • ½ Tbsp olive oil


Instructions

  1. Make the Spice Rub
    In a small bowl, mix together the brown sugar, smoked paprika, salt, ground mustard, onion powder, black pepper, garlic powder, and cayenne (if using).

  2. Prep the Pork
    Trim any silver skin or excess fat from the pork tenderloin. Pat it dry with a paper towel for better browning.

  3. Season
    Rub the pork all over with olive oil, then coat evenly with the spice mixture, pressing it gently so it sticks.

  4. Air Fry
    Preheat the air fryer to 400°F (200°C) for about 5 minutes. Place the pork tenderloin in the basket and cook for 20 minutes, flipping halfway through, or until the internal temperature reaches 145–160°F (63–71°C), depending on your preference.

  5. Rest & Serve
    Transfer the pork to a cutting board, tent it loosely with foil, and let it rest for 5 minutes. Slice into medallions and spoon over any juices collected on the board.

Serving Tip: Pair with roasted veggies, a fresh salad, or mashed potatoes for a complete meal.

Freezer-Friendly Instructions

  • Before Cooking: You can season the raw pork tenderloin and wrap it tightly in plastic wrap, then foil, and freeze for up to 3 months. Thaw overnight in the refrigerator before air frying.

  • After Cooking: Slice the cooked pork, place it in airtight freezer-safe containers with its juices, and freeze for up to 2 months. Reheat in the air fryer or oven until warmed through.

Give that photo below a click and pin it to your Pinterest board. After all, good food is worth sharing – even if it’s just a picture!

Air Fryer Pork Tenderloin Best Recipe

Air Fryer with the Best Pork Tenderloin Seasoning Rub

This recipe for air fryer pork tenderloin could not be much more straightforward. I’ve used a medium-sized bowl and combined together with the dry ingredients.

Before rubbing the ingredients on the tenderloin, we’ll need to cut off any of the “silver skin,” which is a thin membrane that’s usually on the exterior area of the pork tenderloin.

You can do this using a sharp knife and just peel it away. After that, coat the pork tenderloin with olive oil and rub it in all of the seasoning mix.

Temperature to Cook Pork Tenderloin in Air Fryer

Preheat your air fryer for 5 minutes at 400 F. When the air fryer is heated, keep a consistent temperature of 400 F, select air fry, and set the time for 20 – 23 minutes. Most pork tenderloins are often between 1.25 Lbs to 2 Lbs.

For smaller-size pork tenderloin, opt for 20 minutes. For bigger-size pork, choose 23 minutes. It is suggested to cook pork tenderloin to an interior temperature of 145 F to 160 F.

Air fryer pork tenderloin

Let The Pork Tenderloin Rest After Cooking in Air-Fryer

When the cooking is completed, slowly remove the pork loin from your air fryer, put it on a dish or cutting board, and allow it to rest for about 3 – 5 min before slicing.

Pork Tenderloin Leftovers

Pork tenderloin leftovers can be kept in an airtight container for up to four days in the fridge. For up to four weeks, freeze slices in small zip-lock bags. Make sure to label the bag with the date.

Air-Frier Pork Tenderloin Video Recipe

Since this Air-Fryer Pork tenderloin recipe is so popular, it was updated with additional information based on your questions and suggestions with the video instructions below. 


FAQs

My Pork Tenderloin I a bit Pink; is that ok?

You might be slightly frightened if your pork tenderloin is pink inside when you cut into it. Be at ease, though! You may be sure the pork is cooked adequately if the thickest area has the proper internal temperature (145 °F). It’s acceptable if the hue is a little pink.

Can I Store and reheat Pork tenderloin?

Any leftovers should be carefully wrapped in tin foil or plastic wrap for simple storage. Zip-top bags are another option and are so simple! Four days or more in the refrigerator.

To reheat, roast the remaining pork at 350 degrees Fahrenheit or cook it in a covered pan over low heat. Pork will get tough if you cook it too long.

If you like this recipe, be sure to check

Air-Fryer chicken nuggets recipe 

Air Fryer Corn Dogs Recipe


Garlic Parmesan Creamy White Sauce

Garlic Parmesan Creamy White Sauce

This heavenly Garlic Parmesan White Sauce has amazing flavors from Parmesan cheese and garlic. Combined with pasta, pour it over some roasted veggies; great as a dipping sauce as well as pizza sauce. I like to make a sauce that serves multiple purposes. If you Read More

Sous Vide BBQ Pulled Pork Shoulder Recipe

Sous Vide BBQ Pulled Pork Shoulder Recipe

Sous Vide BBQ Pulled Pork Shoulder slow cooked for 24 hours, and finished a smokey barbecue leading to probably the most tender and juicy pulled pork you’ve tasted. Like the majority of sous vide recipes, two-step cooking process is the thing. The two-step cooking is Read More

El Pollo Loco Chicken Recipe (Copycat)

El Pollo Loco Chicken Recipe (Copycat)

Marinated overnight in pineapple juice and citrus, this El Pollo Loco Chicken Recipe will be enjoyed by everyone. El Pollo Loco Copycat is really easy to make and has all the classical flavors needed.

Have you experienced El Pollo Loco in your area? I believe it might be a mostly West Coast chain of Mexican fast food. I recall my mom picking it up when I was little and enjoying the juicy chicken stuffed in a tortilla. It was absolutely so simple but always so delicious. Eventually, she developed an outstanding recipe. This really is just excellent chicken.

I really enjoy simple recipes that don’t take much preparation, and this really is one of them. This El Pollo loco chicken is excellent because the marinade takes five minutes to make, and you are able to just throw the chicken in and just forget about it. 

El Pollo Loco Chicken is not easy to explain if you haven’t tried it. There is a specific citrus flavor, but there’s also an absolute chicken quality to it. I used to observe them make El Pollo Loco chicken on my break while looking forward to being done.

And what I saw is they put a steel press on top of it. You don’t need to do this, but it is the better way to acquire a delicious crispy skin on the chicken.

Does El Pollo Loco refer to the crazy chicken?

El Pollo Loco (Spanish for “The Crazy Chicken”) is the name of two independent restaurant chains that specialize in Mexican-style grilled chicken. Both were founded by Juan Francisco Ochoa. He established the first El Pollo Loco restaurant in Guasave, Sinaloa, Mexico, in 1974.

 El Pollo Loco Chicken

Ingredients

  • 1 Tbsp white vinegar

  • 2 cloves garlic, minced

  • ½ tsp salt

  • ½ tsp dried oregano

  • ¼ tsp ground black pepper

  • ¼ jalapeño, seeded and minced

  • 1 cup pineapple juice

  • 2 Tbsp lime juice

  • 1 Tbsp canola oil

  • 8 bone-in chicken thighs, skin on


Instructions

1. Make the Marinade

  1. In a large bowl, whisk together vinegar, garlic, salt, oregano, pepper, jalapeño, pineapple juice, lime juice, and canola oil.

  2. Reserve ¼ cup of the marinade in a small container for basting later.


2. Marinate the Chicken

  • Add chicken thighs to the bowl, turning to coat well.

  • Cover with plastic wrap and refrigerate for at least 8 hours, ideally overnight.


3. Oven Roast & Crisp

  1. Preheat oven to 425°F (220°C).

  2. Arrange chicken skin-side up in a cast iron skillet or oven-safe pan.

  3. Roast for 25 minutes, or until skin begins to crisp and internal temperature is at least 165°F (74°C).


4. Press & Sear

  1. Transfer the skillet to the stovetop over medium heat.

  2. Spray a sheet of foil lightly with canola oil and place it, oiled side down, over the chicken.

  3. Weigh down with a foil-wrapped brick, bacon press, or another heavy pan.

  4. Cook for 2–3 minutes, remove the weight, flip the chicken, baste with reserved marinade, and cook another 2–3 minutes.


5. Serve

  • Serve hot with grilled corn, tortillas, or rice, drizzling with any leftover pan juices.


Grill Option

Instead of oven-roasting, grill chicken over medium heat for 6–7 minutes per side, pressing lightly during the last few minutes for charred, crispy skin.


Make-Ahead & Freezer Tips

  • Make Ahead: Marinate chicken up to 24 hours in advance. Cooked chicken can be stored in the refrigerator for up to 4 days.

  • Freezer-Friendly: Place chicken and marinade in a freezer bag and freeze up to 2 months. Thaw overnight in the fridge, then cook as directed.

el pollo loco chicken recipe (copycat)

What to serve with El Pollo Loco Chicken?

Yes, this El Pollo loco chicken is great on its own. However, the best way to serve it is to add some macaroni and cheese on the side and some warm, delicious tortillas. 

Important Notes For El Pollo Loco Chicken Recipe

  • It is true that El Pollo Loco uses coloring. Yes, El Pollo Loco uses food coloring. They get it done to help make the chicken look better. This has no effect on the flavor, so I left it out but noted it in this recipe.
  • Chicken is marinated for a long period of time. That’s why it’s so rich in flavor without adding any sauce!
  • You are able to cook it using your stovetop, too, if you do not wish to bake, but be careful that you don’t burn the chicken skin too much. The flavor of the crispy chicken skin is crucial to the El Pollo loco recipe.


El Pollo Loco Chicken Video Recipe

If you’ve liked this El Pollo Loco Chicken, you must try these popular copycat recipes below:

Popeyes chicken sandwich recipe
KFC Chicken Littles recipe (Copycat)
McDonald’s Chicken McGriddles (Copycat)
Chick-Fil-A Chicken Minis and Burgerville Fried Asparagus with Garlic Aioli (Copycat)

New York Strip Roast Recipe (With Garlic and Herbs)

New York Strip Roast Recipe (With Garlic and Herbs)

New York strip loin Roast beef for a holiday dinner or festive occasion is a straightforward and impressive meal that everyone will just love. I’ve made this recipe with an awesome blend of garlic and herbs, and the results are fantastic. The New York Strip Read More