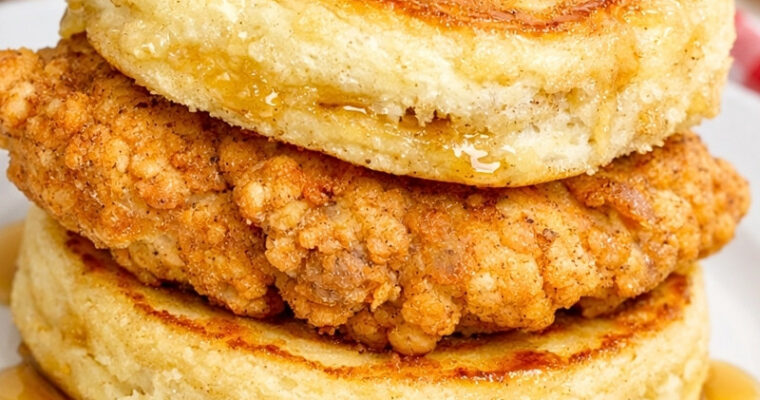
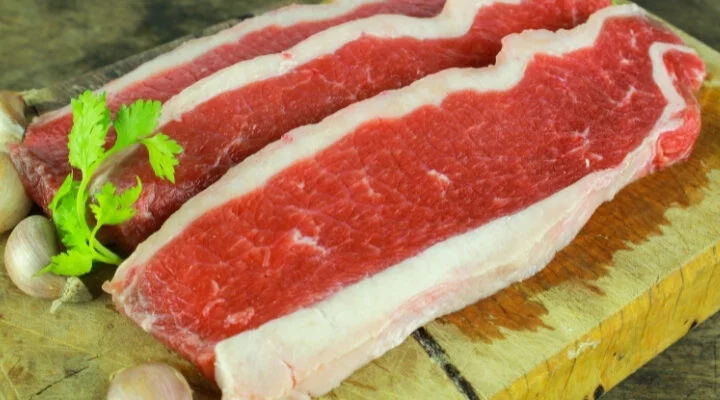
Easy and Delicious Recipes

Recent Posts

How to make Turmeric Paste (The Best Recipe)

How to make Turmeric Paste (The Best Recipe)

Today, we will dive in and show you how to make Turmeric Paste. And take full advantage of the healing properties of turmeric’s healing power. Whether you use it in smoothies, turmeric golden milk, curries, or this homemade golden paste is much better than its Read More

Ground Turkey Meatloaf – Gluten Free Recipe

Ground Turkey Meatloaf – Gluten Free Recipe

This gluten-free turkey meatloaf is moist, flavorful, and perfectly seasoned, with a light topping of sugar-free ketchup for a classic finish. It’s an easy, healthy dinner that pairs beautifully with mashed potatoes, roasted veggies, or a simple side salad. Ingredients 1 medium yellow or white Read More

Low-Carb Pepperoni Pizza with Cauliflower Crust

Low-Carb Pepperoni Pizza with Cauliflower Crust

Are you avoiding carbs but craving delicious pizza? This Low-carb Pepperoni Pizza with Cauliflower Crust is super flavorful and gluten-free.

I made these cauliflower bites for lunch, and we just loved them. We’ve enjoyed them so much that I assumed I should try and make this Low-carb pepperoni Cauliflower pizza Crust myself. Of course, we really enjoyed it, which was so delicious.

Of course, it’s not made with flour, so the taste of this pizza is somewhat different from the normal pizzas; however, I promise that you won’t be disappointed. It’s so flavourful with mozzarella cheese, pepperoni, and mushrooms. You don’t need to use the same toppings are me. Feel free to feature whatever you have got in your fridge.

To make this pizza, first, you’ll need a food processor or a grater to form the rice-like consistency, and then you have to microwave it to help release some wetness from the cauliflower. The next step is to dump all the cauliflower into a kitchen towel and squeeze it as hard as possible. This is the key to a crisp crust. If you skip this step, your crust could be soggy, and we don’t want that.

Low-Carb Pepperoni Pizza

Ingredients

  • 1 head cauliflower
  • 1 whole egg
  • Teaspoon of oregano
  • 1/2 teaspoon of garlic powder
  • ground fresh black pepper and salt
  • 1/2 cup of marinara sauce
  • ½ cup of grated mozzarella
  • ¼ cup grated of Parmesan cheese
  • ¼ of sliced mushroom
  • 3 oz of Pepperoni

How to make Low-Carb Pepperoni Pizza with Cauliflower Crust

  • Heat up the oven to 380F.
  • Cover a baking sheet with parchment, gently spray with oil, and set aside.
  • Pulse the cauliflower florets in your food processor for just about 25 seconds till it’s a rice-like consistency.
  • Put the cauliflower in a microwave-safe bowl and microwave it for about four minutes.
  • After the cauliflower has cooled enough to handle, place it into a kitchen towel and wring it out. You must squeeze out as much as you can.
  • Place the cauliflower in a bowl and add the egg, and season it well. Use your hands to mix everything and form a ball.
  • Place the dough on a baking sheet and press the ball to form a pizza shape. The crust should be no over ½ in. (1 cm) thick.
  • You should use a kitchen towel to help you to create a pizza shape. It is useful to absolve more liquids if necessary.
  • Bake for about 20-25 minutes, and remove from the oven.
  • Top it with pizza sauce, pepperoni, cheese, and mushroom.
  • Bake the pizza for about 15 minutes more or till the cheese has melted nicely.
Keto Zucchini and Spinach Lasagna

Keto Zucchini and Spinach Lasagna

This vegetarian keto Zucchini and Spinach Lasagna is gluten-free and low-carb. It is made with skinny ricotta, tomato sauce, mozzarella, and zucchini noodles. How to make the perfect zucchini noodles? As you see, rather than lasagna noodles, I take advantage of zucchini noodles. So, how Read More

Chili with Butternut Squash – Whole30 Low-Carb

Chili with Butternut Squash – Whole30 Low-Carb

This no bean this Chili with Butternut Squash (Whole30 Low-Carb) is a perfect recipe to treat yourself to this fall. It’s rich, thick, delicious, low-carb, paleo, and gluten-free.  Reasons why you’ll love this Chili with Butternut Squash This recipe is super flavorful with many spices, Read More

Juicy Garlic Lamb Chops with Herbs

Juicy Garlic Lamb Chops with Herbs

These Juicy Garlic Lamb Chops with Herbs are very easy to make, so please don’t let it intimidate you. Once you master the cooking of lamb properly, you can make this delicious and impressive holiday meal.

Juicy Garlic Lamb Chops with Herbs 4

Ingredients

  • 4 lamb chops

  • 1 tbsp olive oil

  • 5 garlic cloves, minced

  • 2 tsp fresh rosemary, chopped

  • 2 tsp fresh parsley, chopped

  • 1½ tsp dried oregano

  • Salt and freshly ground black pepper, to taste


Instructions

1. Prep the Lamb

  • Remove the lamb chops from the refrigerator 30–40 minutes before cooking to bring them to room temperature. This ensures even cooking.

  • Pat the chops completely dry with paper towels. A dry surface helps achieve a golden, flavorful sear.

  • Season generously with salt and freshly cracked black pepper on both sides.


2. Make the Garlic Herb Marinade

  • In a small bowl, mix together the olive oil, garlic, rosemary, parsley, and oregano.

  • Rub the mixture all over the lamb chops, making sure they are evenly coated.

  • For the best flavor, marinate for at least 1 hour, or up to 4 hours in the refrigerator.


3. Cook the Lamb Chops

  • Heat a 12-inch skillet (preferably cast iron) over medium-high heat.

  • Place the chops fat-side down first to render the fat, pressing lightly with tongs for 2–3 minutes until the edges are crisp.

  • Lay the chops flat and sear for 3 minutes per side for medium-rare, or 4 minutes per side for medium. Avoid moving the chops while they sear to get a deep, golden crust.


4. Rest the Meat

  • Transfer the lamb chops to a plate or cutting board.

  • Let them rest for 10 minutes before serving. Resting allows the juices to redistribute, keeping the meat tender and juicy.


5. Serve

  • Garnish with a sprinkle of fresh parsley or rosemary for color and freshness.

  • Pair with roasted vegetables, mashed potatoes, or a light salad for a complete meal.


Make Ahead & Storage

  • Make Ahead: Prepare the marinade and coat the chops up to 24 hours in advance. Keep covered in the refrigerator until ready to cook.

  • Refrigerator: Store cooked lamb chops in an airtight container for up to 3 days. Reheat gently in a skillet over medium heat to avoid drying out.

  • Freezer: Freeze uncooked, marinated chops for up to 2 months. Thaw overnight in the fridge before cooking.


Pro Tips for Perfect Lamb Chops

  • Use a meat thermometer for precision: 125°F for medium-rare, 135°F for medium.

  • Cast iron skillets create the best crust thanks to even, high heat.

  • Letting the chops rest is key — skipping this step often leads to dry meat.

Enjoyed these lamb chops? Pin the image below to your Pinterest board to share the deliciousness with others! 🍽️📌

Juicy Garlic Lamb Chops with Herbs 3


What is the correct internal temperature for lamb chops?

The general agreement is that the best way to cook lamb chop recipes is to medium-rare. At medium-rare, the lamb’s inner temperature will be 145 degrees Fahrenheit, and the meat will be nice and pink within. Most of the microorganism on this kind of meat is on the surface.

As a result, it doesn’t need to be cooked as thoroughly as poultry. I don’t advise cooking to a temperature higher than 160F because the lamb can become chewy and too dry to be enjoyable.

Also, check out this garlic butter pork chops recipe in the air fryer!

Low Carb Chocolate Muffins With Almond Flour

Low Carb Chocolate Muffins With Almond Flour

These Low-carb Chocolate Muffins With Almond Flour are great if you want to give up desserts and switch to a low-carb lifestyle. It’s made with cocoa powder, almond flour, and natural sweetener. It’s time to indulge your appetite with these Low-carb Chocolate Muffins; you won’t feel Read More

Juicy Skillet Pork Chops With Sauce

Juicy Skillet Pork Chops With Sauce

Juicy Skillet Pork Chops With Sauce is a quick, healthy, and easy-to-make dinner. This recipe ensures juicy, tender, and flavorful pork chops without fuss. Ingredients 4 about 1-inch thick pork chops Salt to your liking tablespoon of flour 1 teaspoon of chili powder 1 teaspoon Read More

Easy Instant Pot Pulled Pork Recipe

Easy Instant Pot Pulled Pork Recipe

You want the smoky, juicy, tender, savory taste of pulled pork, but you don’t want to stand over a smoker all day. Our recipe for Easy Instant Pot Pulled Pork is just what you need. With just basic ingredients and your trusty Instant Pot, you can make delicious pulled pork in a fraction of the time.

No more having to wait around for hours for your pork to smoke just right, no more testing the temperature every several minutes, and no longer worrying about running out of propane. The Instant Pot does all the hard work for you, so you can sit back, relax, and smell how good your food is cooking.

This recipe is great for people who want to show off their BBQ skills to their friends and family without having to work too hard. And what’s best? The next day, the pulled pork tastes even better, so you can eat it for days. So, get your Instant Pot ready, get your ingredients ready, and let’s start cooking!

Easy Instant Pot Pulled Pork Recipe

Ingredients

  • 4 lb pork butt roast (bone-in or boneless)

  • 3 tbsp brown sugar

  • 2 tsp salt

  • 1 tsp ground mustard

  • 1 tsp black pepper

  • 1 tsp onion powder

  • 1 tsp paprika

  • ½ tsp garlic powder

  • ¼ tsp cayenne pepper

  • 1½ cups chicken broth

  • 1 tbsp Worcestershire sauce

  • 1 tsp liquid smoke

  • 2 tbsp olive oil

  • 1 cup BBQ sauce (your favorite)


Instructions

1. Prep the Pork

  • Trim excess fat from the pork.

  • Cut into 4 equal chunks to help it cook evenly.


2. Make the Dry Rub

  • In a large bowl, combine brown sugar, salt, ground mustard, pepper, onion powder, paprika, garlic powder, and cayenne.

  • Toss the pork chunks in the seasoning until thoroughly coated.


3. Sear the Pork

  • Set the Instant Pot to Sauté and wait until it displays “Hot.”

  • Add olive oil and sear the pork in batches, 2 minutes per side, until browned.

  • Remove and set aside on a plate.


4. Deglaze the Pot

  • Press Cancel to stop sautéing.

  • Pour in ½ cup of chicken broth and scrape the bottom with a wooden spoon to release any browned bits. This prevents the “burn” warning during pressure cooking.


5. Pressure Cook

  • Return the seared pork chunks to the pot.

  • Add the remaining chicken broth, Worcestershire sauce, and liquid smoke.

  • Secure the lid, set the valve to Sealing, and cook on High Pressure for 50 minutes.

  • Allow for a 10-minute natural release, then carefully quick-release any remaining pressure.


6. Shred and Sauce

  • Transfer the pork to a large bowl and shred with two forks.

  • Mix in BBQ sauce or drizzle some of the flavorful cooking liquid over the shredded meat for extra juiciness.


7. Serve

  • Serve on brioche buns, in tacos, over baked potatoes, or alongside coleslaw and cornbread for a hearty meal.


Make Ahead & Storage

  • Make Ahead: Cook and shred the pork, then store covered in the cooking juices in the fridge for up to 2 days before serving.

  • Refrigerator: Store leftovers in an airtight container for up to 4 days. Reheat gently on the stovetop or in the microwave with a splash of broth.

  • Freezer: Portion the cooled pork into freezer bags and freeze for up to 3 months. Thaw overnight in the fridge and reheat as needed.

If you like this delicious pulled pork recipe for the instant pot, it’s time to spread the love! Why not add the tasty picture to your Pinterest board and let your followers in on the tasty secret? You will not only tell people about this tasty treat, but you will also show off your cooking skills. Don’t be shy; let’s get those pins sticking and tickle some taste buds. 🙂

Easy Instant Pot Pulled Pork


Check out this Sause Vide BBQ Pork Shoulder Recipe

How to Make Burgers with Ground Beef without Egg

How to Make Burgers with Ground Beef without Egg

Making juicy, flavorful burgers without eggs is much easier than you think. This allergy-friendly burger recipe uses fewer ingredients than traditional versions, but the moisture and texture are spot-on — and the patties hold together perfectly without ever falling apart. The Secret to Egg-Free Burgers Read More