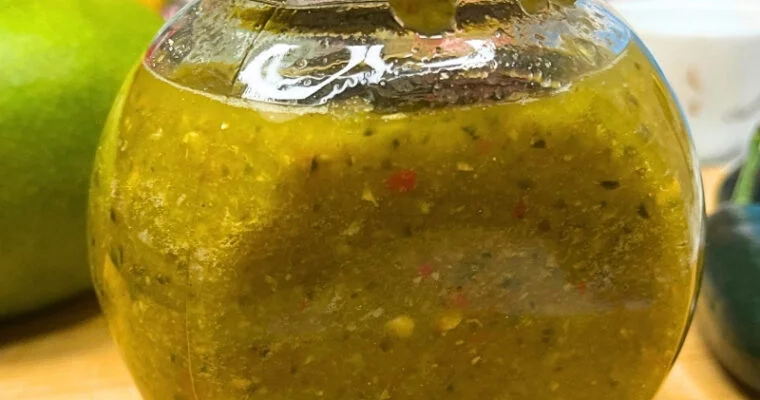
Easy and Delicious Recipes

Recent Posts

Juicy Air Fryer BBQ Chicken Drumsticks

Juicy Air Fryer BBQ Chicken Drumsticks

Some days, you just want dinner to be simple, fast, and really satisfying. These air fryer BBQ chicken drumsticks check all the boxes—they’re crispy on the outside, juicy in the center, and slathered in sticky, smoky BBQ sauce that makes you want to lick your Read More

Air Fryer Frozen Brussels Sprouts

Air Fryer Frozen Brussels Sprouts

Need a quick and tasty way to prepare frozen Brussels sprouts? This air fryer recipe turns frozen sprouts into crispy, golden veggies so flavorful, you’ll hardly believe they weren’t fresh. Perfect when you’re short on time but still want something delicious, air frying ensures caramelized, Read More

Perfectly Crispy Air-Fryer Roast Potatoes (Herb-Infused)

Perfectly Crispy Air-Fryer Roast Potatoes (Herb-Infused)

There’s something magical about a perfectly crispy roast potatoes—that satisfying crunch when you bite in, followed by a soft, fluffy center. It’s the kind of side dish that can steal the spotlight from any main course. While many associate crispy roast potatoes with British Sunday roasts, where they’re tossed in beef fat and cooked to golden perfection, you don’t need a roasting pan or hours in the oven to achieve those results.

Instead, enter the air fryer—the game-changing kitchen gadget that delivers next-level crispiness in half the time. By using a few key techniques—parboiling with a touch of baking soda to create that signature rough texture, infusing oil with garlic and herbs, and letting the air fryer work its magic—you get roast potatoes so good, they might just become your new obsession.

Now, this recipe technically serves 6-8. But let’s be real. That’s only if you have the willpower to stop eating them. Some of us were just trying to make a side dish, and now we’re standing over the air fryer shoveling crispy potato chunks into our mouths like we haven’t eaten in days. Don’t say I didn’t warn you.

Perfectly Crispy Air Fryer Roast Potatoes Herb Infused 2 1

Ingredients:

  • 2 pounds (about 1 kg) russet or Yukon Gold potatoes, peeled and cut into even-sized chunks

  • ¼ teaspoon (2 g) baking soda

  • 1 tablespoon kosher salt (for boiling) + extra for seasoning

  • 4 tablespoons extra-virgin olive oil, duck fat, goose fat, or beef fat

  • 2 cloves garlic, minced

  • 1 Tablespoon fresh rosemary, finely chopped

  • ¼ teaspoon black pepper, freshly ground

  • 1 small handful fresh parsley, finely minced

Instructions:

Step 1: Parboil the Potatoes

  1. Bring 1 quart (1L) of water to a boil in a large pot.

  2. Stir in 1 tablespoon kosher salt and ¼ teaspoon baking soda.

  3. Add the potato chunks and boil for 8-10 minutes, until just fork-tender but still holding shape.

  4. Drain and let sit in the colander for 2 minutes to release excess steam.

Step 2: Infuse the Oil

  1. In a small saucepan, heat 2½ tablespoons oil over medium-low heat.

  2. Add garlic, rosemary, and black pepper, stirring constantly for about 2 minutes until the garlic just turns golden.

  3. Strain the oil into a large bowl, setting the garlic-rosemary mixture aside.

Step 3: Coat & Rough Up the Potatoes

  1. Toss the steamed potatoes in the infused oil and a pinch of extra salt.

  2. Shake the bowl roughly until a starchy coating forms on the potato edges.

Step 4: Air Fry to Crispy Perfection

  1. Preheat your air fryer to 400°F (200°C) for 5 minutes.

  2. Spread the potatoes in a single layer in the air fryer basket.

  3. Cook for 10-12 minutes, shake the basket, then cook for 10-12 more minutes until crispy and golden brown.

Step 5: Finish & Serve

  1. Toss the potatoes with the reserved garlic-rosemary mixture and fresh parsley.

  2. Serve immediately with your favorite meal or dipping sauce.

Perfectly Crispy Air Fryer Roast Potatoes

Loved this recipe? Save it for later and share the crispy magic—just pin the image below to your favorite Pinterest board!

Perfectly Crispy Air Fryer Roast Potatoes Herb Infused 3 1

Video Recipe

Tips & Tricks for the Crispiest Air Fryer Roast Potatoes

Don’t skip the parboil.
Yes, it’s an extra step—but it’s the step. It softens the insides and sets the stage for that legendary crust. Skipping it is basically potato sabotage.

Baking soda isn’t optional.
That tiny bit of baking soda changes the pH of the water, helping the surface of the potatoes break down and go starchy. That starchy layer = crispiness heaven.

Steam dry = crunch gold.
Letting the potatoes sit in a colander after boiling helps moisture escape, which means you’re not steaming them in the air fryer. Dry potatoes = crispier crust.

Shake it like you mean it.
Tossing the boiled potatoes with infused oil roughly helps build up that mashed potato-like coating on the outside. It looks messy, but that’s the texture you’re after.

Don’t crowd the basket.
If your air fryer is on the smaller side, cook in two batches. Overcrowding leads to sad, soggy potatoes—and no one wants that.

Watch the garlic.
Infuse the oil, but don’t leave the garlic in during air frying—it’ll burn and turn bitter. Straining the oil keeps the flavor, not the char.

Salt at the end, too.
Always taste and adjust salt after tossing with the final herb-garlic mix. Potatoes soak up flavor like a sponge, and a little sprinkle at the end goes a long way.

Crispy Ranch Air Fryer Chicken Nuggets

Crispy Ranch Air Fryer Chicken Nuggets

Craving something crispy, flavorful, and easy to make at home? These ranch chicken nuggets are coated in a creamy, herb-packed dressing and finished with a golden breadcrumb crust—all done right in the air fryer. With every bite delivering juicy chicken and serious crunch, this recipe Read More

Hearty Spring Bean Soup Recipe

Hearty Spring Bean Soup Recipe

Welcome spring with this delightful and nourishing Spring Bean Soup, brimming with wholesome ingredients and vibrant flavors. Tender beans, fresh vegetables, and aromatic herbs come together beautifully in a comforting dish that is both satisfying and easy to prepare. Perfect for a cozy family dinner Read More

Stuffed Sauerkraut Cabbage Rolls (Serbian Sarma)

Stuffed Sauerkraut Cabbage Rolls (Serbian Sarma)

If you’re looking for the ultimate comfort food, you can’t go wrong with Sarma—Serbian-style stuffed sauerkraut rolls. This slow-cooked dish is rich, hearty, and packed with deep, smoky flavors.

Some say Sarma has Croatian origins, but I’ve only tried the Serbian version, and let me tell you—it’s absolutely amazing! The combination of tangy sauerkraut leaves, seasoned meat, and slow-simmered broth makes this a must-try dish for anyone who loves traditional Balkan cuisine.

This recipe follows the authentic Serbian method, step by step, so you can make perfect Sarma at home. Whether it’s your first time making stuffed cabbage rolls or you’re a seasoned pro, this recipe will bring warmth and flavor to your table.

Let’s get started!

Stuffed Sauerkraut Cabbage Rolls Serbian Sarma 2

Ingredients

(Yields: 6-8 servings)

For the Cabbage Rolls:

  • 1 large head of sauerkraut cabbage (about 4 lbs)
  • 1 lb ground pork
  • ½ lb ground beef
  • ½ lb smoked beef ribs or pork ribs (cut into pieces)
  • ½ cup white rice (uncooked)
  • 2 yellow onions (finely diced)
  • 2 carrots (grated)
  • 1 egg
  • ½ tsp black pepper
  • 1 tsp sweet paprika
  • Salt to taste

For Cooking:

  • 4-5 bay leaves
  • 6-8 black peppercorns
  • 4-5 cups water or beef broth

For the Roux (Thickener):

  • 2 tbsp butter or neutral oil (sunflower or avocado oil)
  • 1 tbsp all-purpose flour
  • 1 tsp sweet paprika

Step-by-Step Instructions

Step 1: Prepare the Cabbage

  1. Gently remove whole leaves from the sauerkraut cabbage, trimming the thick stem at the base to make them more pliable.
  2. If the cabbage is overly sour, rinse it briefly in cold water.

Step 2: Make the Filling

  1. In a large pan, heat 1 tbsp oil or butter over medium heat.
  2. Add diced onion and sauté until soft. Add grated carrots and sauté until soft.
  3. Stir in ground pork and beef, cooking for about 5 minutes until lightly browned.
  4. Remove from heat and mix in uncooked rice, black pepper, paprika, egg, and a pinch of salt.

Step 3: Roll the Cabbage Leaves

  1. Take one cabbage leaf, place about 1 tbsp of filling near the base.
  2. Fold in the sides, then roll tightly to create a small, firm roll.
  3. Continue rolling until all the filling is used.

Step 4: Assemble the Pot

  1. Line the bottom of a large heavy-bottomed pot with leftover cabbage leaves.
  2. Place the sarma rolls seam-side down, layering them tightly in rows.
  3. Tuck smoked beef ribs (or turkey) between the layers.
  4. Add bay leaves and black peppercorns.
  5. Pour in enough cold water or beef broth to just cover the rolls.

Step 5: Slow Cook to Perfection

  1. Bring to a simmer over medium heat, then reduce to low.
  2. Cover and let cook for 2 – 1/2 hours, checking occasionally to maintain liquid levels.

Step 6: Prepare the Roux

  1. In a small pan, melt butter or oil over medium heat.
  2. Stir in flour and cook for 30 seconds until golden.
  3. Mix in paprika, then immediately pour over the sarma.
  4. Let simmer for another 30 minutes to thicken and enhance flavor.

Step 7: Serve & Enjoy!

  • Serve hot with crusty bread or cornbread (proja) for a true Serbian experience!
  • Store leftovers in the fridge – they taste even better the next day.

If you liked this recipe, go ahead and pin the image below so you can find it easily later! 😊

Stuffed Sauerkraut Cabbage Rolls Serbian Sarma 3

Video Recipe

Tips & Tricks for the Best Sarma

Making authentic Serbian Sarma isn’t complicated, but a few key tricks will take your dish to the next level. Here’s what you need to know:

1. Choose the Right Cabbage

For the best flavor, use fermented sauerkraut cabbage—it gives Sarma that signature tangy taste. If it’s too sour, soak the leaves in cold water for a few minutes before using.

2. Don’t Overfill the Rolls

A little filling goes a long way! The rice will expand as it cooks, so be sure to leave some room when rolling the cabbage to prevent them from bursting.

3. Layer Properly

Lining the bottom of the pot with leftover cabbage leaves keeps the rolls from sticking and adds extra flavor. Also, placing smoked beef ribs in the center infuses the Sarma with a rich, smoky depth.

4. Slow and Steady Cooking

Sarma needs low, slow cooking—at least two hours—to allow the flavors to develop. Rushing the process won’t give you that melt-in-your-mouth tenderness.

5. Roux for the Perfect Sauce

For a thicker, richer sauce, the final touch is making a simple roux with oil, flour, and paprika. This step enhances the texture and gives the dish a beautiful, deep color.

6. Even Better the Next Day

Like many slow-cooked dishes, Sarma tastes even better the next day as the flavors continue to develop. If you have leftovers, you’re in for a treat!

7. Freezing & Storing

Sarma freezes beautifully, so don’t hesitate to make a big batch. Just store it in an airtight container, and when you’re ready to eat, reheat it slowly on the stove for the best results.

With these simple tips, you’ll have perfect Sarma every time—rich, tender, and packed with traditional flavors!

Peri Peri Chicken Skewers with Lemon Butter Sauce (Air Fryer Recipe)

Peri Peri Chicken Skewers with Lemon Butter Sauce (Air Fryer Recipe)

One of the best ways to elevate chicken is with a bold and zesty peri peri marinade. This version is blended with roasted red pepper, garlic, lemon juice, and spices, then finished with a rich lemon butter sauce for a perfect balance of heat and Read More

Perfectly Seared T-Bone Steak Recipe (A Steakhouse-Quality Dish at Home)

Perfectly Seared T-Bone Steak Recipe (A Steakhouse-Quality Dish at Home)

There’s something truly magical about a perfectly seared T-bone steak—the sizzling sound as it hits the pan, the rich aroma of butter and herbs, and the deep, golden crust that forms on the outside. Whether you’re cooking for a special occasion or just treating yourself Read More

Air Fryer Bang Bang Chicken Breast Recipe

Air Fryer Bang Bang Chicken Breast Recipe

There’s something incredibly satisfying about a meal that combines simplicity with a burst of flavor. When I first tried this Bang Bang Chicken Breast made in my air fryer, I was surprised at how effortlessly the creamy, spicy sauce elevated the tender chicken to a whole new level. It’s a dish that transforms an ordinary weeknight dinner into something truly memorable—perfect for those evenings when you want a little culinary excitement without spending hours in the kitchen.

Air Fryer Bang Bang Chicken Breast Recipe 2

Air Fryer Bang Bang Chicken Breast Recipe

Ingredients

For the Chicken:

  • 2 boneless, skinless chicken breasts (about 1–1.5 lbs each)
  • 1 tablespoon extra virgin olive oil
  • 1 teaspoon paprika
  • 1 teaspoon garlic powder
  • 1 teaspoon onion powder
  • 1 teaspoon kosher salt
  • ½ teaspoon freshly ground black pepper

For the Bang Bang Sauce:

  • 1 ¼ cups mayonnaise
  • ⅔ cup Thai sweet chili sauce
  • 2 teaspoons Sriracha (adjust to taste)
  • 1 tablespoon honey
  • 1 teaspoon lime juice
  • 2 teaspoons lime zest

Optional Garnish:

  • Sliced green onions
  • Sesame seeds
  • Lime wedges

Instructions

  1. Season the Chicken:
    • Pat the chicken breasts dry with paper towels. Rub both sides with olive oil.
    • Sprinkle paprika, garlic powder, onion powder, kosher salt, and black pepper evenly over the chicken. Let the seasoned breasts sit for 10–15 minutes at room temperature to help the flavors meld.
  2. Prepare the Bang Bang Sauce:
    • In a medium bowl, whisk together the mayonnaise, Thai sweet chili sauce, Sriracha, honey, lime juice, and lime zest until smooth.
    • Divide the sauce into two portions: one half for brushing on the chicken during cooking, and the other half to drizzle over the finished dish.
  3. Preheat Your Air Fryer:
    • Set your air fryer to 400°F and allow it to preheat for about 3–5 minutes.
  4. Cook the Chicken:
    • Place the seasoned chicken breasts in the air fryer basket, ensuring they do not overlap.
    • Generously brush the top of each breast with half of the prepared Bang Bang sauce.
    • Air fry at 400°F for 15 minutes, flipping halfway through the cooking time. When you flip, brush the other side with more sauce.
    • Check that the internal temperature of the chicken reaches 165°F before removing it from the air fryer.
  5. Finish and Serve:
    • Transfer the cooked chicken breasts to a serving plate.
    • Drizzle with the remaining Bang Bang sauce and, if you like, garnish with sliced green onions, sesame seeds, and a squeeze of fresh lime juice from a lime wedge.
    • Serve alongside your favorite sides—steamed rice or a crisp salad work wonderfully.

Enjoyed making this dish? Spread the love and pin it to your Pinterest board so everyone can savor the flavor!

Air Fryer Bang Bang Chicken Breast Recipe 3

Tips & Variations

Enhance your Air Fryer Bang Bang Chicken Breast experience with these practical tips and creative variations. Whether you’re fine-tuning the flavors or seeking ways to simplify your cooking process, these suggestions can help you perfect the dish every time.

Adjusting the Heat

  • Customize Your Spice: If you prefer a milder taste, reduce the amount of Sriracha in the sauce or swap it for a gentler hot sauce. For those who enjoy more heat, feel free to add extra Sriracha or a pinch of red pepper flakes to intensify the flavor.
  • Layered Flavors: For an extra burst of complexity, consider adding a dash of smoked paprika or a sprinkle of chili powder when seasoning the chicken.

Marinating Ideas

  • Extra Tender Chicken: Marinate the chicken breasts in a mixture of lime juice, minced garlic, and a touch of soy sauce for about 30 minutes before applying the Bang Bang seasoning. This not only enhances the flavor but also helps to tenderize the meat.
  • Herbal Twist: Experiment by adding fresh herbs such as cilantro or basil into your marinade for a refreshing herbal note that complements the tangy sauce.

Air Fryer Best Practices

  • Preheat for Perfection: Always preheat your air fryer to 400°F to ensure even cooking and a crisp exterior.
  • Avoid Overcrowding: Arrange the chicken breasts in a single layer with ample space between them. Proper spacing allows hot air to circulate freely, ensuring the meat cooks evenly.
  • Temperature Matters: Use a meat thermometer to confirm that the chicken reaches an internal temperature of 165°F. This step is key for both safety and flavor.

Sauce Customizations

  • Experiment with Citrus: Try substituting lime juice with lemon juice for a slightly different tang, or add a splash of orange juice for a hint of sweetness.
  • Add a Zing: Incorporate a bit of grated ginger into the sauce for a zesty twist that pairs well with the creamy base.

Serving Suggestions

  • Complementary Sides: Pair your Bang Bang Chicken Breast with steamed jasmine rice, a crisp garden salad, or even a bowl of quinoa for a balanced meal.
  • Garnish Creatively: Enhance the presentation by topping the dish with sliced green onions, sesame seeds, and a squeeze of fresh lime juice.
Air Fryer Breaded Chicken Skewers

Air Fryer Breaded Chicken Skewers

Craving a quick, comforting meal without drowning in leftovers? These small-batch Air Fryer Breaded Chicken Skewers are the answer. Each tender piece is marinated for extra flavor, then coated in crisp breadcrumbs that turn golden and irresistible after just a few minutes in the air Read More