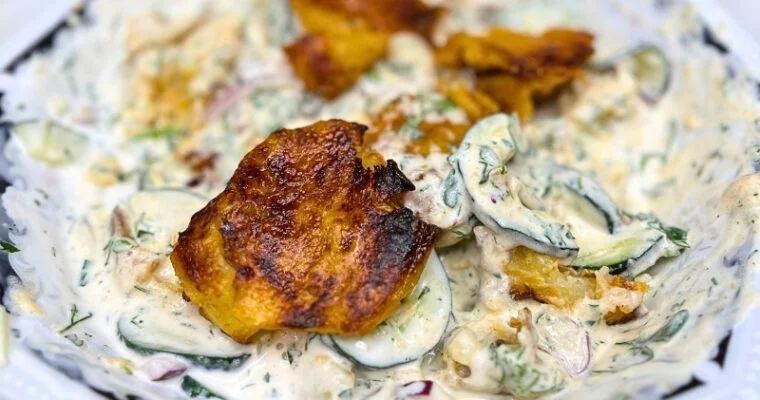
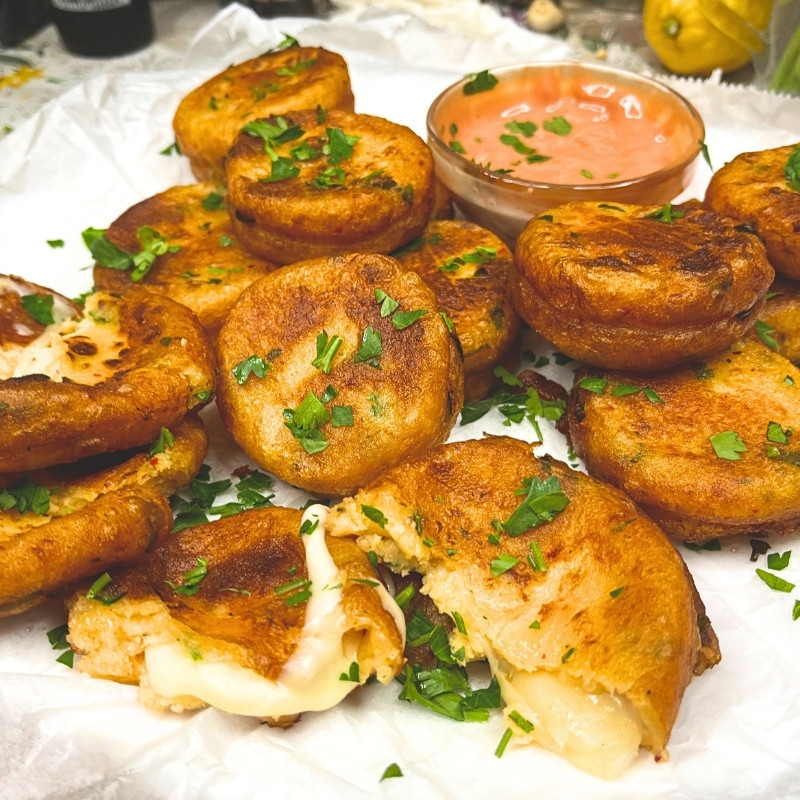
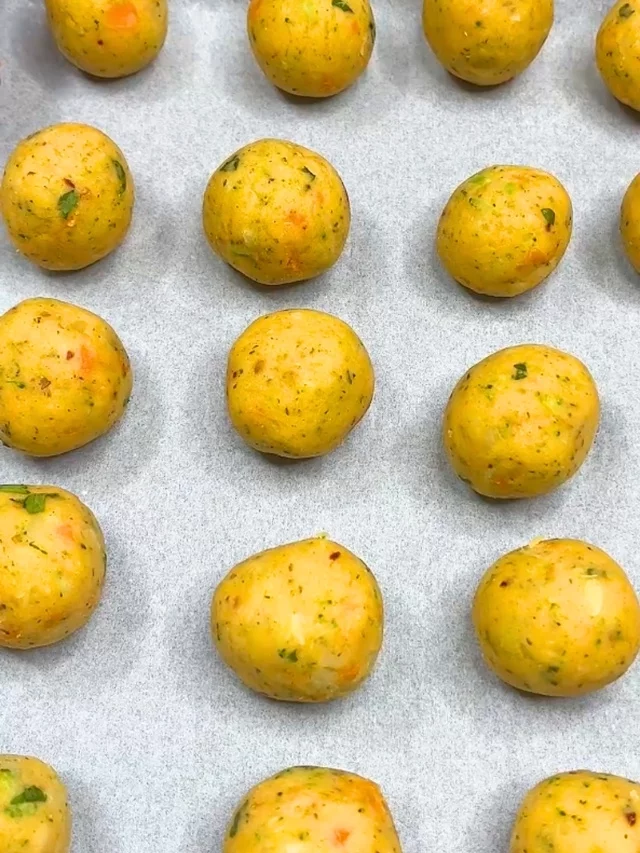
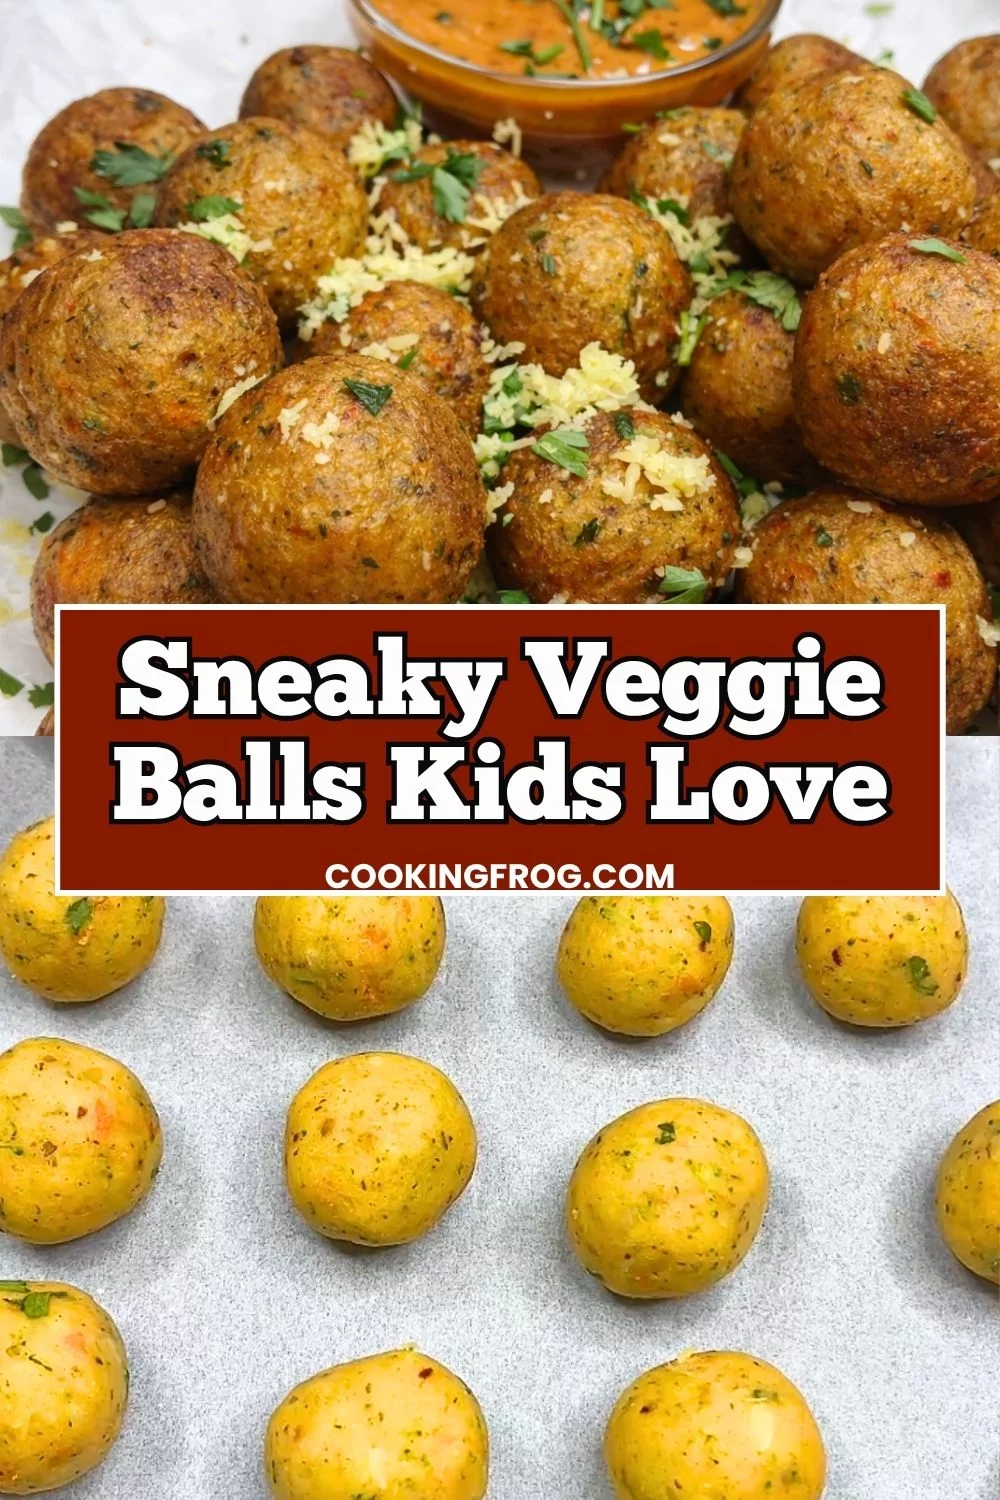
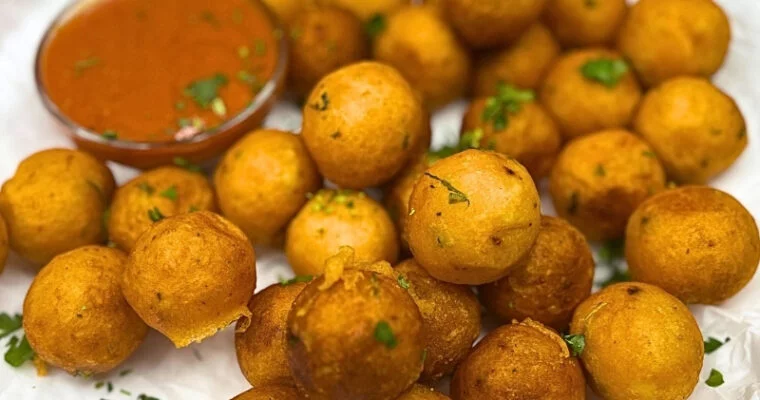
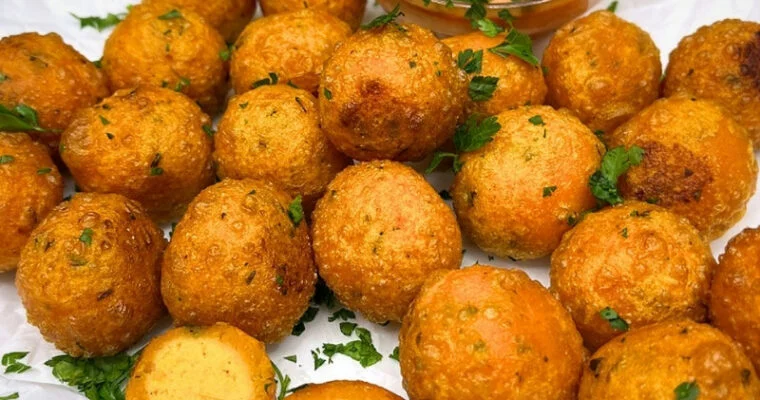
Easy and Delicious Recipes

Author: Sarah Berthold

Fermented Mango Jalapeño Hot Sauce

Fermented Mango Jalapeño Hot Sauce

Mango and jalapeño are one of those combinations that just make sense. The sweetness of ripe mango softens the heat, while fresh jalapeños keep the sauce lively without overwhelming everything else on the plate. This fermented mango jalapeño hot sauce is smooth, vibrant, and incredibly Read More

Fermented Pineapple Jalapeño Hot Sauce

Fermented Pineapple Jalapeño Hot Sauce

Fermented pineapple jalapeño hot sauce sounds a little fancy, but it’s actually one of the easiest ways to make a small-batch, homemade hot sauce with big flavor. Fresh pineapple, garlic, onion, and jalapeños sit in a simple salt brine for a few days, pick up Read More

Juicy Italian Marinated Chicken Breasts

Juicy Italian Marinated Chicken Breasts

Some nights I just want dinner to behave: no complicated steps, no long list of ingredients, just something juicy and full of flavor. That’s where this Italian marinated chicken comes in. You stir together a quick basil pesto marinade, throw in a few chicken breasts and let the fridge do the heavy lifting. When it’s time to eat, the chicken hits the pan (or grill, or oven) and comes out golden, tender and soaked with garlicky basil goodness.

Juicy Italian Marinated Chicken Breasts 7


Ingredients

  • 3 medium chicken breasts, pounded to an even thickness

  • 1/2 cup basil pesto

  • 2 tablespoons apple cider vinegar

  • 1 tablespoon balsamic vinegar (or use 1 more tablespoon apple cider vinegar)

  • 1 tablespoon fresh lemon juice

  • 1 teaspoon EACH: dried basil, onion powder, garlic powder, kosher salt, dried oregano, dried rosemary (crushed between your fingers)

  • 1/2 teaspoon EACH: paprika, black pepper

  • 1/4 teaspoon red pepper flakes

Instructions


Marinate the Chicken

  1. In a large bowl or freezer bag, whisk together the pesto, apple cider vinegar, balsamic vinegar, lemon juice and all of the dried herbs and spices.

  2. Add the chicken breasts and turn them several times so every side is coated in the marinade.

  3. Cover and marinate at room temperature for about 30 minutes, or refrigerate for at least 1 hour and up to 12 hours. (The longer it sits, the more flavorful and tender the chicken will be.)

  4. If the chicken has been in the fridge, pull it out 20–30 minutes before cooking so it isn’t ice-cold going into the pan, oven or grill.

Juicy Italian Marinated Chicken Breasts 4


To Grill the Chicken

  1. Preheat your grill to about 400°F with the lid closed. Clean and oil the grates.

  2. Shake off any extra marinade and place the chicken on the hot grates. Close the lid and grill for 5–7 minutes per side, or until an instant-read thermometer in the thickest part reads 160°F.

  3. Transfer to a plate, tent loosely with foil, and let rest for 5 minutes – the internal temperature will rise to about 165°F.

  4. Brush with a spoonful of fresh pesto (optional).


To Cook the Chicken on the Stove

  1. Heat 1 tablespoon olive oil in a large non-stick skillet or grill pan over medium-high heat.

  2. When the oil is hot and shimmering, add the marinated chicken breasts. Cook, undisturbed, for 3–4 minutes, until the first side is deeply golden.

  3. Flip, cover the pan with a lid, and lower the heat to medium. Cook another 5–7 minutes, depending on thickness, until the chicken reaches 160°F in the center.

  4. Move the chicken to a cutting board, rest for 5 minutes, then slice into thin strips. Spoon any pan juices over the top and finish with a little extra pesto if you like.


To Bake the Chicken in the Oven

  1. Preheat the oven to 425°F. Lightly grease a baking dish and arrange the marinated chicken breasts in a single layer.

  2. Bake:

    • 14–16 minutes for smaller breasts (about 5–6 oz each)

    • 16–20 minutes for medium/large breasts (7–9 oz)

    • 20–25 minutes for very large pieces

    Always go by temperature rather than time – you’re aiming for 160°F in the thickest part.

  3. Let the chicken rest on a cutting board for 5 minutes so the juices settle, then slice. Brush with a little more pesto and drizzle with the pan juices from the baking dish.

If this pesto chicken ends up on repeat at your place, save it for later and share the image below to your Pinterest board so you can find it anytime.

Italian Marinated Chicken

Italian Marinated Chicken Video


FAQ’s for Pesto Marinated Chicken

Can I use chicken thighs instead of chicken breasts?
Yes. Boneless, skinless thighs work really well with this marinade and stay juicy even if they cook a little longer. They’ll usually need a couple of extra minutes per side on the grill or in the pan. Aim for the same internal temperature (about 165°F after resting).

How long can I marinate the chicken?
Anything from 30 minutes to about 12 hours is ideal. Under 30 minutes, the flavor won’t have much time to sink in. More than 12 hours and the acid from the vinegar and lemon can start to change the texture and make the outside a bit mushy.

Can I use store-bought pesto?
Definitely. This recipe is written with jarred pesto in mind. Just choose one you actually like the taste of, since it’s the main flavor. If your pesto is very thick, loosen it with a spoonful or two of olive oil so it spreads over the chicken easily.

What can I use instead of apple cider vinegar or balsamic?
If you’re out of apple cider vinegar, white wine vinegar or red wine vinegar will both work. I’d avoid plain distilled vinegar because the flavor is too sharp. You still want that gentle tang that makes the marinade bright without overpowering the basil.

How do I keep the chicken from drying out?
Two things help the most: pounding the chicken to an even thickness and not overcooking it. Use an instant-read thermometer and pull the chicken off the heat at about 160°F, then let it rest for 5–10 minutes. The temperature will climb a bit while it rests and the juices will stay inside rather than running all over the board.

Can I make this pesto chicken ahead of time for meal prep?
Yes, it’s great for meal prep. Cook the chicken, let it cool, then slice and store it in an airtight container in the fridge for up to 3–4 days. I like to spoon a little of the pesto “glaze” or pan juices over the slices before chilling so they stay moist and flavorful.

Can I freeze the marinated chicken?
You can. Add the chicken and marinade to a freezer bag, press out the air and freeze for up to 2–3 months. Thaw it overnight in the fridge, then cook as directed. It’s an easy way to have a batch of pesto chicken ready to go on a busy day.

Quick Pickled Cherry Tomatoes

Quick Pickled Cherry Tomatoes

Somehow I always end up with a bowl of cherry tomatoes on the counter that all ripen at once. Instead of watching them wrinkle, I turn them into pickled cherry tomatoes – crisp, tangy little bites swimming in a simple apple cider vinegar brine with Read More

Beer-Braised Pork Medallions with Mushroom Onion Sauce

Beer-Braised Pork Medallions with Mushroom Onion Sauce

You know those nights when you want something that tastes like you’ve gone out to a cozy little pub, but you’re absolutely not in the mood for a complicated recipe? That’s exactly how these Beer-Braised pork medallions with creamy mushroom onion sauce were made. Juicy Read More

Raw Raspberry Coconut Cake (No-Bake, Vegan & Gluten-Free)

Raw Raspberry Coconut Cake (No-Bake, Vegan & Gluten-Free)

This raw raspberry–coconut cake is one of those desserts that looks fancy, tastes like summer, and doesn’t ask you to turn on the oven. You get a chewy almond–date crust, a bright raspberry–coconut cream layer, and a gorgeous natural color from fruit only.

It’s naturally vegan, gluten-free, dairy-free and sweetened with dates, agave and dried fruit — but it still feels like a proper cake, not “diet food”. The texture is firm enough to slice cleanly, yet creamy when you bite into it.

Perfect for birthdays, dinner parties, or anytime you want a show-stopping no-bake dessert.

Raw Raspberry Coconut Cake Ingredients

Ingredients

For the crust 

  • 2 cups whole almonds (285 g)

  • ½ cup finely shredded unsweetened coconut (45–50 g)

  • 1¼ cups soft pitted dates, packed (210–215 g)

  • 1½–2 Tbsp agave syrup (about 36 g)

  • 3 Tbsp melted coconut oil (about 40 g)

Use soft Medjool dates if possible. If they’re a bit dry, soak them in warm water for 5–10 minutes and pat dry before using.


For the raspberry coconut cream 

  • 4 cups raspberries, fresh or thawed and well-drained (475–480 g)

  • ½ cup dried cranberries, soaked and drained (70–72 g)

  • About ⅓ cup agave syrup, to taste (115–125 g)

  • ½ cup + 2–3 Tbsp melted coconut oil (125–135 g)

  • 1 cup finely shredded unsweetened coconut (82–85 g)

  • 2–3 tsp finely ground psyllium husk (8–9 g)

Soak the dried cranberries in warm water for 10–15 minutes, then drain very well. This softens them and helps them blend smoothly.


For decoration (optional)

  • Fresh raspberries and blueberries

  • A sprinkle of coconut flakes or shredded coconut


Equipment

  • High-speed blender or very strong regular blender

  • Food processor

  • 9½-inch (24 cm) springform pan (or similar size)

  • Parchment paper


Instructions

1. Prepare the pan

  1. Line the bottom of a 9–10 inch (23–25 cm) springform pan with parchment paper.

  2. If you like, lightly grease the sides with a bit of coconut oil so the cake releases more easily.


2. Make the crust

  1. Process the dry ingredients:
    Add the almonds and shredded coconut to a food processor. Pulse until you get a fine, crumbly texture — you still want a little bit of texture, not almond butter.

  2. Add dates and sweeteners:
    Add the dates, agave syrup and melted coconut oil.
    Pulse in short bursts until the mixture starts to clump together and feels sticky when pressed between your fingers.

  3. Form the base:

    • Transfer the mixture to your prepared pan.

    • Press it firmly and evenly into the base using your fingers, the back of a spoon, or the bottom of a glass.

    • Make sure there are no gaps and that the layer is compact — this keeps the crust from crumbling later.

    Place the pan in the fridge while you prepare the cream layer. 

Raw Raspberry Coconut Cake Crust


3. Make the raspberry coconut cream

  1. Blend the fruit:
    In a high-speed blender, combine the raspberries and soaked, drained cranberries. Blend until you have a smooth, thick puree.

  2. Add the coconut, coconut oil and sweetener:

    • Add the shredded coconut, melted coconut oil and most of the agave syrup.

    • Blend until the mixture is completely smooth, creamy and slightly glossy.

  3. Taste and adjust:

    • Taste the cream and adjust the sweetness or acidity:

      • Add a bit more agave if you prefer it sweeter.

      • If your raspberries are very tart, you might need the full amount of agave.

  4. Add psyllium (thickener):

    • Sprinkle in the ground psyllium husk in 2 additions, blending briefly after each one.

    • Don’t over-blend; once psyllium is in, the mixture will start to thicken and “gel” within 30–60 seconds.

  5. Pour immediately:
    As soon as the cream starts to thicken, pour it over the chilled crust.
    Smooth the top with a spatula, tapping the pan gently on the counter to remove any air bubbles.

Raw Raspberry Coconut Cake


4. Chill and set

  • Fridge option: Chill for 3–4 hours or until completely set and firm to the touch.

  • Freezer option: Chill for about 1½ hours in the freezer for a quicker set. Don’t forget it in there — you want it firm, not rock-hard.

Once set, the surface should feel stable and the slices should hold their shape when cut.


5. Decorate & serve

  1. Just before serving, decorate the cake with fresh raspberries and a sprinkle of coconut flakes or shredded coconut.

  2. Run a thin knife around the edge of the pan, then release the springform ring.

For clean slices:

  • Dip a sharp knife in hot water, wipe it dry, then slice.

  • Repeat the dip-and-wipe step for each cut.

This cake yields about 16–18 slices and weighs roughly 3.3 lb in total.


Storage

  • Fridge:
    Store covered in the refrigerator for 5–6 days. The texture actually improves after the first night as the flavors meld and the cream layer finishes setting.

  • Freezer:
    Freeze individual slices or the whole cake (well wrapped) for up to 1 month.
    Thaw overnight in the fridge before serving, or let individual slices sit at room temperature for 20–30 minutes until pleasantly creamy.


Don’t lose this recipe—pin the photo below to your Pinterest board so you can find it anytime.

Raw Raspberry Coconut Cake No Bake Vegan Gluten Free 2

Texture Tips & Troubleshooting

  • Want a firmer, cleaner slice?
    Add about 1 g more psyllium (a small pinch) or 5–10 g (1–2 tsp) more coconut oil to the cream layer.

  • Prefer a softer, more mousse-like texture?
    Use slightly less psyllium (about 1 g less, or start with 2 tsp and see if you like the set).

  • Using a smaller pan (8½–9 inch / 22–23 cm):
    The cake will be taller and thicker, which looks beautiful, but:

    • Add a tiny bit more psyllium or coconut oil for extra stability.

    • Allow additional chilling time so the center sets fully.


Video Recipe

Raw Note

To keep this cake truly raw:

  • Melt the coconut oil very gently, using only warm water or the lowest heat possible.

  • Try not to heat it above about 104°F (40°C). It should just be liquefied, not hot.

Serve chilled, enjoy the raspberry–coconut flavor, and store the rest in the fridge for an easy, no-bake treat over the next few days.

How to Make Ajvar: Roasted Red Pepper Spread (Large Yield)

How to Make Ajvar: Roasted Red Pepper Spread (Large Yield)

If you grew up anywhere near the Balkans, you know ajvar is autumn in a jar: sweet, smoky peppers, a whisper of eggplant, and a glossy finish of good oil. This version follows the classic flow—roast → peel → drain → cook—so you get deep Read More

Honey Butter Chicken (Skillet, 20 Minutes)

Honey Butter Chicken (Skillet, 20 Minutes)

Honey Butter Chicken is the kind of one-pan dinner that makes weeknights feel easy again. Hot skillet, light seasoned coating, quick sear; then a buttery honey glaze that picks up a little tang from apple cider vinegar and depth from soy. It finishes glossy, not Read More

Slow Cooker BBQ Brisket (Sticky, Juicy & Caramelized)

Slow Cooker BBQ Brisket (Sticky, Juicy & Caramelized)

Here’s the kind of brisket I make when I want guaranteed praise with almost no fuss: a slow cooker BBQ brisket that finishes in the oven so the sauce turns shiny and caramelized. The rub lays down a savory-sweet base, the slow cooker melts the connective tissue until the meat is tender but still sliceable, and a quick sauce reduction concentrates all those beefy juices into a sticky glaze.

That’s the whole trick—low and slow for texture, then high heat for bark. It’s an easy brisket recipe that doesn’t ask for a smoker, travels well for potlucks, reheats like a dream, and makes legendary sandwiches the next day. If you’ve been searching for oven-finished brisket with real BBQ vibes and a homemade BBQ sauce that clings to every slice, this is it: simple method, big flavor, and consistently great results.

Slow Cooker BBQ Brisket Sticky Juicy Caramelized 2

Ingredients

Brisket

  • 3–4 lb (1.5–2 kg) beef brisket, excess fat trimmed (flat or first-cut works great)

  • 1 Tbsp olive oil (or neutral oil)

Dry Rub

  • 1 Tbsp brown sugar

  • 2 tsp paprika

  • 1 tsp onion powder

  • 1 tsp garlic powder

  • 1/2 tsp ground cumin

  • 3/4 tsp dry mustard (mustard powder)

  • 1 tsp kosher salt

  • 1/2 tsp black pepper

BBQ Sauce (for cooking + glazing)

  • 2 garlic cloves, minced

  • 1/2 cup (125 ml) apple cider vinegar

  • 1 1/2 cups (375 ml) ketchup

  • 1/2 cup (110 g) packed brown sugar

  • 2 tsp black pepper

  • 2 tsp onion powder

  • 2 tsp dry mustard (mustard powder)

  • 1 tsp cayenne (use less for mild)

  • 1 Tbsp Worcestershire sauce


Instructions

  1. Season the brisket.
    Stir together all Dry Rub ingredients. Pat the brisket dry, drizzle with oil, and coat evenly with the rub (press it on so it sticks). If you have time, refrigerate 30 minutes up to 24 hours for deeper flavor; otherwise proceed.

  2. Load the cooker.
    In the slow cooker, whisk the BBQ Sauce ingredients until smooth. Nestle the brisket into the sauce (fat side up if there’s a thicker cap).

  3. Slow cook.
    Cover and cook on LOW for 8 hours for a 3 lb / 1.5 kg piece or up to 10 hours for a 4 lb / 2 kg piece, until fork-tender but still sliceable.

  4. Reduce the sauce.
    Transfer the brisket to a sheet pan. Pour the cooking liquid into a saucepan and bring to a lively simmer over medium-high heat. Cook 8–12 minutes until glossy and thick enough to coat a spoon—it will thicken more as it cools.

  5. Caramelize in the oven.
    Heat oven to 390°F / 200°C. Return the brisket (on the sheet pan) to the oven for about 15 minutes until light browning appears. Brush generously with reduced sauce and roast 5 minutes. Brush again and roast another 5–10 minutes, until the surface looks sticky and caramelized.

  6. Slice & serve.
    Rest 10 minutes. Slice thinly across the grain. Serve with remaining sauce.


Alternative Methods

  • Oven-Only Method:
    Place rubbed brisket in a Dutch oven with the sauce. Cover and cook at 300°F / 150°C for 3–4 hours (size-dependent) until tender. Uncover, reduce sauce on the stovetop if needed, then caramelize as written above at 390°F / 200°C with basting.

  • Pressure Cooker (Instant Pot):
    Sauce + brisket in pot. Cook High Pressure 75–85 minutes (3–4 lb), natural release 15 minutes. Reduce sauce on the stove, then finish/brulee in a 390°F / 200°C oven with basting.

Planning game day or a family dinner soon? Save this to Pinterest so future-you can relax while the slow cooker does the work.

Slow Cooker BBQ Brisket


Tips for the Best Brisket

  • Choose the cut: The flat/first cut slices neatly; the point is fattier and ultra-juicy.

  • Don’t skip the reduction: That simmered sauce is the difference between “good” and glossy, stick-to-your-ribs great.

  • Slice against the grain: This shortens the muscle fibers so every bite is tender.

  • Make-ahead friendly: Brisket actually improves after resting in its sauce.


Make-Ahead, Storage & Reheating

  • Make-Ahead: Cook fully, cool, and refrigerate brisket in sauce up to 3 days. Slice cold (easier, cleaner), then rewarm gently in a covered dish at 300°F / 150°C with extra sauce until hot.

  • Freeze: Up to 2 months in airtight containers with sauce. Thaw overnight in the fridge.

  • Reheat: Low and slow with a splash of water or stock to keep it glossy.


How to Serve

  • Classic plate: Brisket, creamy mashed potatoes, buttered corn or green beans, and a pickle spear.

  • Sandwiches/Sliders: Pile onto soft rolls with crunchy coleslaw and dill pickles.

  • Bowls: Over rice or cheesy grits with charred broccoli.

  • Leftovers: Quesadillas, baked potato toppers, brisket grilled cheese, or breakfast hash.

Slow Cooker BBQ Brisket Sticky Juicy Caramelized 3


FAQs

Can I use a larger brisket?
Yes—scale the rub and sauce and extend cook time until fork-tender.

My brisket shredded—did I overcook it?
Likely a bit. Still delicious! Next time, start checking earlier; you want tender but sliceable.

Too sweet or too tangy?
Balance with small additions: a splash of vinegar for sweetness, a teaspoon of brown sugar for tang, or a pinch of salt to brighten.

Fall-Apart Braised Chuck Roast Recipe

Fall-Apart Braised Chuck Roast Recipe

A braised chuck roast is the kind of dinner that makes the whole home feel cozy. This Dutch oven pot roast simmers low and slow with onions, carrots, garlic, and a handful of fresh herbs until the beef turns fork-tender and the pan sauce becomes Read More