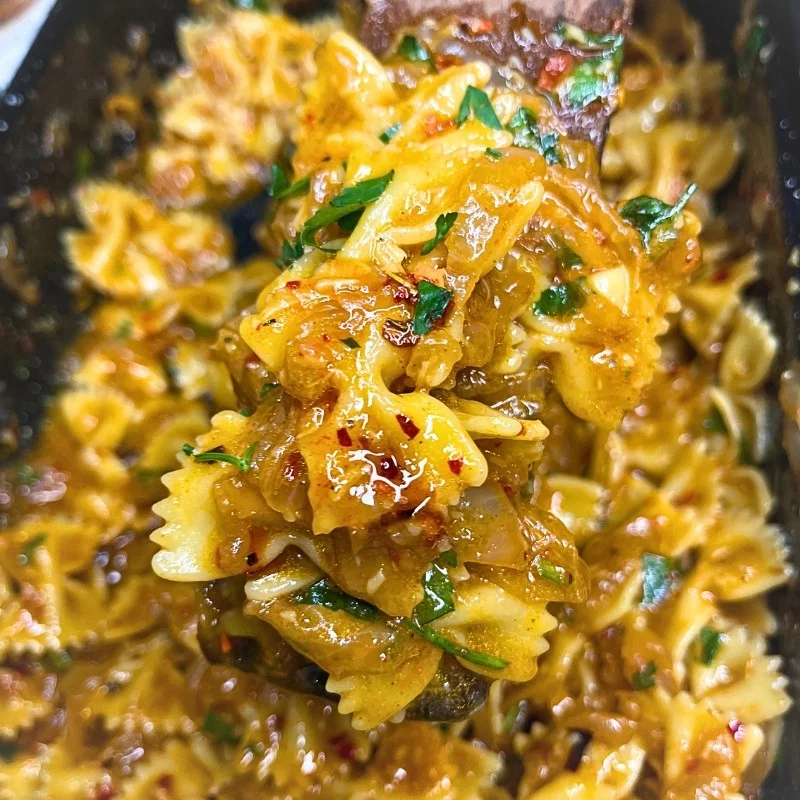
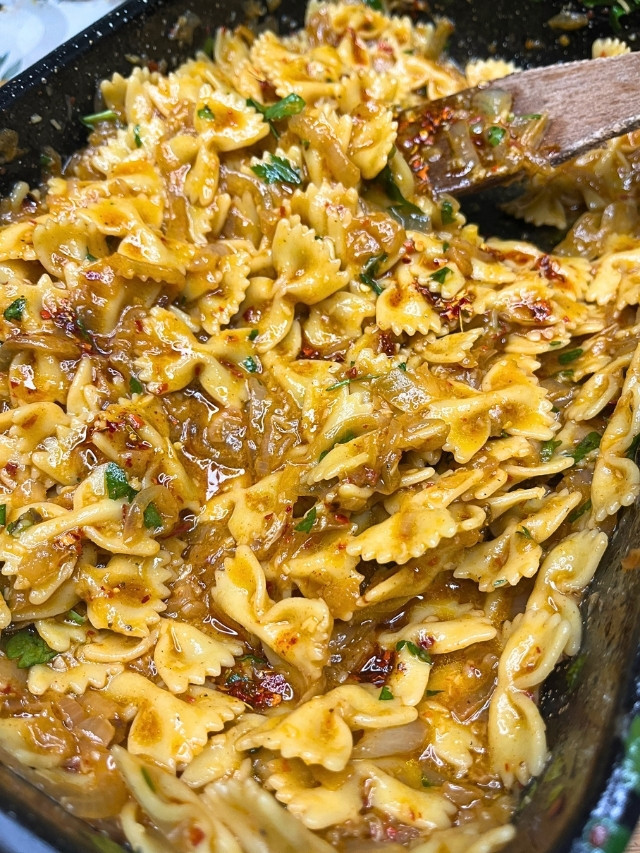
Easy and Delicious Recipes

Author: Sarah Berthold

Air Fryer Chocolate Lava Cake with Hazelnuts (+Recipe Variations)

Air Fryer Chocolate Lava Cake with Hazelnuts (+Recipe Variations)

Hey there! Ready to whip up something that’ll make your taste buds dance? Let’s talk about turning your air fryer into your secret weapon for an incredible dessert. Our air fryer chocolate lava cake is not just another recipe; it’s your ticket to an ooey-gooey, Read More

Air-Fryer Apple Crisp with Recipe Variations

Air-Fryer Apple Crisp with Recipe Variations

Hey there! If you’re looking to spice up your dessert game, you’ve come to the right place. We’re tackling a delicious apple crisp that’s not only easy to whip up in an air fryer but also leaves room for your own creative twists. This recipe Read More

How to Use an Air-Fryer (Full Guide To Air-Frying)

How to Use an Air-Fryer (Full Guide To Air-Frying)

Welcome to the world of air frying! If you’re looking to get started with your new kitchen companion, you’ve landed at the perfect spot. In this beginner’s guide, we’ll unlock the secrets of your air fryer, making your introduction to this versatile appliance both enjoyable and informative.

An air fryer is much more than a gadget for making healthier fried foods; it’s a culinary revolution in your kitchen. We’ll explore how to use it for various cooking methods, from frying to roasting, and even baking. Your journey into air frying will be filled with discovery and deliciousness.

Exploring the Culinary Range of Your Air Fryer

Versatile Cooking

Your air fryer is a versatile tool, ideal for a variety of dishes beyond frying. Cook proteins, vegetables, appetizers, and even desserts with ease.

Crispy Favorites

The air fryer excels in creating crispy foods like French fries and chicken wings, ensuring even cooking and perfect browning.

Juicy and Flavorful Meats

If you’re a meat lover, the air fryer will be your new best friend. Cooking meats like steak and chicken in an air fryer ensures they come out not only juicy but also packed with flavor. The high-speed air circulation locks in the moisture and cooks the meat evenly, making every bite a delightful experience.

A Collection of Air Fryer Recipes

To inspire your culinary journey, I’ll introduce a collection of my favorite air fryer recipes. These recipes are designed to showcase the versatility of your air fryer, providing you with a range of options from quick weekday dinners to impressive weekend feasts.

How Does Your Air Fryer Work

An air fryer combines a heating element with a powerful fan to circulate hot air around the food in its basket. This method cooks food with much less oil than traditional frying, delivering the crispy texture and browning you love.

Its efficient air circulation ensures even cooking and consistent results, making it ideal for a variety of dishes, from fries to baked goods. In short, the air fryer offers a healthier way to enjoy your favorite fried foods with added convenience and consistent cooking.

How to Use Your Air Fryer Correctly 

Optimal Food Arrangement

  • Avoid Overcrowding: Arrange food in a single layer in the basket for even cooking and crispiness. Cook in batches if necessary.

Monitoring and Adjusting

  • Check Progress: It’s safe to pull the basket out during cooking to check on your food.
  • Temperature Control: Generally, set the air fryer 25 degrees lower than conventional oven temperatures. Consult the manual or trusted recipes for specific temperature guidelines.

Even Cooking Techniques

  • Shake or Flip: For small items like Brussels sprouts or fries, shake the basket midway through cooking. For meats, flipping halfway ensures even cooking.

Preparing Food for Crispiness

  • Dry Foods Thoroughly: Eliminate moisture by patting food dry before adding oil or seasonings, as moisture hinders crispiness.

Utilizing Presets and Manual Settings

  • Presets vs. Manual Control: While presets are convenient for common foods, using manual settings gives you more control over cook times and temperatures.

Air Fryer Preheating and Reheating Essentials

Should You Preheat Your Air Fryer?

The necessity of preheating your air fryer varies. Generally, it’s recommended to preheat for optimal cooking, akin to an oven. Not preheating might extend cooking time and affect browning.

Exceptions to Preheating

For foods like broccoli or Brussels sprouts that brown quickly, starting in a cold air fryer can prevent burning, allowing even cooking.

Reheating with Precision

Reheating in an air fryer brings back the crispiness efficiently. Reduce the cooking temperature by about 30 degrees from the original cooking temperature. For instance, reheat pizza at 320° F for 3-5 minutes, ensuring slices don’t overlap. For fries, reheat at 350° F for 3-5 minutes, shaking the basket halfway for even crispiness.

Air Frying Frozen Foods

The Basics of Air Frying Frozen Food

Air frying frozen foods is straightforward and efficient. The air fryer’s hot air circulation cooks frozen food evenly, making it a healthier alternative to traditional deep frying.

Tips for Best Results

  • No Need to Thaw: Place frozen food directly in the air fryer; there’s no need to thaw.
  • Adjust Cooking Time: Frozen foods may need a slightly longer cooking time compared to fresh or thawed foods.
  • Shake or Turn: Halfway through cooking, shake the basket or turn the items to ensure even cooking.
  • Check for Doneness: Depending on the food, cooking times can vary. Always check for doneness before serving.

Example Foods

  • Frozen Fries: Cook crispy and golden without additional oil.
  • Frozen Chicken Wings: Become juicy inside and crisp outside.
  • Vegetables: Cook evenly, retaining texture and flavor.

Essential Safety Tips for Using Your Air Fryer

Key Precautions for Safe Air Frying

While air fryers are generally safe and easy to use, adhering to certain safety guidelines is crucial to ensure a risk-free cooking experience. Here are some straightforward tips to keep in mind:

  1. Use As Intended: Remember, an air fryer is for air frying. Avoid filling the basket with oil, as it’s not designed for traditional deep frying.
  2. Ventilation is Vital: Always use your air fryer in a well-ventilated area. Ensure there’s ample space around it for exhaust to properly ventilate, and avoid placing it too close to walls or other appliances.
  3. Mind the Smoke Points: When cooking fatty foods like bacon, be aware of the smoke points. Cook such items at temperatures lower than their smoke points to prevent smoking or burning. For instance, air frying bacon at 350° F is optimal.
  4. Choose Your Oils Wisely: Be cautious about the type of cooking oils you use. Oils with low smoke points can be problematic, as they may smoke or burn. If using such oils, consider lowering the cooking temperature.
  5. Handle with Care: After use, the air fryer basket will be hot. Protect your hands and countertops by placing the basket on a silicone trivet or a heat-resistant pad.
  6. Unplug When Not in Use: To prevent any electrical hazards, unplug your air fryer when it’s not being used.
  7. Proper Placement: Never place your air fryer on the stove, as this can be a safety hazard.

Air Fryer Cleaning

Simplified Cleaning Process

Most air fryers feature a nonstick coating for effortless cleaning.

Basket Cleaning Guide

For basket-style air fryers, separate the inner and outer baskets for washing. Use warm, soapy water and a gentle cloth to avoid scratching the nonstick surface. Although some baskets are dishwasher-safe, hand washing is recommended for longevity.

Quick Cleanup Tip

For easier cleanup, rinse the basket immediately after use.

Oven-Style Air Fryer Cleaning

Oven-style air fryers can be cleaned similarly, either by hand or in the dishwasher.

Cleaning the Air Fryer Base

For external cleaning, a soft, damp cloth is sufficient to wipe the air fryer base.

Pro Cleanup Tip

Using aluminum foil or perforated parchment paper in the air fryer simplifies cleaning. Ensure food covers the foil or paper to prevent contact with the heating element.

The Best Air Fryer

  1. Ninja Air Fryer
    • Pros: Praised for its lightweight design, ease of cleaning, and quick cooking capabilities. Users appreciate the large basket, making it suitable for cooking larger portions.
    • Cons: Some users report noise during operation and an initial plastic smell. Concerns about the nonstick coating peeling off have also been noted.
    • Overall Impression: Users find it versatile and user-friendly, ideal for those seeking a quick and efficient cooking experience, though minor design issues are noted.
  2. Power XL Air Fryer
    • Pros: Users like its efficiency, especially for cooking for two, noting that it’s great for steaks and wings, and delivers crunchy fries and breaded items. Easy to use and clean.
    • Cons: There are reports of durability issues with some units stopping working after a short period. The door’s quality has been criticized as flimsy by some.
    • Overall Impression: While offering solid performance and ease of use, concerns about its longevity and price might be a downside, as per user reviews.
  3. Ninja Foodie Air Fryer
    • Pros: Its large 7qt size and dual-zone heating are highlights. Users appreciate the variety of settings like Air Broil, Air Fry, Roast, Bake, Reheat, and Dehydrate.
    • Cons: The larger size and handling of the basket can be challenging, requiring extra counter space, as mentioned by users.
    • Overall Impression: A user favorite for its large size and versatility, making it suitable for families or larger meals, though its size may require extra kitchen space.
  4. Cosori Air Fryer
    • Pros: Users are happy with its spacious cooking area and efficient presets for common foods. The compact design is a plus for those with limited kitchen space.
    • Cons: Some users find the basket difficult to handle and note the brand’s relative newness in the market.
    • Overall Impression: Well-received for its performance and capacity, but some users wish for easier basket handling and more customization options.
  5. Cuisinart Air Fryer
    • Pros: Users commend its powerful heating, quick cooking ability, and stylish stainless steel exterior. The variety of functions is a big draw.
    • Cons: The higher price point and issues with the crisper plate staying in place are common user complaints. Some functions are considered gimmicky.
    • Overall Impression: Generally well-regarded for its performance and style, but the cost and some design flaws are points of consideration for users.

Beginner-Friendly Air Fryer Recipes

  1. Marinated Air-Fryer Pork Tenderloin: Upgrade your home dining experience with this easy and delicious air-fried garlic butter pork tenderloin recipe.
  2. Crispy Honey-Garlic Chicken Tenders: A sweet and savory delight, perfect for a quick snack or meal.
  3. Stuffed Pork Tenderloin: A delicious combination of flavors, stuffed for an extra taste sensation.
  4. Juicy Pork Steak: Simple yet flavorful, ideal for a hearty dinner.
  5. Frozen Chicken Breast: A convenient way to cook chicken, retaining moisture and flavor.
  6. Frozen Chicken Wings: Crispy and easy, great for game day or a casual meal.
  7. Crispy Cauliflower: A healthy and tasty veggie option, seasoned to perfection.
  8. Brats in the Air Fryer: Get that grilled flavor with less fuss.
  9. Corn Dogs: A fun, quick snack that’s always a hit.
  10. Chicken Nuggets: Kid-friendly and much healthier than the fast-food version.
  11. Frozen French Fries: Enjoy your favorite side dish with less oil and more crunch.
  12. Air Fryer Hamburgers: Juicy burgers with a delicious grilled taste.
  13. Pork Tenderloin with Delicious Rub: Cooked to tender perfection, a simple yet satisfying dish.
  14. Chicken Fajitas: A Mexican-inspired meal that’s quick and full of flavor.
  15. Chuck Steak: An easy recipe for a succulent and flavorful steak.
  16. Beef Tenderloin: A simple yet elegant dish, perfect for special occasions.
  17. Salmon Bites in Pineapple Bowl: A unique, tropical twist on a seafood favorite.
  18. Pork Chops with Garlic Butter: Rich in flavor, these chops are a garlic lover’s dream.
  19. Juicy Pork Ribs: Fall-off-the-bone ribs that are both juicy and tender.
  20. Kielbasa – Polish Sausage: A traditional recipe that brings authentic flavors to your table.
  21. Crispy Brussel Sprouts: Inspired by Longhorn Steakhouse, a tasty way to enjoy your greens.
  22. Delicious Apple Crisp: This recipe offers the perfect balance of sweet and savory flavors, ideal for any time of the day. 
  23. Chocolate Lava Cake with Hazelnuts: This gourmet chocolate lava cake, with its hint of hazelnut, is more than just a dessert; it’s an experience.

Share

How to Marinate Food: For Flavorful Meats, Seafood, and Vegetables

How to Marinate Food: For Flavorful Meats, Seafood, and Vegetables

Welcome to the world of marination, a culinary technique that promises to transform your everyday meals into extraordinary feasts. Whether you’re a seasoned chef or a home cooking enthusiast, understanding the power of a well-crafted marinade is key to unlocking deep, complex flavors in your Read More

Smoking Food at Home: The How-To Guide for Delicious Results

Smoking Food at Home: The How-To Guide for Delicious Results

Welcome to the world of smoking – a culinary frontier where flavor is king, and technique is queen. Smoking isn’t just a method; it’s a dance of aroma and taste, a preservation art, and a ticket to creating unforgettable dishes. Whether you’re a home cook Read More

How To Make Perfect Crock Pot Ribs

How To Make Perfect Crock Pot Ribs

There’s something undeniably comforting about a dish that requires minimal effort yet yields maximum flavor. Crock Pot Ribs are the epitome of this culinary philosophy.

Picture this: tender ribs, slow-cooked to perfection, each bite infused with a smoky sweetness that only a slow simmer can achieve. It’s the kind of meal that brings a smile to your face after a long day, the kind that has everyone at the dinner table asking for seconds.

The Art of Slow Cooking Ribs

I’ve shared my secrets for Instant Pot Ribs and Barbecue Ribs in the Oven, but there’s a special place in my heart for these Crock Pot Ribs. The process is straightforward, yet the results are anything but simple. The slow cooker works its magic, transforming the meat into a tender, fall-apart delicacy. A final flourish of sauce and a quick broil add a caramelized touch that’s utterly irresistible.

Preparing Your Ribs: A Step-by-Step Guide

  1. Membrane Removal: Begin by locating and removing the silver membrane on the back of the ribs. A knife can help you get started, and a paper towel will provide the grip you need to pull it off. If you don’t find one, you might have lucked out with pre-prepped ribs.
  2. Bone Inspection: Give the ribs a once-over to ensure there are no leftover bone shards from the butchering process.
  3. Sizing It Right: Depending on the size of your slow cooker, you might need to cut the ribs into halves or thirds to ensure they fit snugly.

Choosing Your Ribs

My go-to choice for Crock Pot Ribs is pork baby back ribs. They’re tender, flavorful, and just the right size. Side ribs are an alternative, but they come with smaller bones and might need a tad more cooking time.

Crock Pot Baby Back Ribs Recipe

Ingredients

  • 2 racks of baby back ribs (about 3-4 lbs)
  • 1 onion
  • 4 cloves garlic
  • ½ cup water
  • 2 tablespoons apple cider vinegar

BBQ Rib Sauce:

  • ¼ cup ketchup
  • ½ cup chili sauce
  • ½ cup of your favorite BBQ sauce

Instructions

Prep Work

  1. Remove the Membrane: Use a knife and paper towel to peel off the silver membrane on the back of the ribs.
  2. Check for Bones: Look over the ribs and remove any leftover bone fragments.
  3. Cut to Size: If necessary, cut the ribs to fit into your Crock Pot.

Seasoning

  1. Make the Rub: Combine your spices in a bowl.
  2. Apply the Rub: Coat both sides of the ribs evenly with the spice mixture.

Cooking

  1. Layer the Base: Place sliced onion and garlic in the Crock Pot, then add water.
  2. Cook the Ribs: Lay the ribs on top of the onions and garlic. Cook on high for 4 hours or low for 8 hours.

Finishing Touch

  1. Prepare the Sauce: Mix ketchup, chili sauce, BBQ sauce, and apple cider vinegar.
  2. Broil the Ribs: After cooking, brush the ribs with sauce and broil for 3-5 minutes until caramelized.

Serve

  1. Rest the Ribs: Let them sit for a few minutes after broiling.
  2. Enjoy: Cut into individual ribs and serve hot.

Whip up ribs that’ll have everyone asking for your secret. Go on, give that ‘Pin it’ button a workout and spread the rib-tastic love!

Crock Pot Ribs Recipe Variations: Tailoring the Taste

Cooking is an art, and every artist has their own style. These Crock Pot Ribs are your canvas, and the kitchen is your studio. Here’s how you can tweak the recipe to suit your palate:

Adjusting the Spice Levels

  • Milder Flavor: If your taste buds lean towards the milder side, you can reduce the chili sauce in the BBQ sauce mixture and choose a BBQ sauce that’s low on heat.
  • Extra Heat: For those who crave a spicy kick, add a dash of hot sauce or a teaspoon of crushed red pepper flakes to the rub.

Flavor Enhancements

  • Smokey Aroma: A teaspoon of liquid smoke added to the sauce mixture can infuse a deep, smokey flavor that mimics the taste of outdoor grilling.
  • Sweet and Tangy: Incorporate a tablespoon of brown sugar and a splash of apple cider vinegar into the BBQ sauce for a balance of sweetness and tanginess.

Sauce Variations

  • Honey Garlic Glaze: Combine honey, minced garlic, and a bit of soy sauce for a sticky, sweet glaze that’s irresistible.
  • Bourbon BBQ Sauce: Add a splash of bourbon to your BBQ sauce for a rich, deep flavor with a hint of vanilla and oak.

Herb Infusions

  • Rosemary and Thyme: Add sprigs of fresh rosemary and thyme to the slow cooker for an aromatic twist.
  • Cilantro Lime: Brush the ribs with a mixture of chopped cilantro, lime juice, and olive oil before the final broil for a fresh, zesty finish.

Low-Carb/Keto Adaptation

  • Sugar-Free BBQ Sauce: Choose a sugar-free BBQ sauce to keep the carb count low without sacrificing flavor.

Gluten-Free Adaptation

  • Gluten-Free Sauces: Make sure your BBQ sauce and chili sauce are certified gluten-free if you’re avoiding gluten.

Feel free to play around with these variations or come up with your own. The goal is to create a dish that resonates with your taste preferences while still celebrating the essence of these delectable Crock Pot Ribs.

Sugar-Free Keto Ketchup Recipe (+ Ketchup Flavor Variations)

Sugar-Free Keto Ketchup Recipe (+ Ketchup Flavor Variations)

Diving into a keto lifestyle is an adventure, especially when it comes to navigating the world of condiments. Ketchup, a beloved classic, often comes packed with sugars, making it a tricky fit for those counting carbs. But imagine if you could indulge in the rich, Read More

Oven-Baked Chicken Cordon Bleu (+ Air-Fryer Method & Recipe Variations)

Oven-Baked Chicken Cordon Bleu (+ Air-Fryer Method & Recipe Variations)

Chicken Cordon Bleu is more than just a dish; it’s an experience. This classic French delight, which translates to “Blue Ribbon,” is a testament to culinary excellence. At its core, it’s a harmonious blend of tender chicken, smoky ham, and the rich flavor of Swiss Read More

How to Make Hamburger Soup (+ Recipe Variations)

How to Make Hamburger Soup (+ Recipe Variations)

Ever tried Hamburger Soup? It’s that comforting blend of beef, fresh vegetables, and a tomato base that feels like a hug in a bowl. Whether it’s a cold day outside or you just need a pick-me-up, this soup is your go-to. Simple ingredients, straightforward steps, and a whole lot of flavor.

Gather all your ingredients first for a smooth start. Dice the onion, mince the garlic, and chop the potatoes. In a large pot, brown the beef over medium heat, breaking it apart. Once browned, add the onion and garlic, cooking until the onion is clear.

Pour in beef broth, add diced tomatoes, tomato soup, Worcestershire sauce, and Italian seasoning. Toss in a bay leaf. Add potatoes and vegetables, including bell pepper if using. Let it simmer for about 20 minutes or until potatoes are tender. Season with salt and pepper to taste. Once done, remove the bay leaf, serve hot, and enjoy.

Hamburger Soup Recipe

Ingredients

  • 1 lb. finely ground beef
  • 1 chopped onion
  • 2 garlic cloves, finely chopped
  • 2 average-sized potatoes, skinned and cubed
  • 3.5 cups of beef broth
  • 28 oz. can of chopped tomatoes, including liquid
  • 1 can of condensed tomato soup
  • 2 1/2 teaspoons of Worcestershire sauce
  • 1 1/2 teaspoon of mixed Italian herbs
  • 1 piece of bay leaf
  • Season with salt and pepper as desired
  • 3 cups of mixed  vegetables (can be fresh or frozen)
  • 1 diced bell pepper

Instructions

  1. Preparation: Before you start, gather all your ingredients. This ensures a smooth cooking process. Dice your onion, mince the garlic, peel and chop the potatoes, and have your vegetables ready.
  2. Browning the Beef: In a large pot over medium heat, add the ground beef. Cook the beef until it starts to brown, breaking it apart as it cooks. This should take about 5-7 minutes.
  3. Adding Aromatics: To the browned beef, add the diced onion and minced garlic. Cook until the onion becomes translucent, which usually takes about 3 minutes.
  4. Building the Base: Pour in the beef broth, followed by the diced tomatoes with their juice. Stir in the condensed tomato soup, Worcestershire sauce, and Italian seasoning. Add the bay leaf for that extra depth of flavor.
  5. Vegetables and Simmering: Add the chopped potatoes and your choice of mixed vegetables to the pot. If you’re using our added ingredient, the bell pepper, toss it in now. Let everything simmer together for about 15-20 minutes. You’ll know it’s ready when the potatoes are fork-tender.
  6. Seasoning: Taste the soup. Season with salt and pepper as needed to suit your preference.
  7. Serving: Once cooked, remove the bay leaf, ladle the soup into bowls, and enjoy while hot.

Fell in love with this Hamburger Soup? Why not pin the image below on Pinterest? It’s too good not to share with fellow food enthusiasts!

Recipe Variations for Hamburger Soup:

  1. Protein Swap: Replace ground beef with ground turkey, chicken, or even tofu for a vegan twist.
  2. Grain Addition: Introduce barley, quinoa, or rice for added texture and nutrition. Adjust the cooking time based on your grain choice.
  3. Spicy Kick: Add a diced jalapeño or a dash of chili flakes for a hint of heat.
  4. Creamy Version: Stir in a splash of cream or coconut milk towards the end for a richer texture.
  5. Herb Infusion: Experiment with fresh herbs like rosemary, thyme, or basil. Add them towards the end to retain their freshness.
  6. Bean Boost: Incorporate kidney beans, black beans, or chickpeas for added protein and fiber.
  7. Veggie Variety: Swap out standard veggies for alternatives like sweet potatoes, parsnips, or butternut squash.
  8. Cheesy Delight: Add a handful of grated cheddar or parmesan cheese for a cheesy twist.
  9. Tangy Twist: A splash of balsamic vinegar or a squeeze of lemon juice can add a refreshing tang to the soup.
  10. Global Flavors: Incorporate spices like curry powder, cumin, or smoked paprika for a different cultural take on the classic.

Feel free to combine multiple variations or adjust them based on what you have on hand. The beauty of Hamburger Soup is its adaptability to different tastes and preferences.

Easy Hawaiian Chicken Kabobs (+ Kabobs Variations)

Easy Hawaiian Chicken Kabobs (+ Kabobs Variations)

Summer is synonymous with barbecues, and what better way to elevate your grilling game than with Hawaiian Chicken Kabobs? After marinating chicken in a tropical blend and skewering it with vibrant vegetables and pineapple, you’ll grill them to perfection, ensuring a delightful fusion of flavors. Read More