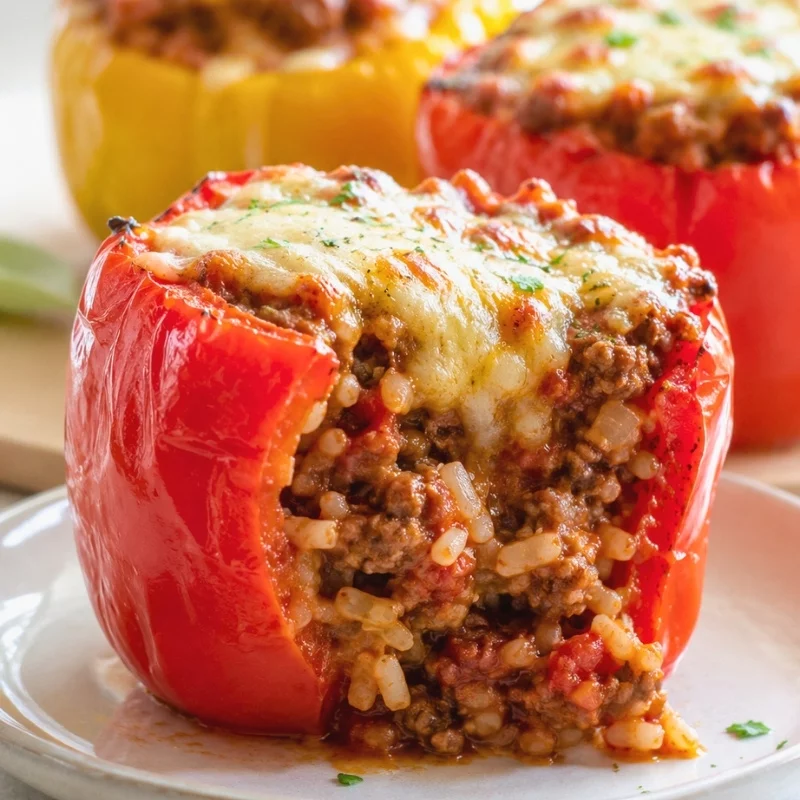
This stuffed peppers recipe fills tender bell peppers with seasoned ground beef, cooked rice, tomatoes, and plenty of melted cheese. The peppers are roasted briefly before filling, which gives them time to soften without overcooking the beef mixture or leaving you with watery filling. Using cooked rice also keeps the texture consistent since there isn’t enough liquid inside the peppers to properly cook dry rice.
They make a filling dinner on their own, or you can serve them with golden garlic bread or creamy mashed potatoes. If you like hearty ground-beef dinners, my stuffed sauerkraut cabbage rolls and meatloaf with a tangy ketchup glaze are good ones to try next.
Ingredients
- 6 medium bell peppers, any color, tops cut off and seeds removed
- 1 tablespoon olive oil, plus more for the dish
- 1 lb (450 g) ground beef (85% lean)
- 1 medium yellow onion, diced
- 3 cloves garlic, minced
- 2 tablespoons tomato paste
- 1 can (14.5 oz / 411 g) diced tomatoes, well drained
- 1 teaspoon dried oregano
- 1 teaspoon paprika
- 1 teaspoon kosher salt, plus more for the peppers
- ½ teaspoon black pepper
- 1 cup (185 g) cooked white rice, cooled
- 1½ cups (170 g) shredded mozzarella or Monterey Jack, divided
- 2 tablespoons chopped fresh parsley
Instructions
- Prep the peppers: Cut the tops off the peppers and pull out the seeds and white membranes. If a pepper wobbles, shave a thin slice off the bottom without cutting through the wall, so it stands upright in the pan. Salt the insides lightly, then stand them in a lightly oiled 9×13-inch baking dish.
- Pre-roast the shells: Heat the oven to 400°F (200°C) and roast the empty peppers for 15 minutes, until the walls look slightly wrinkled and a knife slides in with a little resistance. Pre-roasting drives off moisture so the filling doesn’t sit in a puddle later, so leave the oven at 400°F while you cook the filling.
- Cook the filling: While the peppers roast, heat the olive oil in a large skillet over medium heat. Cook the onion for about 5 minutes until it turns translucent, then add the garlic and tomato paste and stir for 1 minute until the paste darkens and smells sweet. Add the beef, break it up with a spoon, and cook for 6 to 7 minutes until no pink remains, then drain off the excess fat.
- Mix rice and tomato: Stir in the drained tomatoes, oregano, paprika, salt, pepper, cooked rice, and ½ cup of the cheese. The mixture should look moist but not soupy. If liquid pools in the pan, cook for 2 more minutes until a spoon dragged through the center leaves a trail, then taste and add salt if the filling is bland.
- Stuff and bake: Spoon the filling into the roasted peppers, packing it in without mounding so high that it spills over the rim. Sprinkle the remaining cheese on top. Bake for 25 to 30 minutes, until the cheese is bubbling and browned in spots and the pepper walls look collapsed and glossy.
- Rest and serve: Let the peppers sit for 5 minutes so the filling sets enough to eat with a fork instead of spilling the moment you lift one. Scatter the parsley over the top and serve them in the dish they baked in, with a spoon for the juices at the bottom.
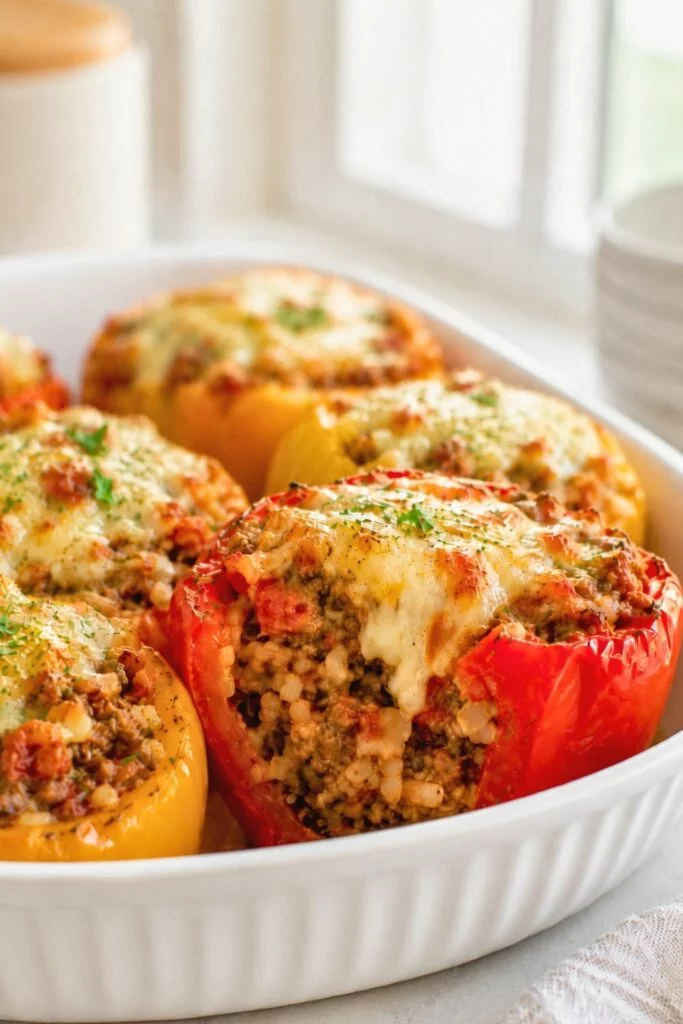
Tips for the Best Classic Stuffed Peppers with Beef and Rice
- Cook the rice ahead and let it cool to room temperature before it hits the skillet. Hot rice keeps cooking in the beef fat and turns the filling sticky instead of separate. Leftover rice from the night before is actually better here than a fresh pot, because the grains have dried out enough to absorb sauce without turning to paste.
- Use 85% lean ground beef, because extra-lean dries out inside the pepper when there’s no pan sauce left to baste it, and 80/20 leaves a grease puddle in the bottom of each shell. Drain whatever fat renders in the skillet before you add the tomatoes, or the filling will taste oily even if the ratio was right.
- Don’t skip the empty-pepper roast. Blanching in boiling water soaks the walls, so they steam from the inside and the filling sits in a puddle. Fifteen minutes at 400°F drives that moisture off and gives you a pepper that’s already starting to soften, which means the final bake can be shorter and the cheese doesn’t burn waiting for the walls to give.
- Drain the canned tomatoes well and press them in a sieve for a few seconds so you’re adding tomato, not tomato water. If the filling looks soupy in the skillet after you stir in the rice, keep it on the heat another two minutes until a spoon dragged through the center leaves a trail.
- Buy peppers that are about the same height and can stand on their own. A mix of squat and tall peppers means some overcook while others stay crunchy. If one wobbles, shave a thin slice off the bottom and stop before you cut a hole, or the filling will leak into the dish.
- Ground turkey works if you add a tablespoon of olive oil to the skillet with the meat, because turkey has less fat and otherwise tastes dry. Italian sausage mixed half and half with the beef is another swap when you want more spice without changing the rest of the method.
- Stir some of the cheese into the filling, not only on top. The cheese inside binds the rice and beef so a forkful holds together, and the layer on top still browns. Pre-shredded mozzarella works in a pinch, though a block you grate yourself melts cleaner because it isn’t coated in starch.
- Green peppers taste more grassy and hold their shape a little better under heat. Red, yellow, and orange peppers are sweeter and soften faster, so check them a few minutes earlier. If you mix colors in one pan, pull the red ones as soon as the walls look collapsed, even if the green ones need another few minutes.
Storage
Store leftover stuffed peppers in an airtight container in the refrigerator for 3 to 4 days. Reheat them in a 350°F (175°C) oven, covered with foil for about 15 minutes, then uncovered for 5 minutes so the cheese melts again. The microwave works in a pinch but turns the pepper walls rubbery, so use it only if you’re eating one for lunch. To freeze, bake the peppers fully, cool them, wrap each one tightly, and freeze for up to 3 months. Reheat from frozen at 350°F, covered, until the center is hot, which usually takes 30 to 40 minutes. According to the USDA leftover food safety guidance, cooked leftovers keep 3 to 4 days in the fridge, so don’t stretch that window even if they still smell fine.
FAQ
Can you freeze this stuffed peppers recipe?
Bake the peppers first, cool them completely, then wrap each one in plastic wrap and foil and freeze for up to 3 months. Reheat from frozen in a 350°F oven, covered, until the filling is hot in the center. Freezing them raw makes the pepper walls collapse into mush when they thaw, so skip that shortcut and freeze them after the first bake.
Do you cook the rice before stuffing the peppers?
The rice needs to be fully cooked and cooled before it goes into the filling. Uncooked rice doesn’t get enough liquid inside a stuffed pepper to soften, and you end up with hard grains in the middle. One cup of cooked rice is about ⅓ cup dry, so a leftover pint container from takeout is plenty.
Can I use ground turkey instead of beef?
Ground turkey works if you add a tablespoon of olive oil to the skillet when you brown it, because it has less fat than 85% beef and otherwise tastes dry. Season it the same way, and taste the filling before you stuff the peppers, since turkey is milder and often needs an extra pinch of salt. Italian sausage mixed half and half with turkey is another option if you want more flavor without going back to beef.
How do I know stuffed peppers are done?
The pepper walls should look wrinkled and glossy, and a knife should slide through the side with little resistance. The cheese on top should be melted and browned in a few spots, and you should see the filling bubbling at the edges. If the cheese is brown but the pepper still feels rigid, cover the dish with foil and give it another 8 to 10 minutes.