
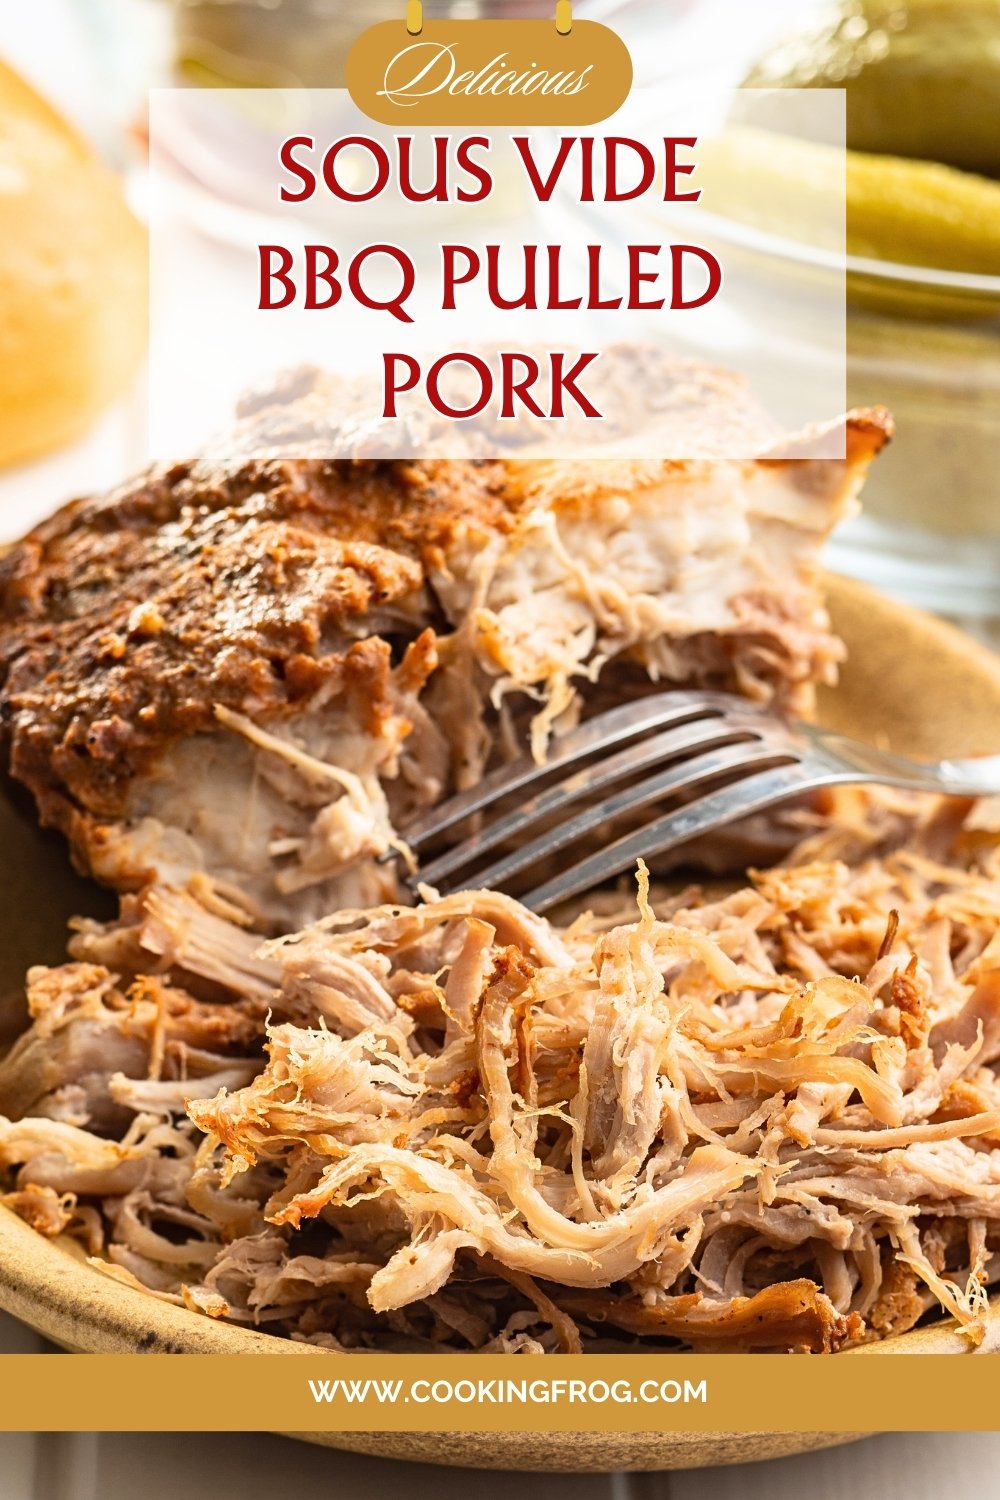
Sous Vide BBQ Pulled Pork Shoulder slow cooked for 24 hours, and finished a smokey barbecue leading to probably the most tender and juicy pulled pork you’ve tasted.
Like the majority of sous vide recipes, two-step cooking process is the thing. The two-step cooking is almost totaly hands-off and definitely stress free. First you’ll cook the pork shoulder in the sous vide water bath, and then end it either in a the oven or BBQ smoker.
Sous Vide BBQ Pulled Pork Shoulder
Finishing in the BBQ will result in a delicious smoky pulled pork. The beautiful thing about cooking a pork shoulder low and slow is that it’s nearly impossible to get it wrong; especially when cooking it in this sous vide method.
This technique is ideal for entertaining because it could be made in advance and then finished in a smoker or in the oven. The fun part is as soon as your guests are there and they smell what appears like has been cooking all day.
Ingredients
Pork:
-
1 bone-in or boneless pork shoulder (5–7 lbs)
-
1 tsp liquid smoke (optional)
Optional Spice Rub:
-
¼ cup paprika
-
¼ cup brown sugar
-
3 Tbsp kosher salt
-
1 Tbsp yellow mustard seeds (whole)
-
1 tsp ground black pepper
-
2 Tbsp granulated garlic powder
-
1 Tbsp dried oregano
-
1 Tbsp coriander seeds
-
½ tsp Prague Powder #1 (optional, for pink “smoke ring” effect)
-
1 tsp red pepper flakes
Instructions
1. Heat the Water Bath
-
For tender, pull-apart pork: Set your sous vide cooker to 165°F (74°C).
-
For tender but sliceable pork: Set to 145°F (63°C).
2. Make the Spice Rub (Optional)
-
Combine paprika, brown sugar, salt, mustard seeds, black pepper, garlic powder, oregano, coriander seeds, and red pepper flakes in a spice grinder.
-
Grind into a fine powder.
-
If using, add Prague Powder #1 to the rub for a cured, smoky-pink interior.
3. Season the Pork
-
Reserve 3 Tbsp of the rub for finishing later.
-
Rub the rest evenly over the pork shoulder.
-
Drizzle liquid smoke over the pork if using, and pat it in gently.
4. Bag and Seal
-
Place pork in a vacuum-seal bag.
-
Seal using a vacuum sealer or the water displacement method with a zipper-lock bag: Seal all but 1 inch, lower slowly into the water until air is pushed out, then seal fully.
5. Sous Vide Cook
-
Submerge the sealed pork completely in the preheated water bath.
-
Cook 20–24 hours for pull-apart texture, or 16–18 hours for sliceable texture.
-
To prevent water loss during long cooks, cover the water surface with foil or plastic wrap.
6. Finish the Pork
-
Remove from the bag and pat dry.
-
Coat lightly with the reserved spice rub.
-
Finish under a hot broiler for 5–8 minutes, or sear in a cast-iron skillet with a little oil until caramelized.
7. Serve
-
Shred for sandwiches, tacos, or BBQ plates.
-
Drizzle with juices from the bag or your favorite BBQ sauce.
Make-Ahead & Freezer Tips
-
Make Ahead: Cook sous vide, cool, and refrigerate in the sealed bag for up to 4 days. Reheat in a 165°F water bath for 1 hour before serving.
-
Freezer-Friendly: Cool pork completely in the bag, freeze for up to 3 months. Thaw in the fridge overnight, then reheat in sous vide until warmed through.
Sous Vide Pulled Pork Finish
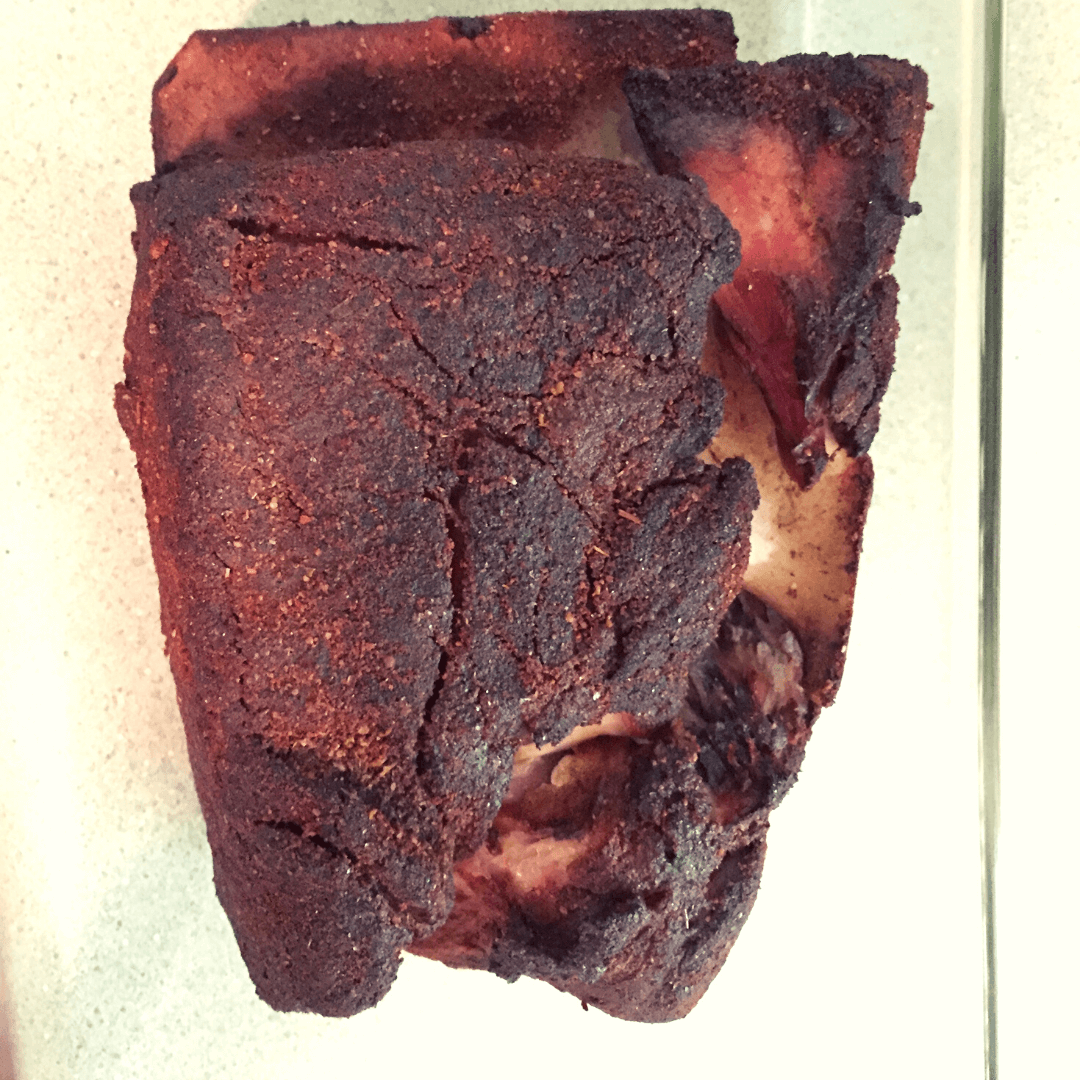
- After the pork shoulder is cooked, you can cool it and refrigerate for approximately a week before continuing, or simply continue to the finishing steps.
- The very first thing to do to complete is eliminate the excess moisture by removing the pork and patting it down really good with paper towels.
- If you wish, you are able to take the nice juices in the sous vide bag, add them to your chosen barbecue sauce, and reduce it on the stovetop to offer your sauce extra pork flavor.
- The initial sprinkling of rub did an excellent job of having flavor into the pork. An additional coat of rub now provides you with a great foundation for building up that dark, crunchy, full of flavor bark.
Finishing in the Oven
- Take the pork and place it on a lined rimmed baking sheet with a wire rack on it.
- Place it in a preheated 300 F oven and cook till outside is a dark, mahogany bark, about 1 hour and 30 min.
- Take away from the oven and move on to the next step.
- The pork is ready to be pulled! I find this simplest to do using two forks, however if you have durable heat gloves to guard your fingers from the hot meat, then go right in and use your hands.
- I prefer to shred apart into, tender, big chunks, however you may also move the shreds to a cutting board and chop it finely with a chef’s knife or cleaver.
- After the meat is shredded nicely it’s ready to serve with your preferred barbecue sauce. It goes nicely with some pickles, creamy cole slaw, and a nice bun and you’ve got yourself an excellent meal.
Finishing Steps – Gas Grill or Smoker
- To complete your pork shoulder over live fire, light a smoker and set the temp to 300°F. Or light up a half chimney of coals, and spread them out over 1 / 2 of the coal grates.
- Add several chunks of hardwood, no need certainly to soak it and the moment it starts smoldering, place the meat in the smoker or on the grill, away from any direct heat.
- Now for a gas grill, light 1 / 2 of the burners and leave another half turned off.
- Put the chunks of wood in a foil boat directly on the hot side of the grill and place the pork shoulder on the cooler side.
- Cook it covered, adding a couple of bits of wood and coals as needed. And maintain the air intake valves to test and keep consistently cooker hovering at around 275F to 300F all the time.
- Continue cooking till pork has reached a deep, dark, mahogany crust and tears apart when you pick at it. This may take about an 1:30 hours – 2 hours.
- The pork is now ready to be pulled!
If you like this recipe, check this Instant Pot Pulled Pork

Maybe I overlooked it but when and where do you use the liquid smoke in this recipe. I want my pork to have that smoky flavor but do not own a smoker.